Milestone
Introduction
This manual provides an overview of Scylla Alarm Receiver plugin for Milestone Video Management System (VMS) and instructions on how to use it.
This plugin adds additional functionality to Milestone Video Management System to support Scylla AI Modules.
Scylla has two-way fully integration with Milestone Xprotect system which means that it takes input from Milestone Server and reports back to Milestone Smart Client.
Scylla Alarm Receiver Setup
Scylla Alarm Receiver setup file for Milestone can be downloaded from Scylla's Cloud Dashboard.
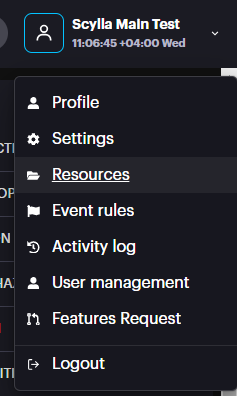
Navigate to Account Settings à Resources à alarm receiver à select the latest version
NOTE: Scylla Alarm Receiver should be installed on the Milestone Server.
Prerequisite:
-
.Net Framework 4.8
-
.Net Runtime 6.0
-
Milestone ONVIF Bridge or Open Network Bridge
-
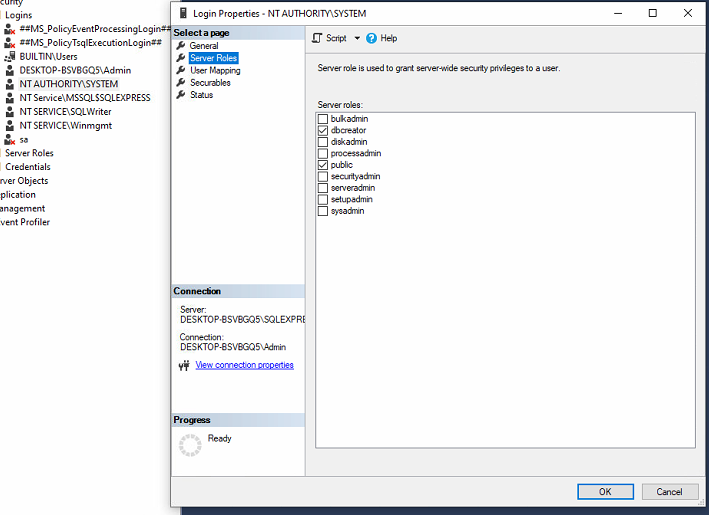
MS SQL Express with Local System Account having the dbcreator role enabled
Right click on the Local System Account -> Properties -> Server Roles and enable dbcreator
To setup Scylla Alarm Receiver do the following:
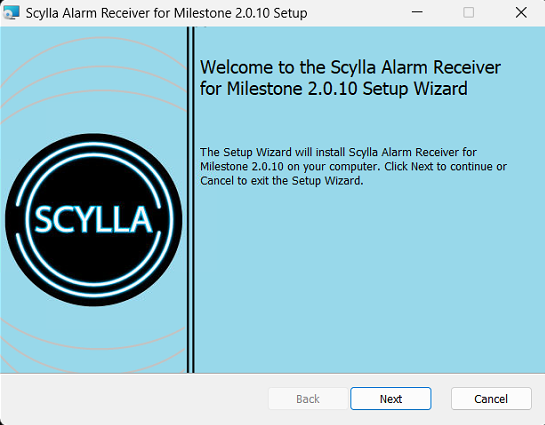
- Open the ScyllaAlarmReceiver.Milestone.Setup.msi file. Click Next.
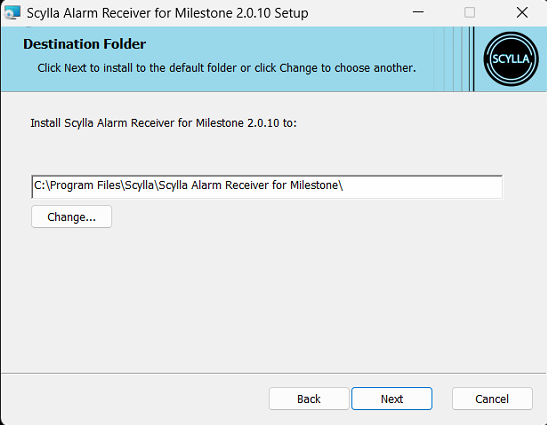
- Specify the installation path. For example, C:\Program Files\Scylla\Scylla Alarm Receiver for Milestone Click Next.
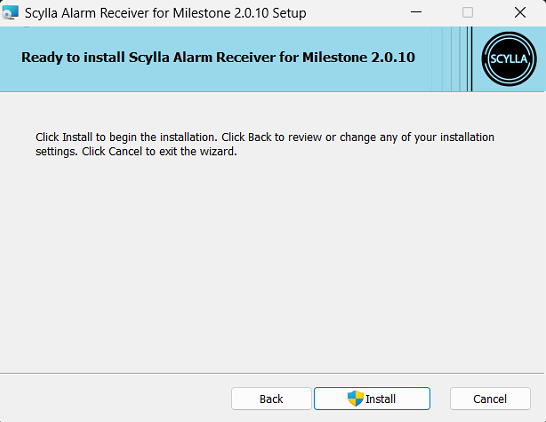
- Click Install.
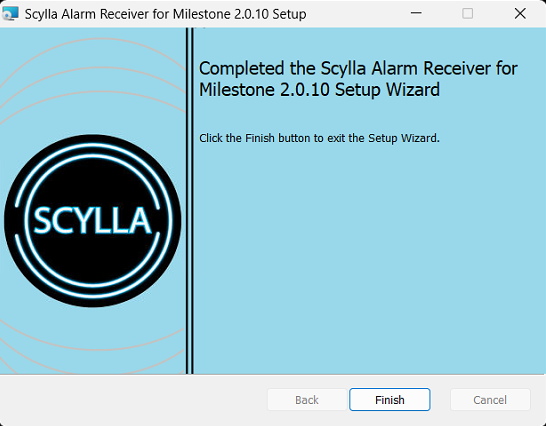
- Click Finish.
Configuring Scylla Alarm Receiver
Make sure ScyllaAlarmReceiver service is running.
![]()

Fill the Server Credentials
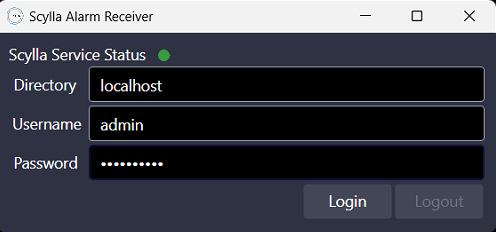
Enter Milestone Server credentials and click Login.
After Successful connection to the server, new configuration fields will be displayed.
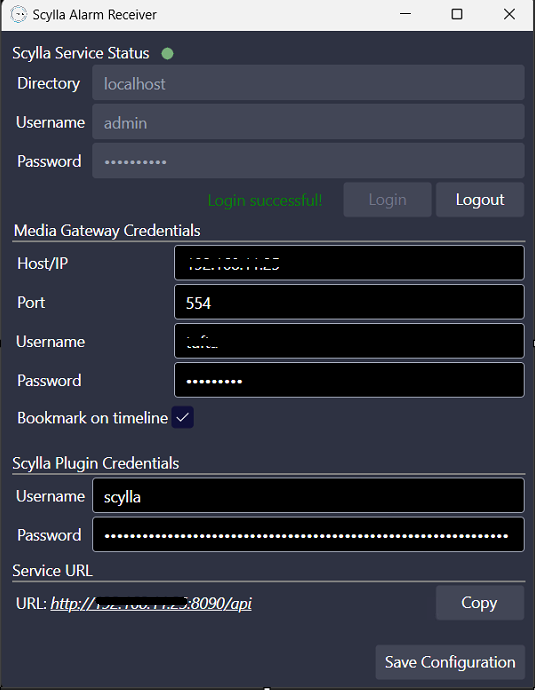
Fill the Media Gateway Credentials
Need to install Milestone Onvif Bridge or Open Network Bridge to stream to Scylla.
Note: ONVIF bridge only supports H.264 stream.
Host/IP: IP address of the ONVIF Bridge/Open Network Bridge.
Port: RTSP port in ONVIF Bridge/Open Network bridge configuration
Xprotect Management client -> Onvif Bridges
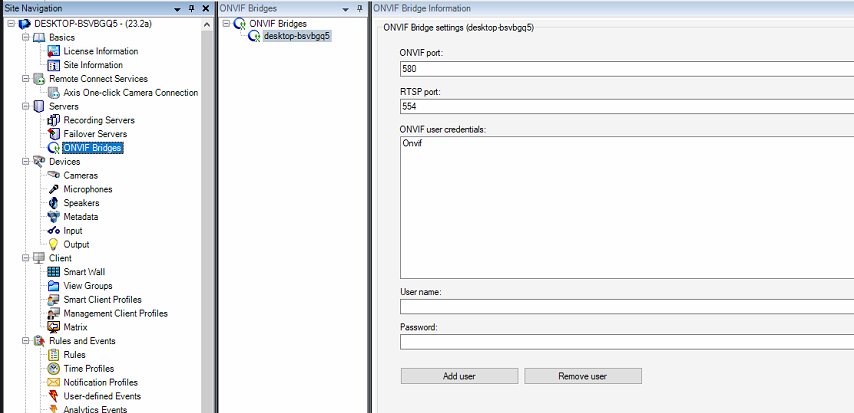
Username & Password: Credentials for ONVIF Bridge.
ONVIF BRIDGE
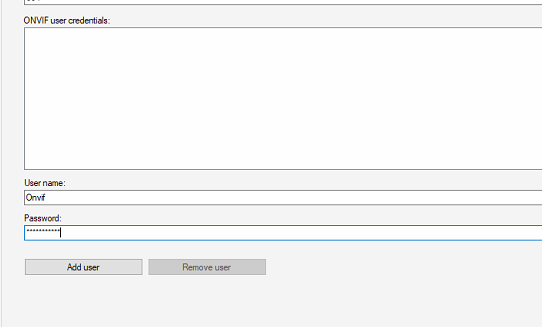
Create a new Basic User, then add it to the Administrator role.
In the Onvif Bridges page, Type Username and Password and Click Add user.
OPEN NETWORK BRIDGE
In the case of Open Network Bridge, create a new Basic user then add to administrator role.
Then from the system tray , right click on the Open Bridge Manager à Manage ONVIF client users and add the newly created user.
Now type the same username and password in the Scylla Alarm receiver, under Media Gateway credentials.
Bookmark on timeline: If enabled, alarms will automatically be bookmarked and easily searched for using Xprotect Smart Client.
Fill the Scylla Plugin credentials
Username & Password: Set username and password that will be used in the Scylla Asteria or Scylla On-premise dashboard Alarm Endpoint configuration page to establish a link.
Click Save.
Click Save Configuration.
Scylla Dashboard Configuration
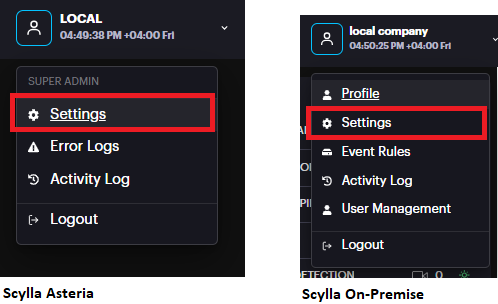
Open the Scylla Asteria or Scylla On-Premise Dashboard.
Go to Account menu -> Settings
Now navigate to Integrations menu
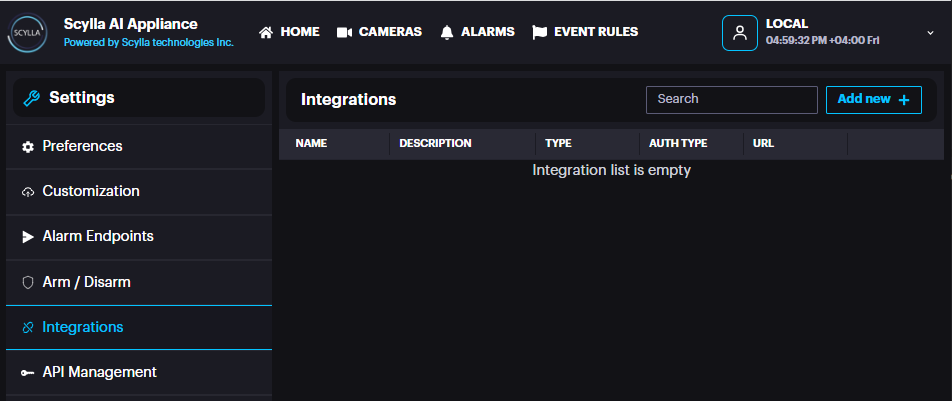
Click Add new +
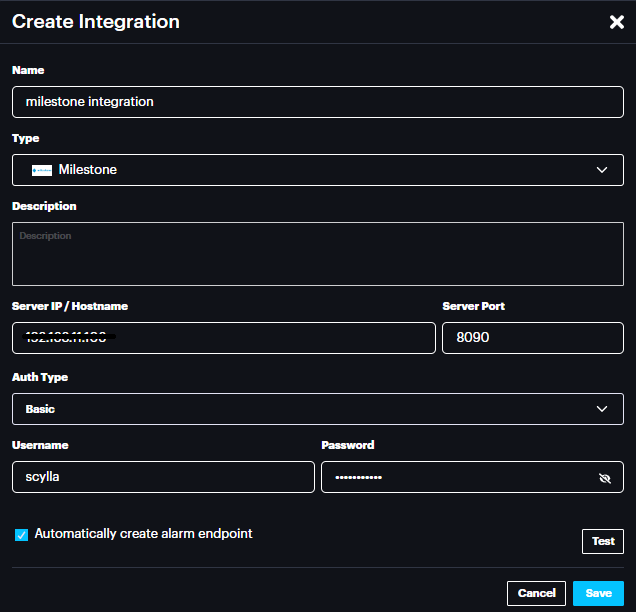
Name: name the integration
Type: Select Milestone from the list
Description: Add a description if needed
Server IP/Hostname: IP address of the Milestone Server/Scylla Alarm receiver
Port: 8090
Auth Type: Basic or Bearer (select Basic)
Username: username that is set in the Scylla Alarm Receiver -> Scylla Plugin credentials part
Password: password that is set in the Scylla Alarm Receiver -> Scylla Plugin credentials part
Click test to test the connection, if successfully connected then a message will be displayed.

Automatically create alarm endpoint: If enabled, an alarm endpoint will be automatically created in the settings-> alarm endpoints
Importing Cameras from VMS
Scylla Asteria
Go to Cameras page and click add new +

Select Import From VMS

Select the Integration created previously from the drop-down menu.
Cameras from Milestone server will appear in this window, enable the cameras to be imported to Scylla Asteria.
Click Create
The imported camera(s) will be shown in the Cameras page.

Scylla On-Premise
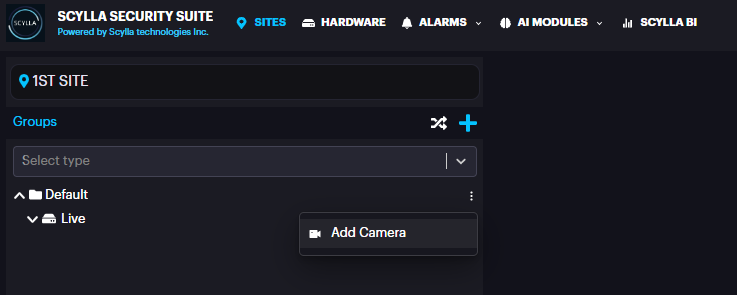
Go to Sites page , select a site -> Properties -> Manage Devices

Click the three dots near the Group (Default) -> Add Camera
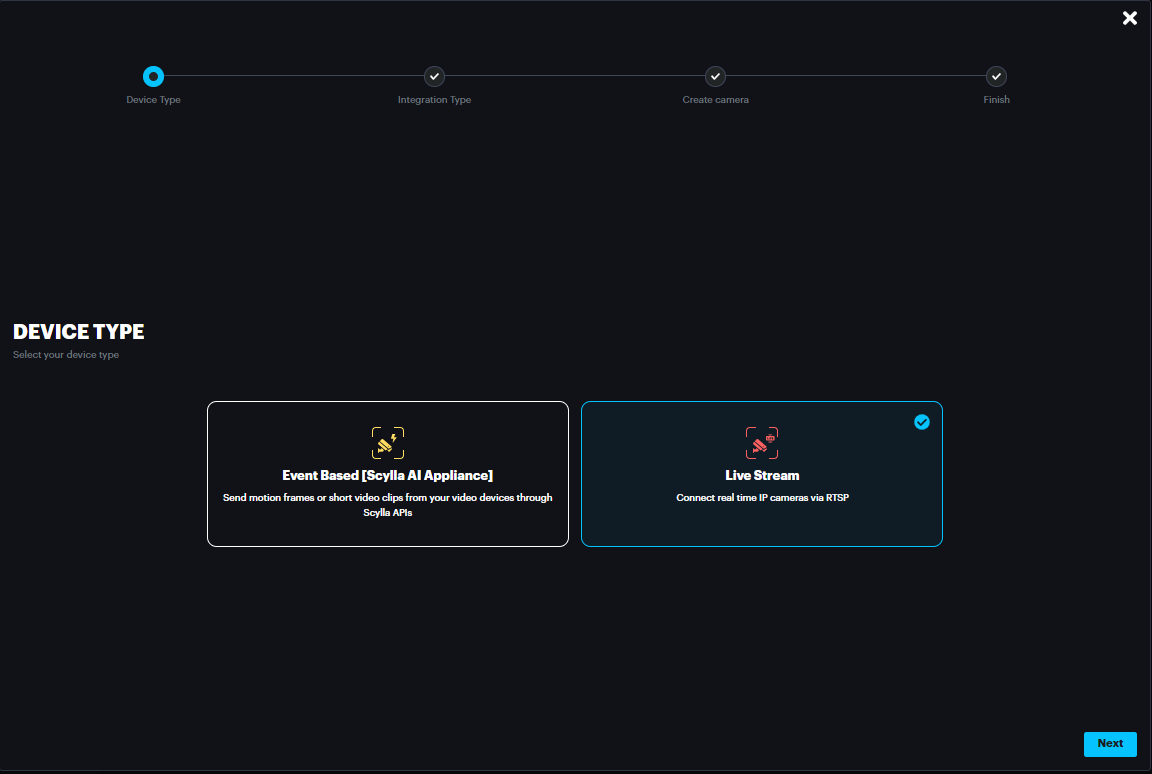
Select Live Stream and click Next
Select Milestone and click Next
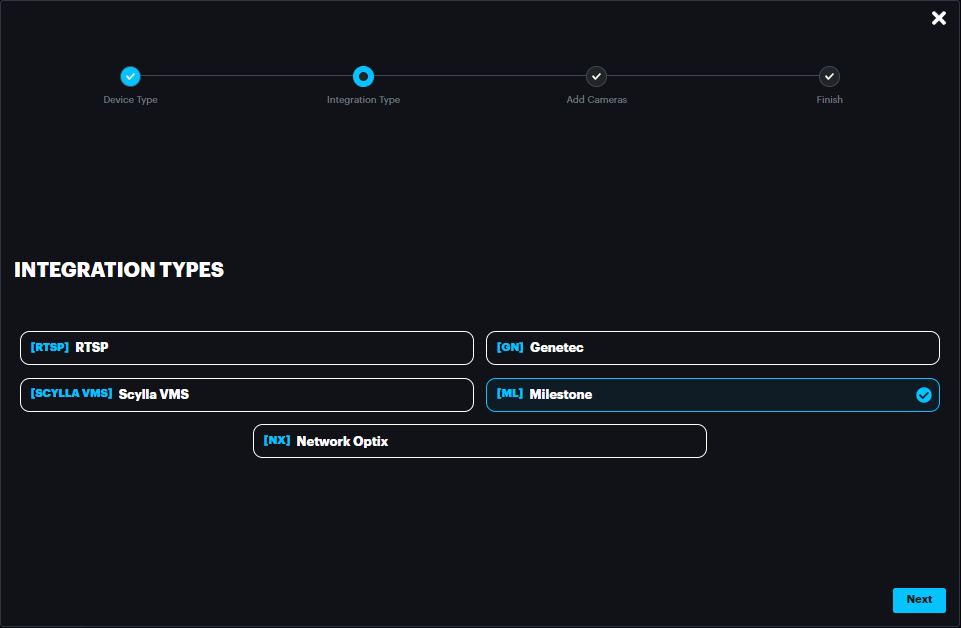
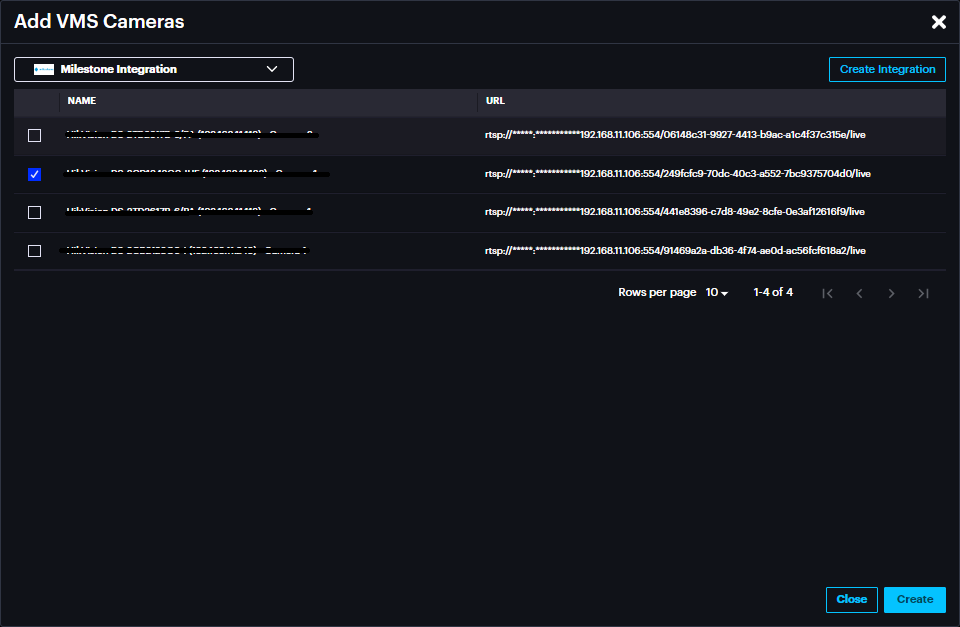
Select the integration from the drop-down menu and the cameras on Milestone server will appear.
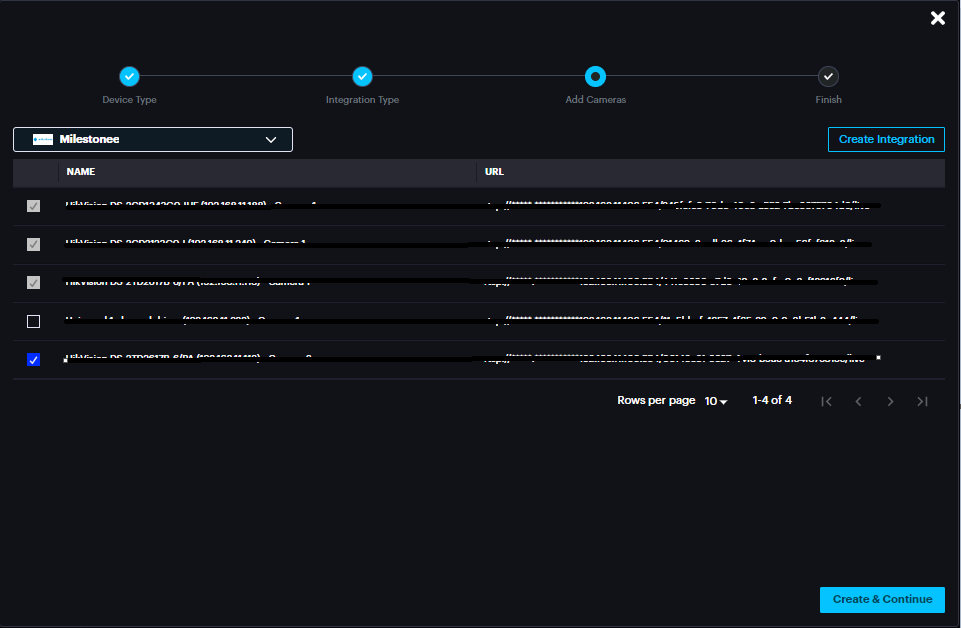
Enable the cameras that will be imported to Scylla on-premise server.
Click Create & Continue
The imported camera(s) will appear under the group
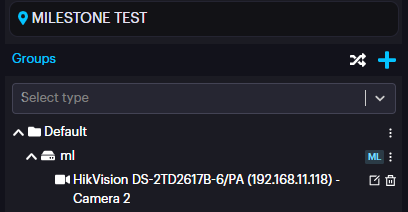
Click edit camera and try to connect to the camera and you should get the successful frame .
Note: In case “ Camera Frame Available” shows error and the camera frame does not appear , follow these steps:
Open Registry Editor (regedit)
1-Navigate to HKEY_LOCAL_MACHINE\SOFWTARE\Milestone
2-Right click -> New->Key
3-Name the newly created Key "Milestone Open Network Bridge"
4-Right Click the Mileston Open Network Bridge Key->New->Dword
6-Name the newly created DWORD "SHA256Auth"
7-Double click and make sure value is 0
Now , restart Milestone services and the camera frame will be reachable on Scylla Dashboard.
Now, go to AI modules -> select the module -> click on deployments and deploy the cameras.
Once deployed, the alarms will appear on Scylla Dashboard and Milestone Smart Client
(alarm endpoint and event rule should be already configured).
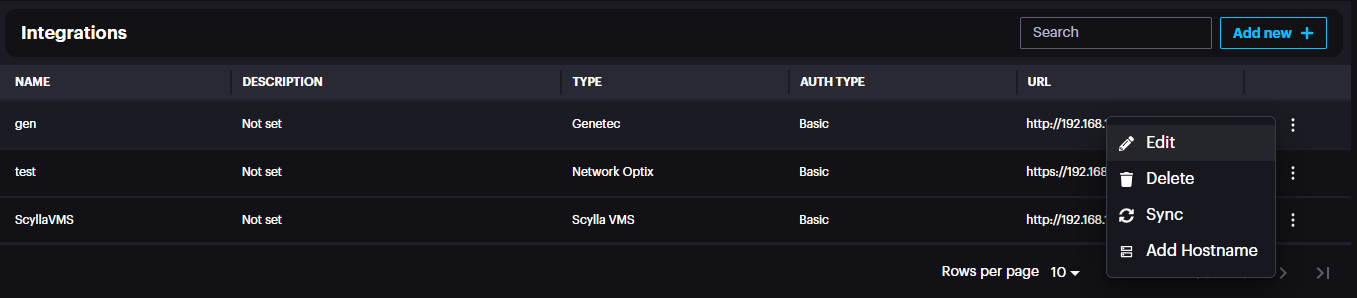
Sync feature
If there are any changes to camera names in the VMS or if a camera is removed from the VMS, use the sync feature to update these changes on the Scylla dashboard.
Navigate to Settings à Integrations à three dots à Sync
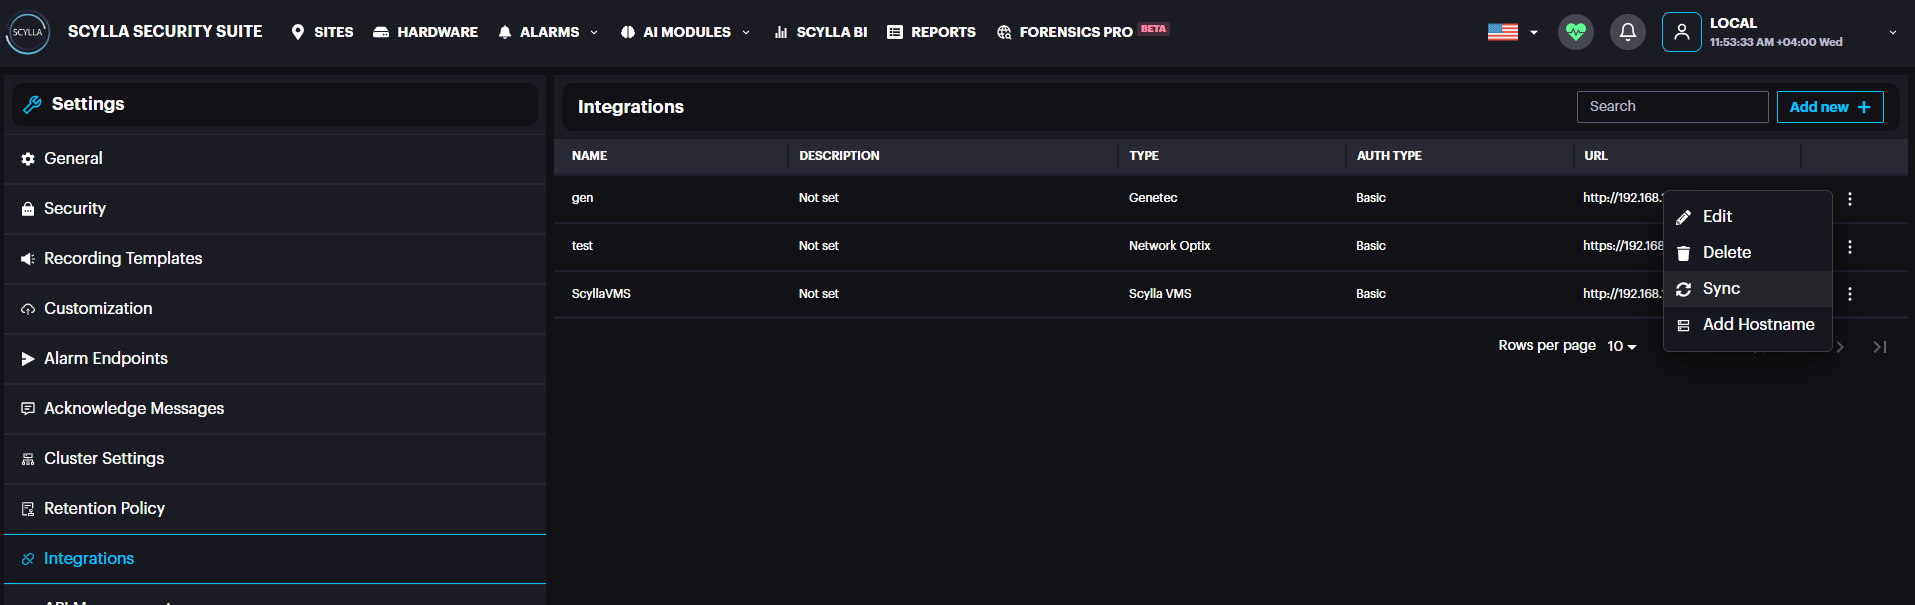
Add Hostname
If the Milestone ONVIF bridge/Open Network bridge IP address changes, the "Add Hostname" feature lets you update the Milestone ONVIF bridge/Open Network bridge IP address in scylla. This will automatically refresh the IP in the RTSP URL for all existing cameras from Milestone in one click, preventing any disconnection.
Deployment
Once the cameras have been imported into Scylla, assign them to the appropriate AI module for deployment.
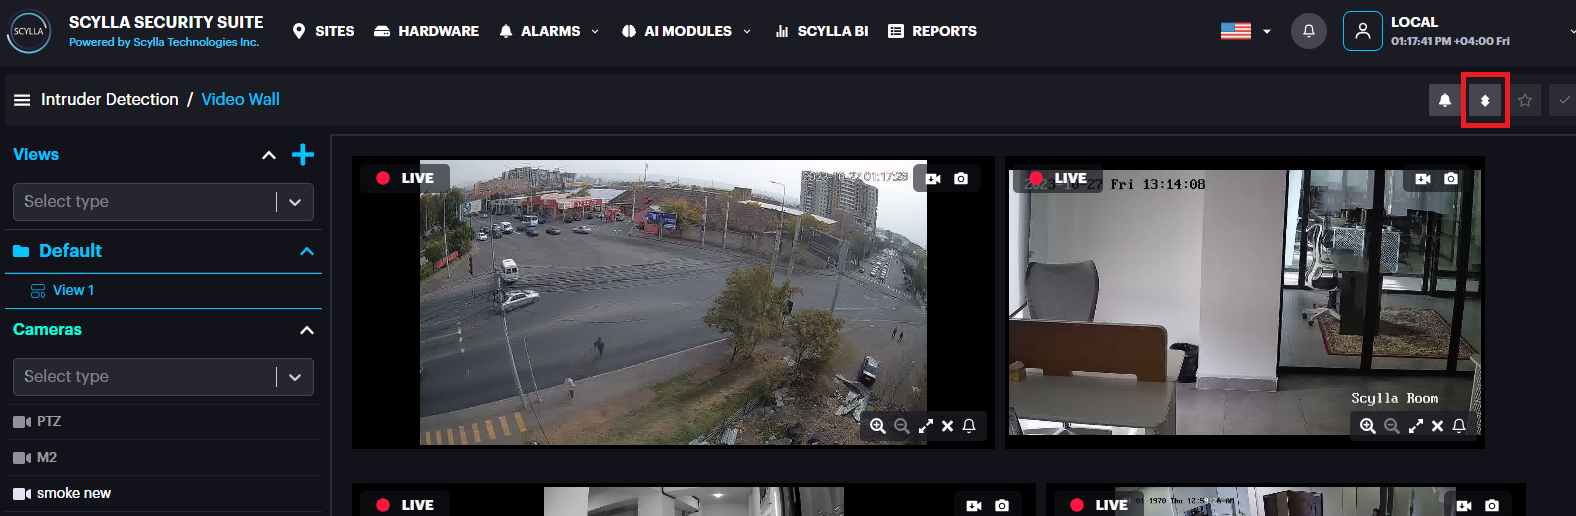
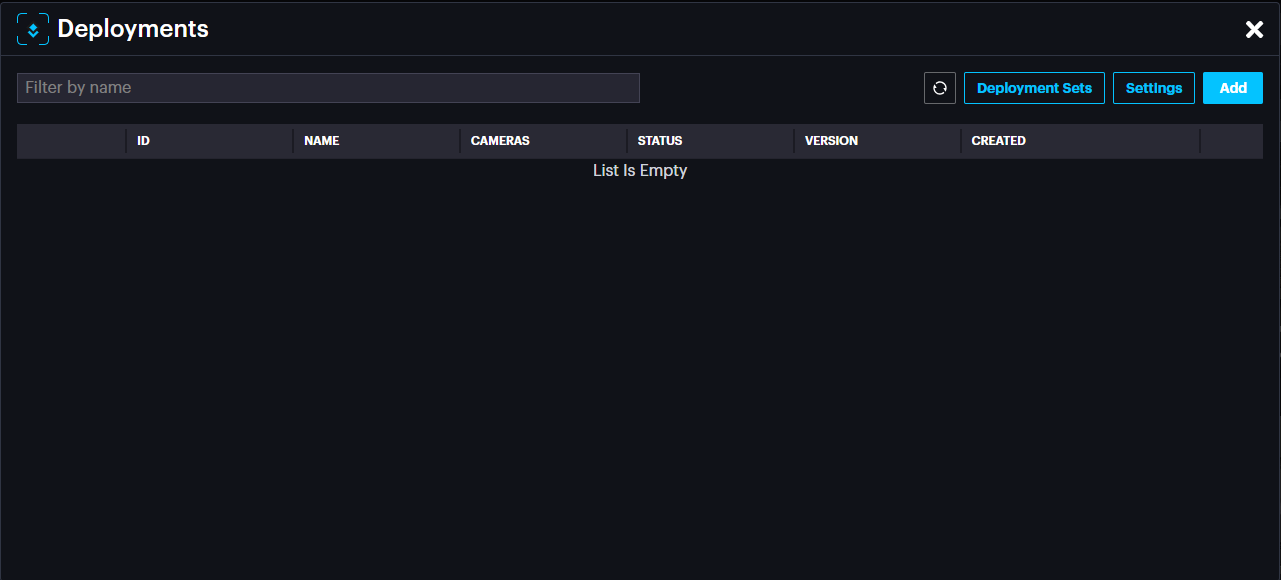
To add a new deployment , go to AI MODULES section and select the required AI Module. Then click the Deployments icon
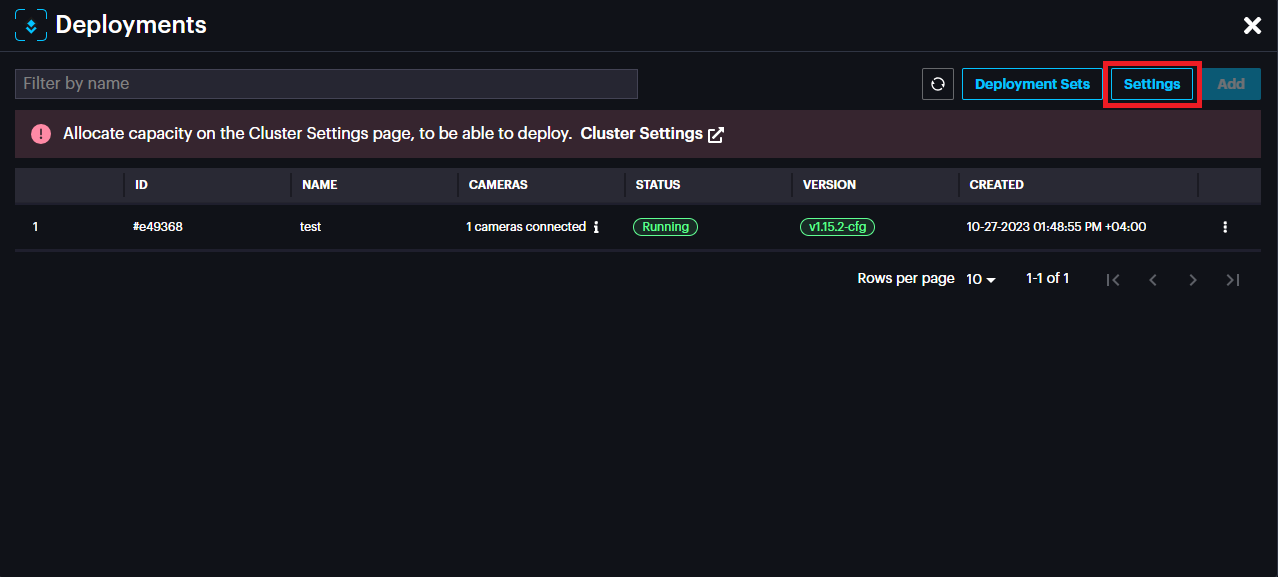
Deployments pop up appears, click Add.
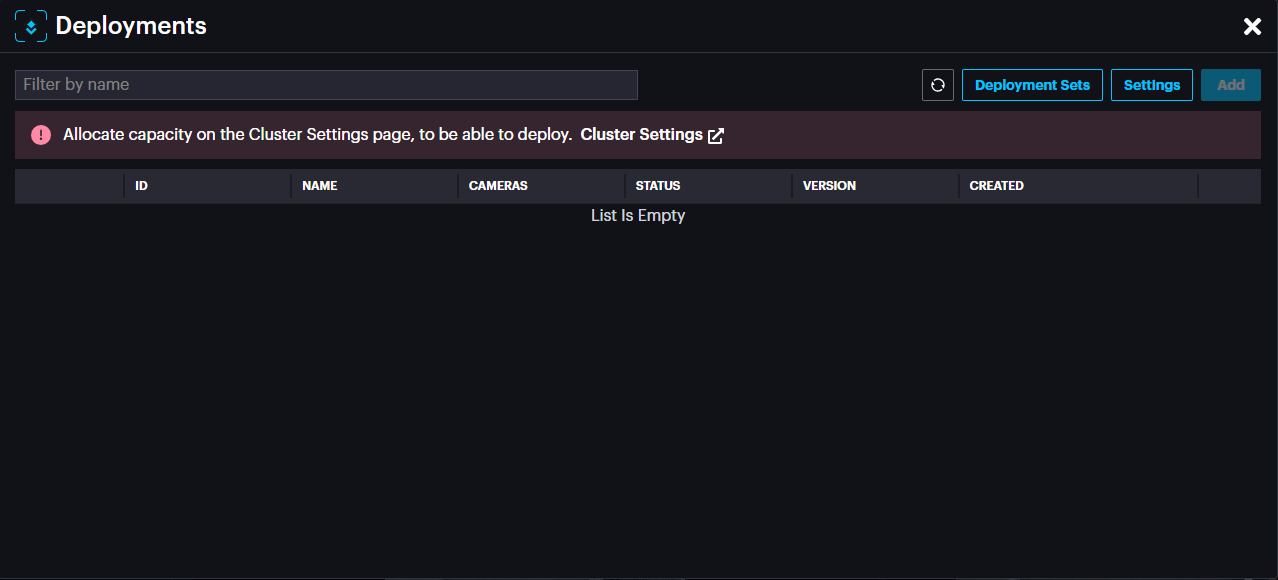
If you have not allocated capacity for this module, a message will appear.
Click on Cluster Settings to navigate to Settings->Cluster Settings.
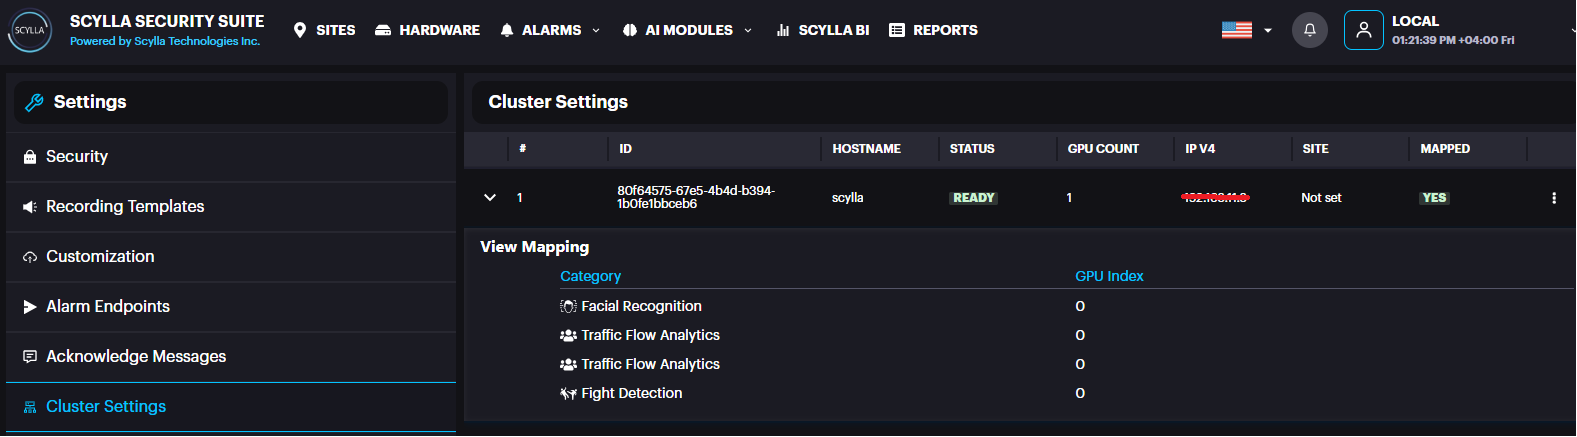
Here, Cluster information appears with number of GPUs installed (under GPU count)
And a summary about the modules/gpu mapping.
If you have several GPUs installed, you can balance the load by distributing the modules across several GPUs.
Click on the more options three dots in the cluster record then then GPU Mapping.

Now the list of modules with their GPU mappings appears, if any.
You can add mapping by clicking +.
After selecting module and mapping to the GPU index, click submit.
Now you are ready to add deployment.
Back to deployments page, it is possible to create Deployment sets to assign cameras to sets and save them to avoid camera selection every time manually.
Click Deployment Sets
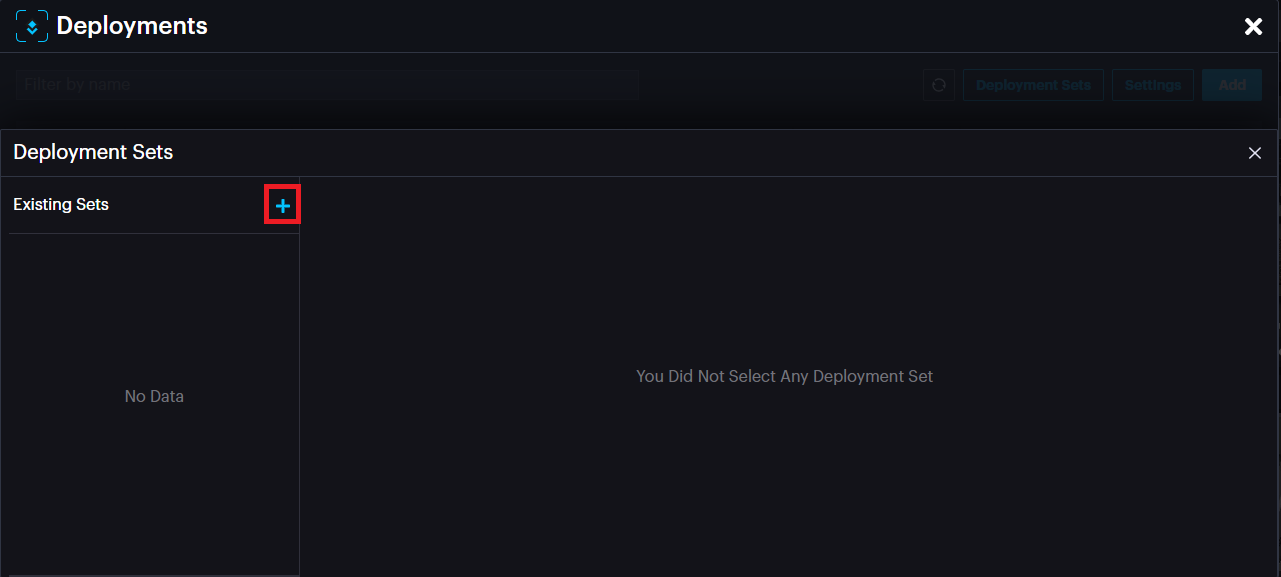
Click the add button to add a Set.
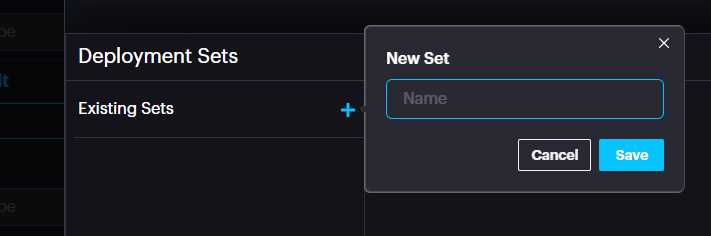
Name the Set. Click Save.
List of available cameras and selected cameras appear.

Choose the required camera(s) and drop them in the Selected cameras window by clicking the > arrow.
It is possible to remove cameras from a set by selecting the camera and clicking < arrow.
After adding the camera(s) to a set, click Save.
Now click on the add button to add a deployment.
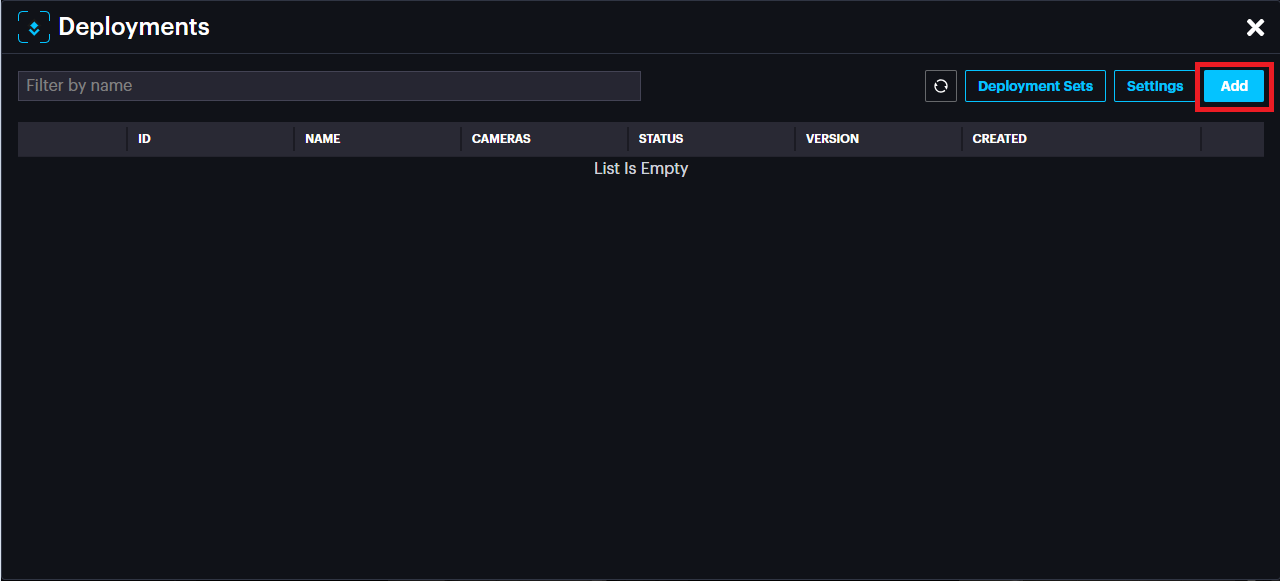
A new deployment window appears.
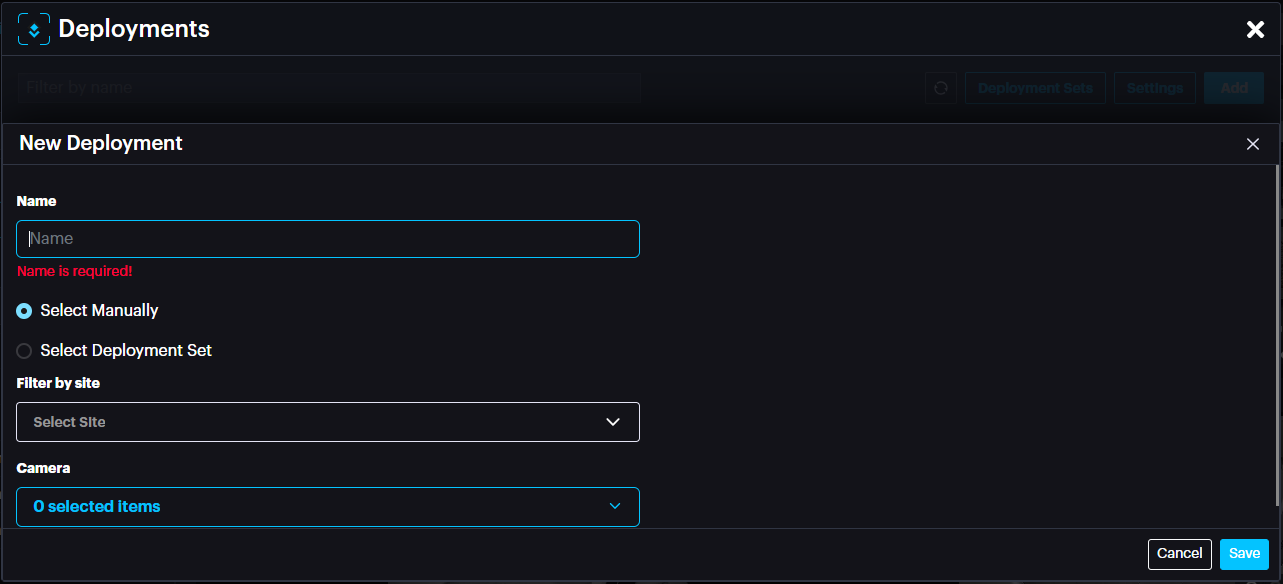
Name: Name of deployment
Select Manually: Select the cameras manually from the camera drop down menu below.
Select Deployment Set: select Deployment set if you have already created one.
After selecting the camera(s) or set, click Save.

The new deployment will appear with the status (Pending, Waiting or Running).
In the deployment window, click Settings to access configuration specific to the module.
The settings page includes settings specific to the module such as threshold, cooldown between detection etc. Change these settings carefully as it will affect the detection rate.
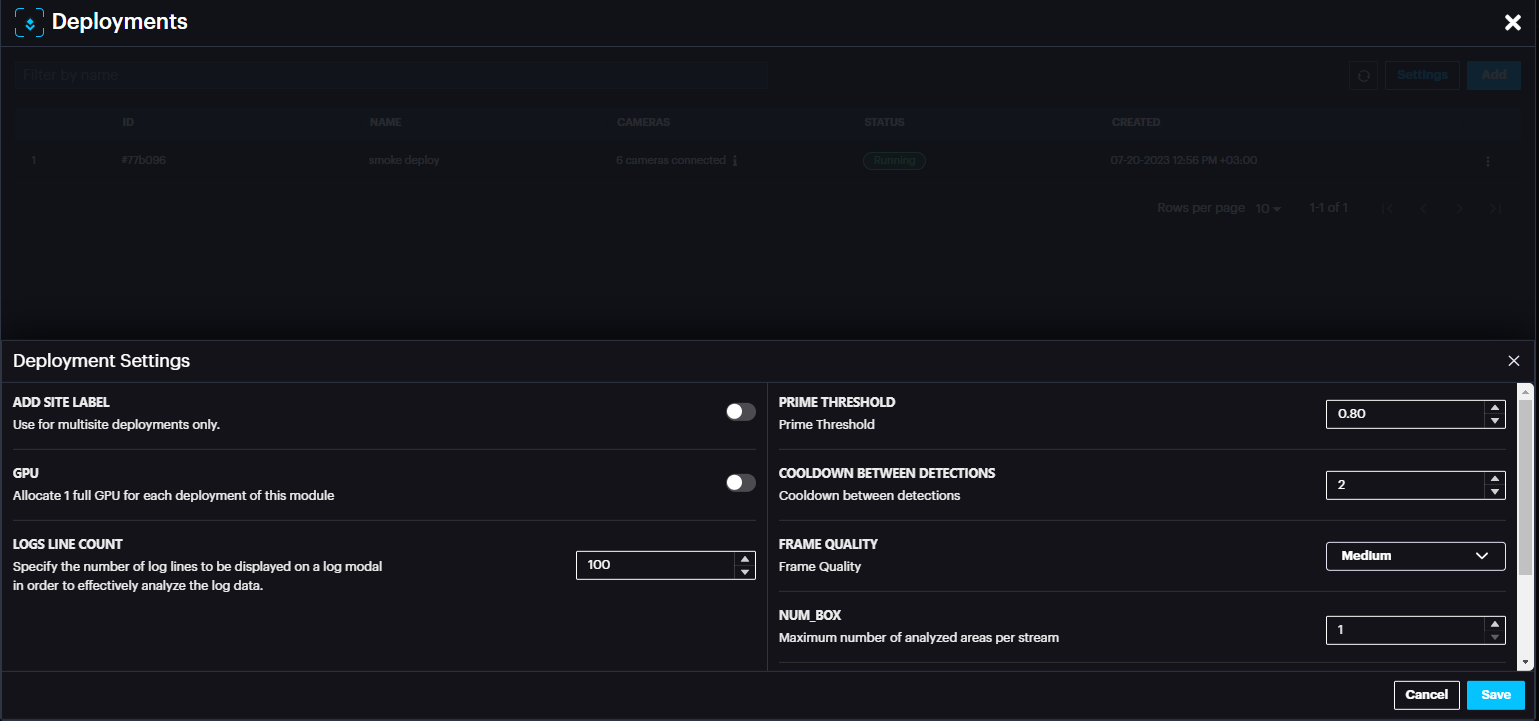
In case of any setting change, click Save.
For successful deployment, the deployment status should state Running (usually in few minutes after adding deployment). You can refresh the page by clicking the refresh button on the top right of the window.
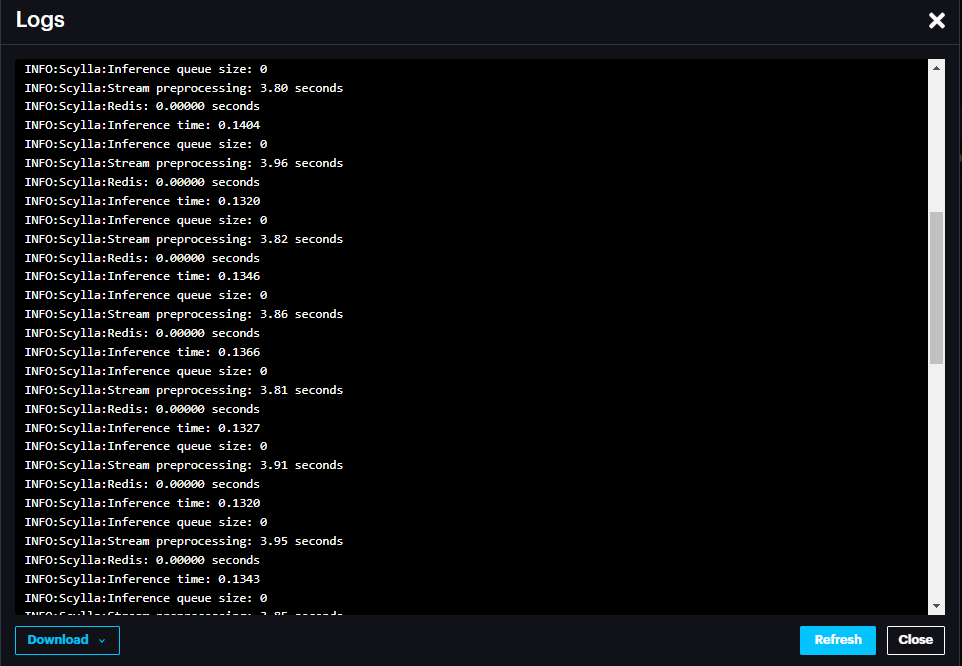
In case the status is not changed to Running, it is possible to check the logs by clicking more options (three dots) then View Logs. In the Logs window it is possible to Download the logs from the bottom left section.
It is possible to Restart the deployment, edit deployment or Delete deployment by clicking the three dots at the end of the record.
Configuring Event Rules
Event rules are created to link the events, schedules and actions.
Scylla Asteria
Go to EVENT RULES page click Add

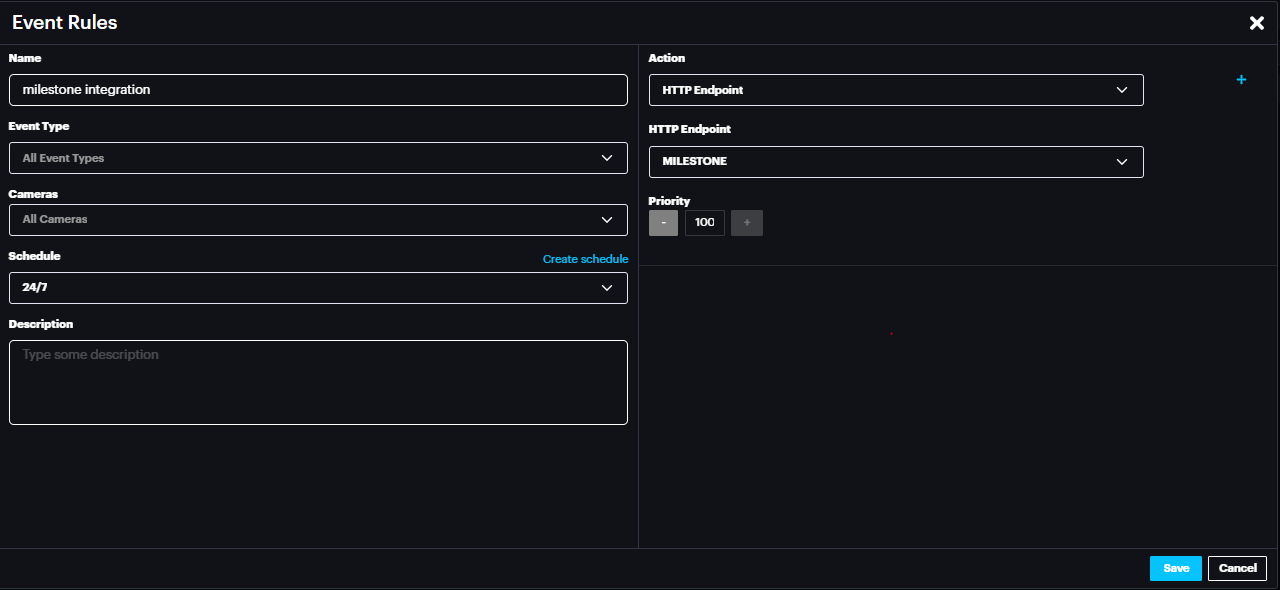
Name the event rule, select the event type (default is All event type), Select the camera(s) whose event will trigger the action (default is All cameras), select schedule (select the default 24/7 from drop down menu or create new schedule by clicking create schedule).
In the action select HTTP Endpoint and for HTTP Endpoint select MILESTONE.
Click Save.
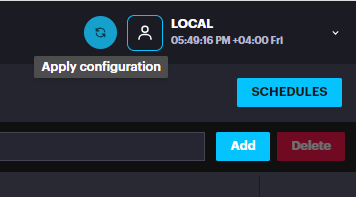
Now click Apply configuration on top.
Now Scylla Asteria is ready to send the alarm to Milestone Xprotect Smart Client from camera(s) that are configured in the Event Rule.
Scylla On-Premise
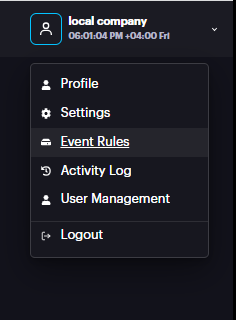
Go to Account Menu -> Event rules
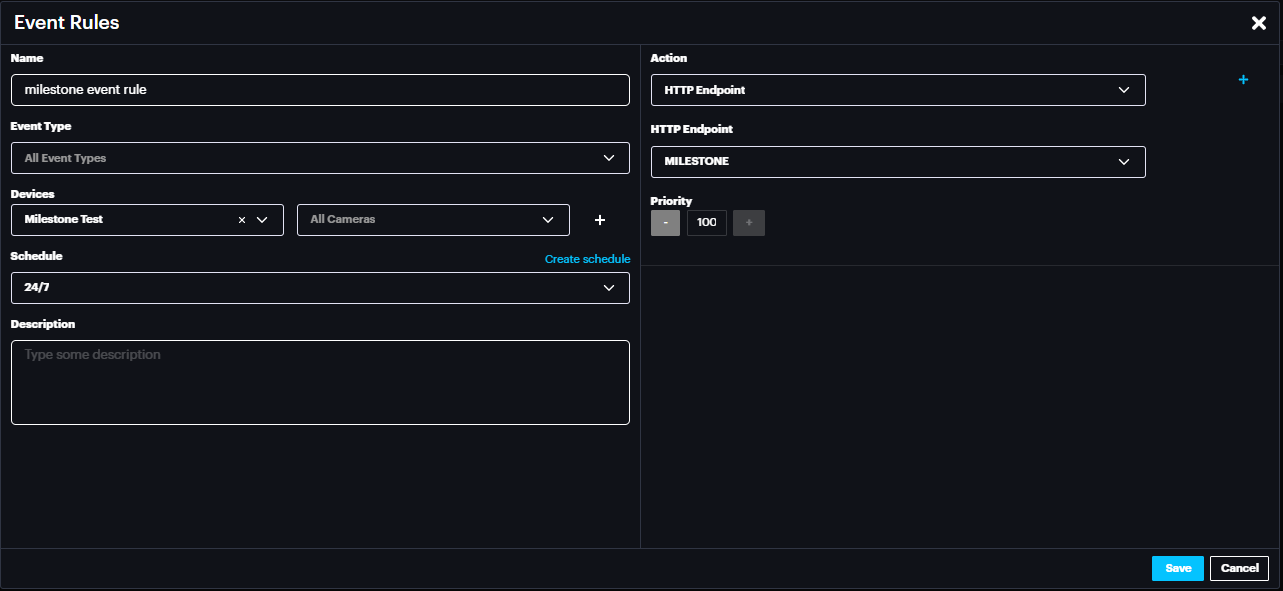
Name the event rule , select the event type(default is All event type) , Select the Site and camera(s) whose event will trigger the action (default is All Sites & All cameras) , select schedule (select the default 24/7 from drop down menu or create new schedule by clicking create schedule) .
In the action select HTTP Endpoint and for HTTP Endpoint select MILESTONE.
Click Save.
Now Scylla On-Premises is ready to send the alarm to Milestone Xprotect Smart Client from camera(s) that are configured in the Event Rule.
Milestone Xprotect Management Client Configuration
Metadata configuration
To add MIP(Metadata Provider) navigate to Recording Server ➝ Select Server under which you want to add it.
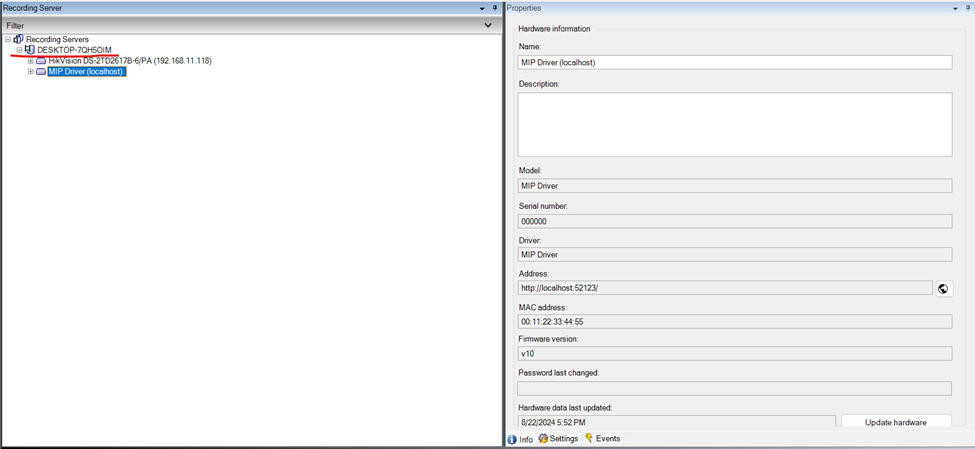
Click add new Hardware and Select Manual.
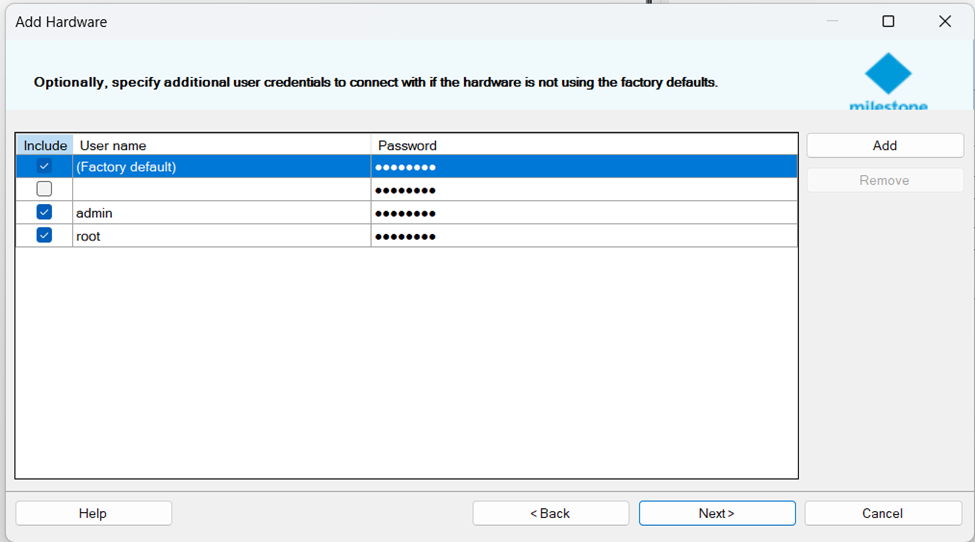
You will be prompted to add a login and password on the next page. Add new one with username "root" and password "password"
Select Milestone.
In the next page, add the address of the Alarm receiver. If it's on the same server you can write "localhost" otherwise insert the correct IP address. Set Port to 52123 and select Hardware Model as MIP Driver.
Next, add the metadata to the cameras that will be used for integration.
Cameras ➝ Select Camera ➝ Related Metadata.

Congratulations! The metadata step is finished.
Analytics Event & Alarm Definition
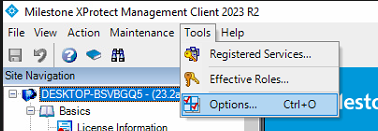
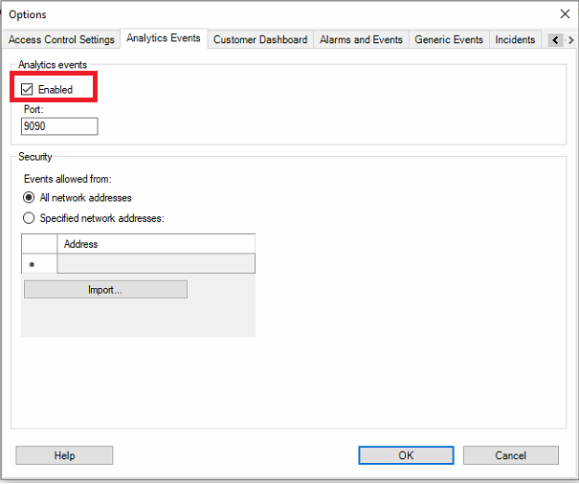
Go to Tools - > Options -> Analytics Events
Enable the Analytics events
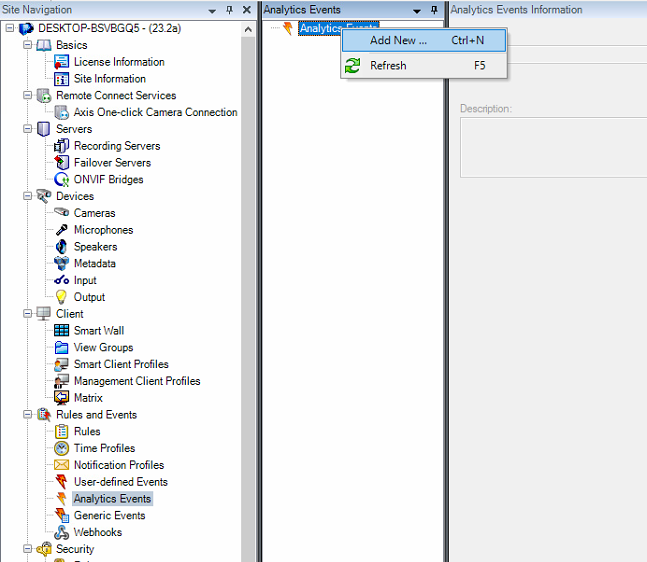
Navigate to Analytics Events page in the Site Navigation.
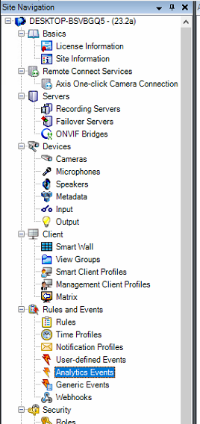
Right click on the Analytics Events -> Add New
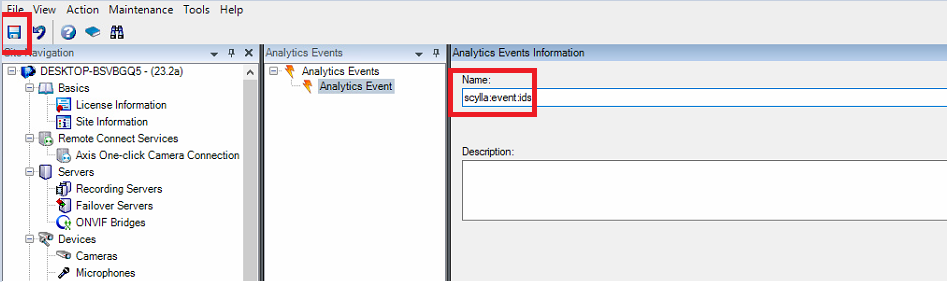
Name the analytics event in the following way (create analytics events for each Scylla AI module you want to receive alarm from):
- Intruder Detection System-> scylla:event:ids
- Gun Detection-> scylla:event:gun
- Suspicious Shopping Behavior-> scylla:event:tds
- Slip And Fall Detection System-> scylla:event:snfds
- Smoke And Fire Detection System-> scylla:event:sfds
- Fight Detection System-> scylla:event:fds
- Industrial Temperature Monitoring-> scylla:event:itm
- Face Recognition System-> scylla:event:frs
- Robbery Mask Detection-> scylla:event:rmd
- Traffic Flow Analysis-> scylla:event:tfa Intruder Detection System-> scylla:event:ids
Gun Detection-> scylla:event:gun
Suspicious Shopping Behavior-> scylla:event:tds
Slip And Fall Detection System-> scylla:event:snfds
Smoke And Fire Detection System-> scylla:event:sfds
Fight Detection System-> scylla:event:fds
Industrial Temperature Monitoring-> scylla:event:itm
Face Recognition System-> scylla:event:frs
Robbery Mask Detection-> scylla:event:rmd
Traffic Flow Analysis-> scylla:event:tfa
After creating the needed Analytics events, click save button.
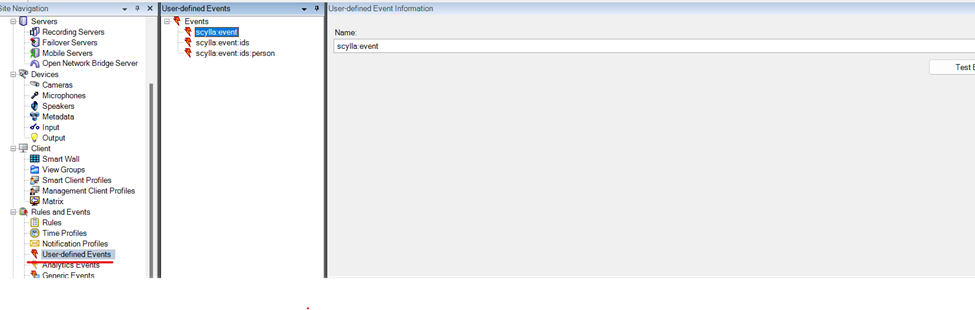
Now need to create User-defined Event
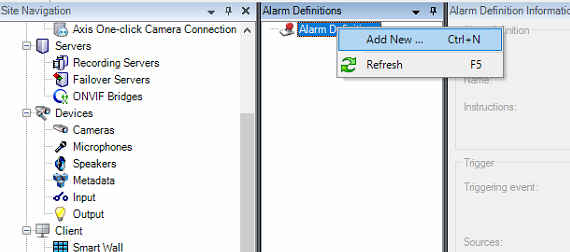
Now navigate to Alarm Definitions page in the site navigation list.
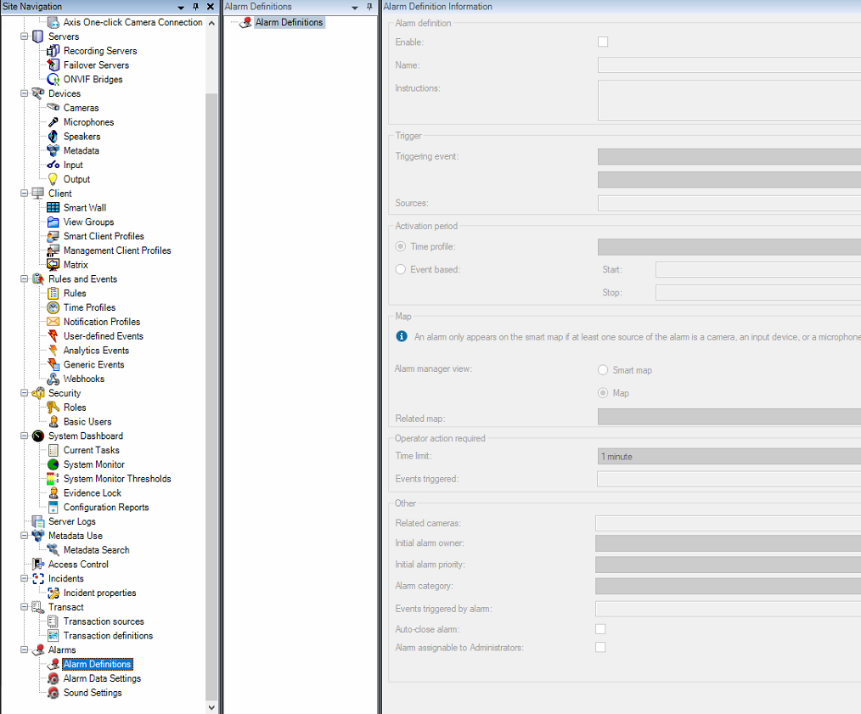
Right click on the Alarm Definitions->Add New
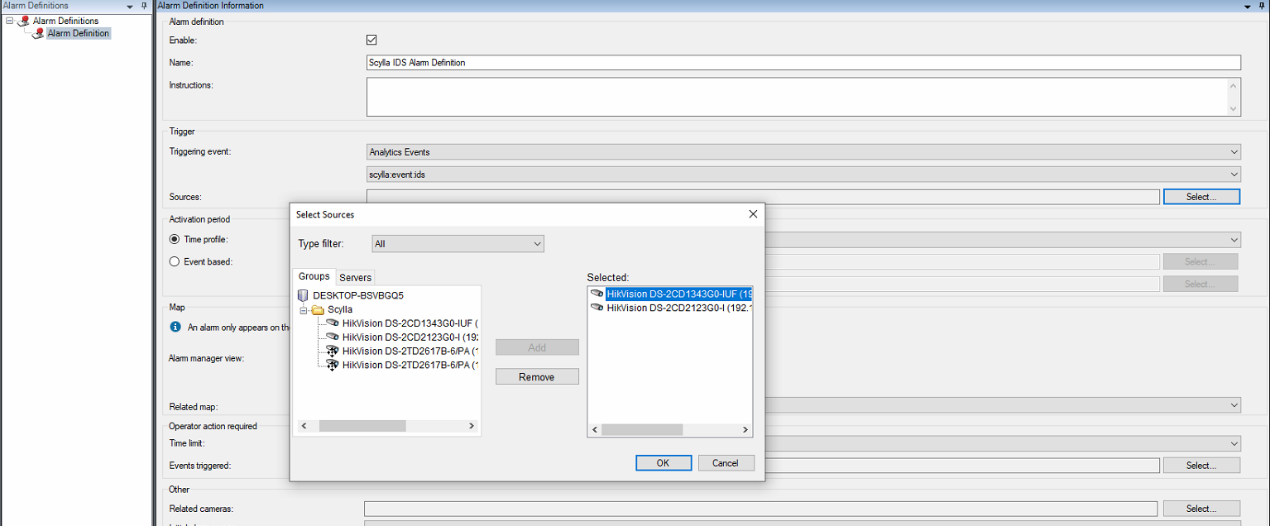
Name: Alarm Definition name (e.g Scylla IDS Alarm Definition)
Triggering event: Analytics Events & choose the appropriate analytics event created in the previous step from the list (for IDS its scylla:event:ids).
Sources: Click Select and Add the cameras that are related to this Analytics event to the right window (e.g cameras that are deployed with IDS module). Click OK.
If needed choose a time profile (to send alarms to Smart client only during that time) .
Choose the initial alarm owner which is the default user responsible for the alarm.
In the lower part, in the "Events triggered by alarm" insert the user-defined event that was created before.

Click the Save button.
Rules
Now it's time to create a Rule.
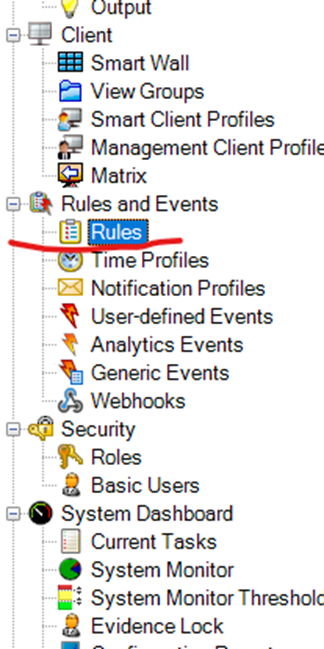
Rules to trigger recording on the video.
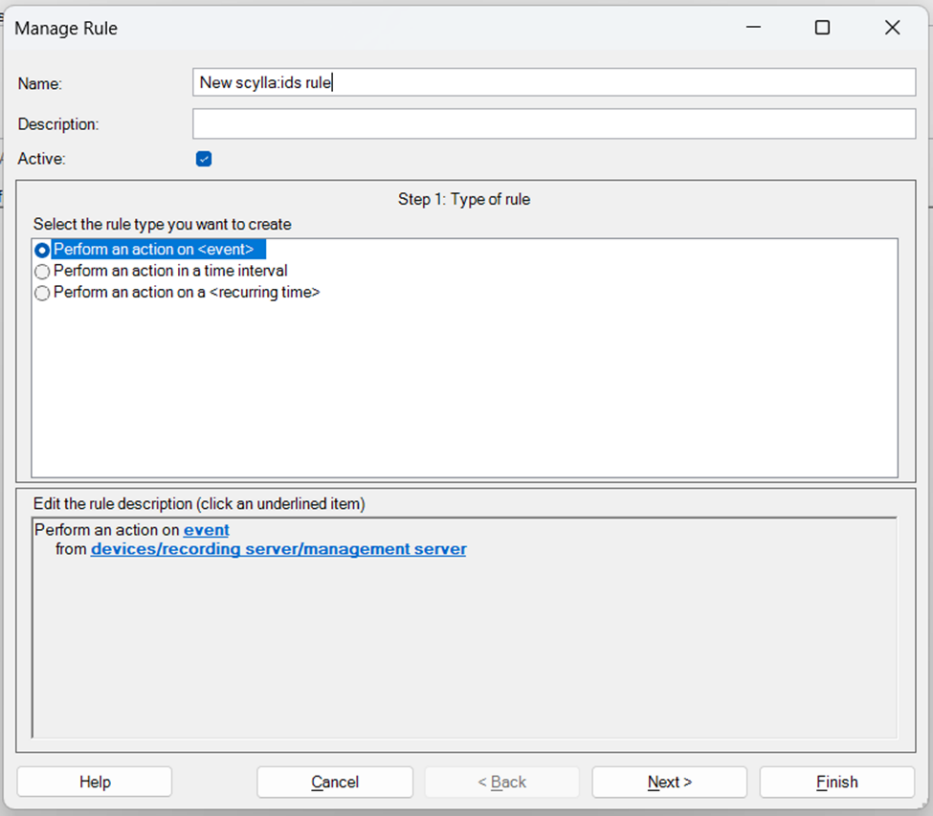
Select "perform an action on <event>" and then click on blue event and select newly created analytics event
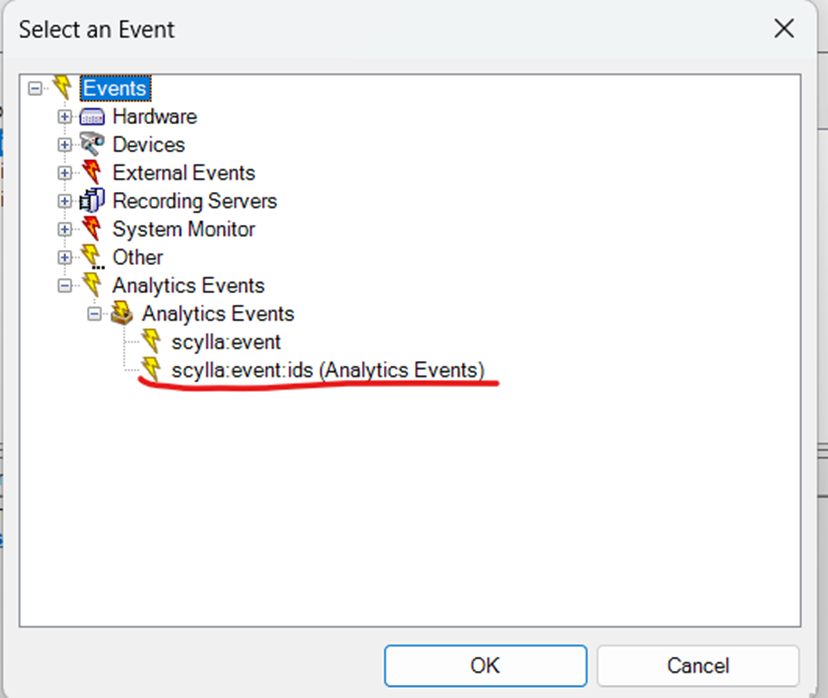
then select cameras that are used in the integration.
Click next.
Select start recording on <device> and start recording immediately on the devices from metadata
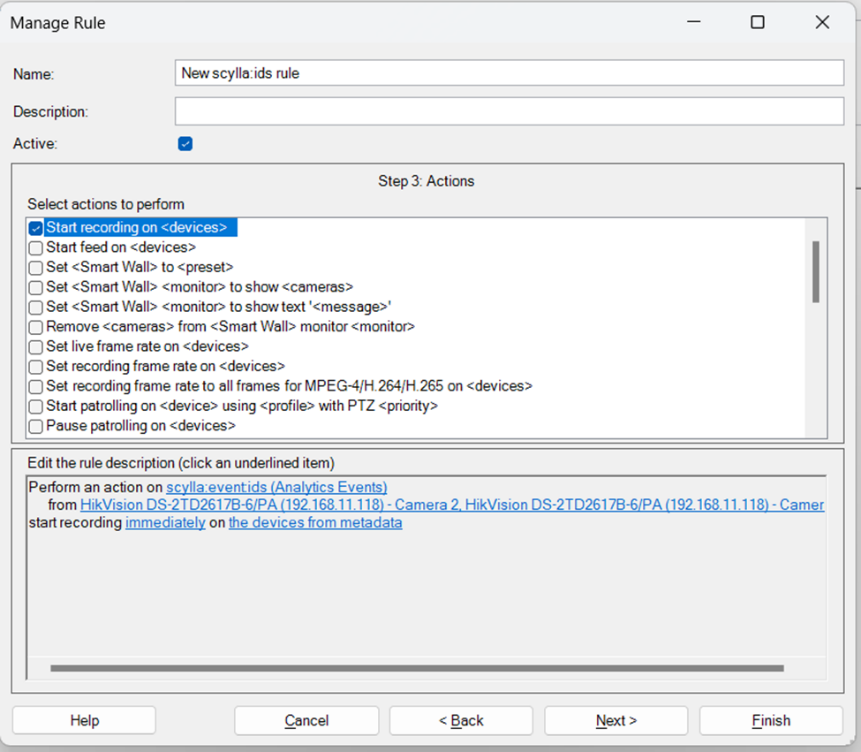
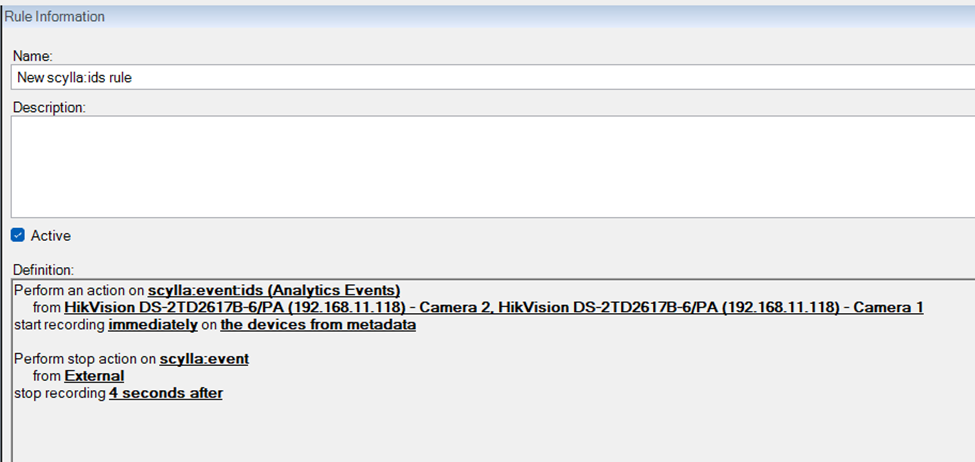
In next page need to specify when to finish recording.
Select perform action on the User-Defined Event that was also being triggered by an alarm. and set the recording length as much as you want. (Preferably 4 secs).

In the end it should look like this.
Milestone Smart Client
Alarms
Alarms from Scylla system will appear in the Xprotect Smart Client Alarm manager.
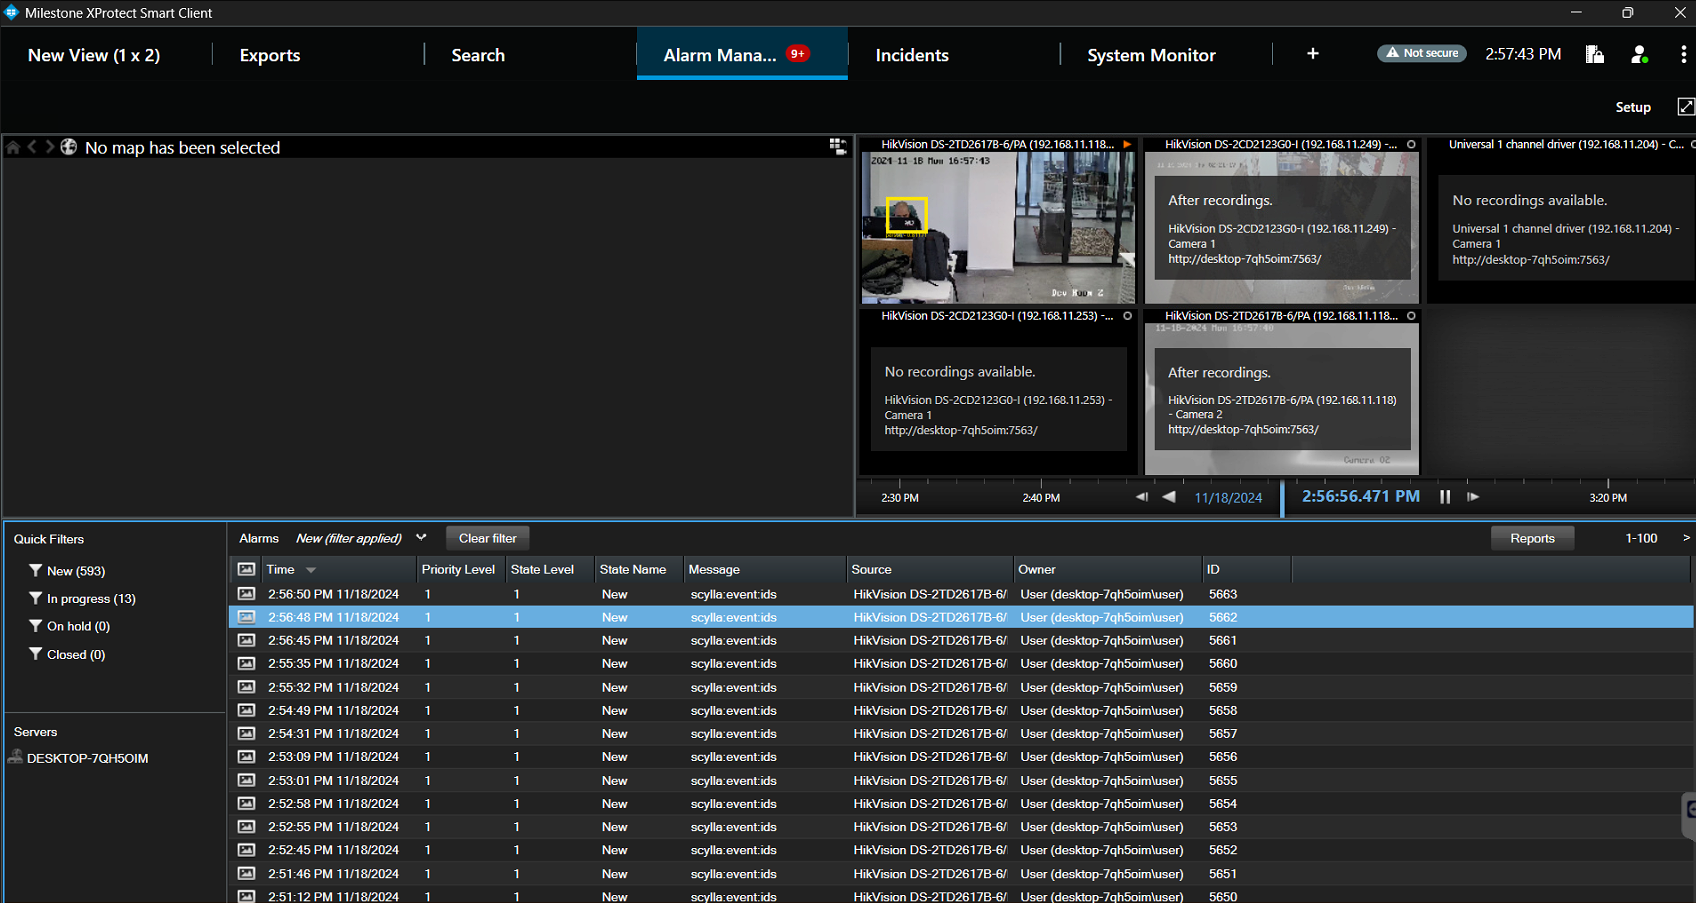
It is possible to create separate views for Scylla integration in the Views page and add to them the alarm list & alarm preview to organize alarms.
Click Setup -> create new view -> select the layout template -> name the view -> expand Alarms in the System overview -> drag and drop alarm list & alarm preview.

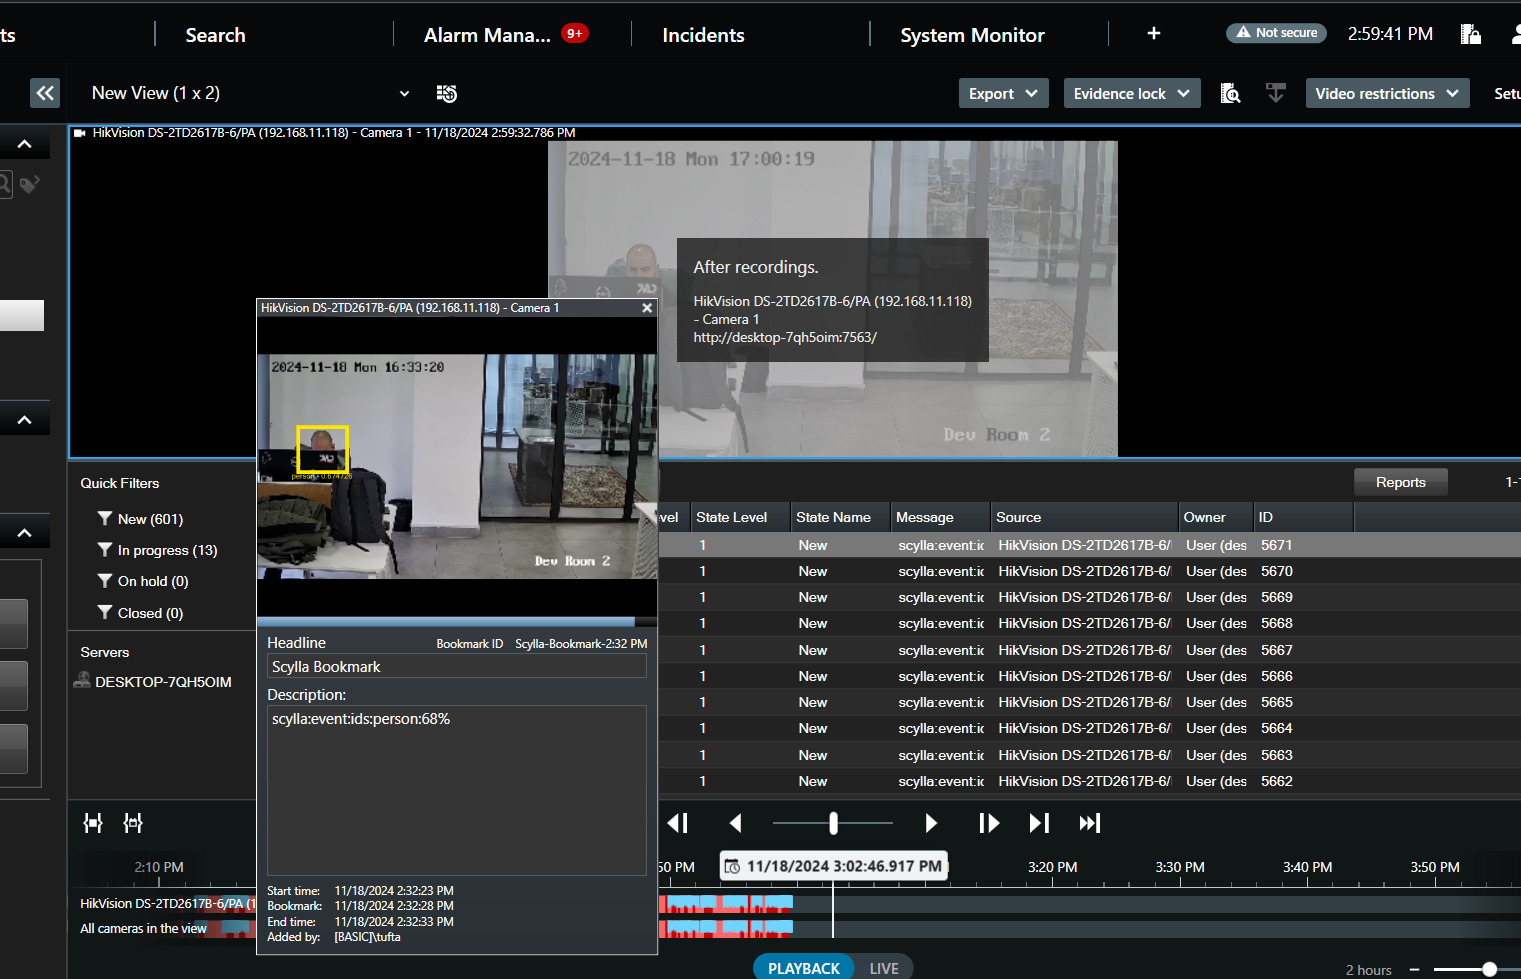
Bookmarks
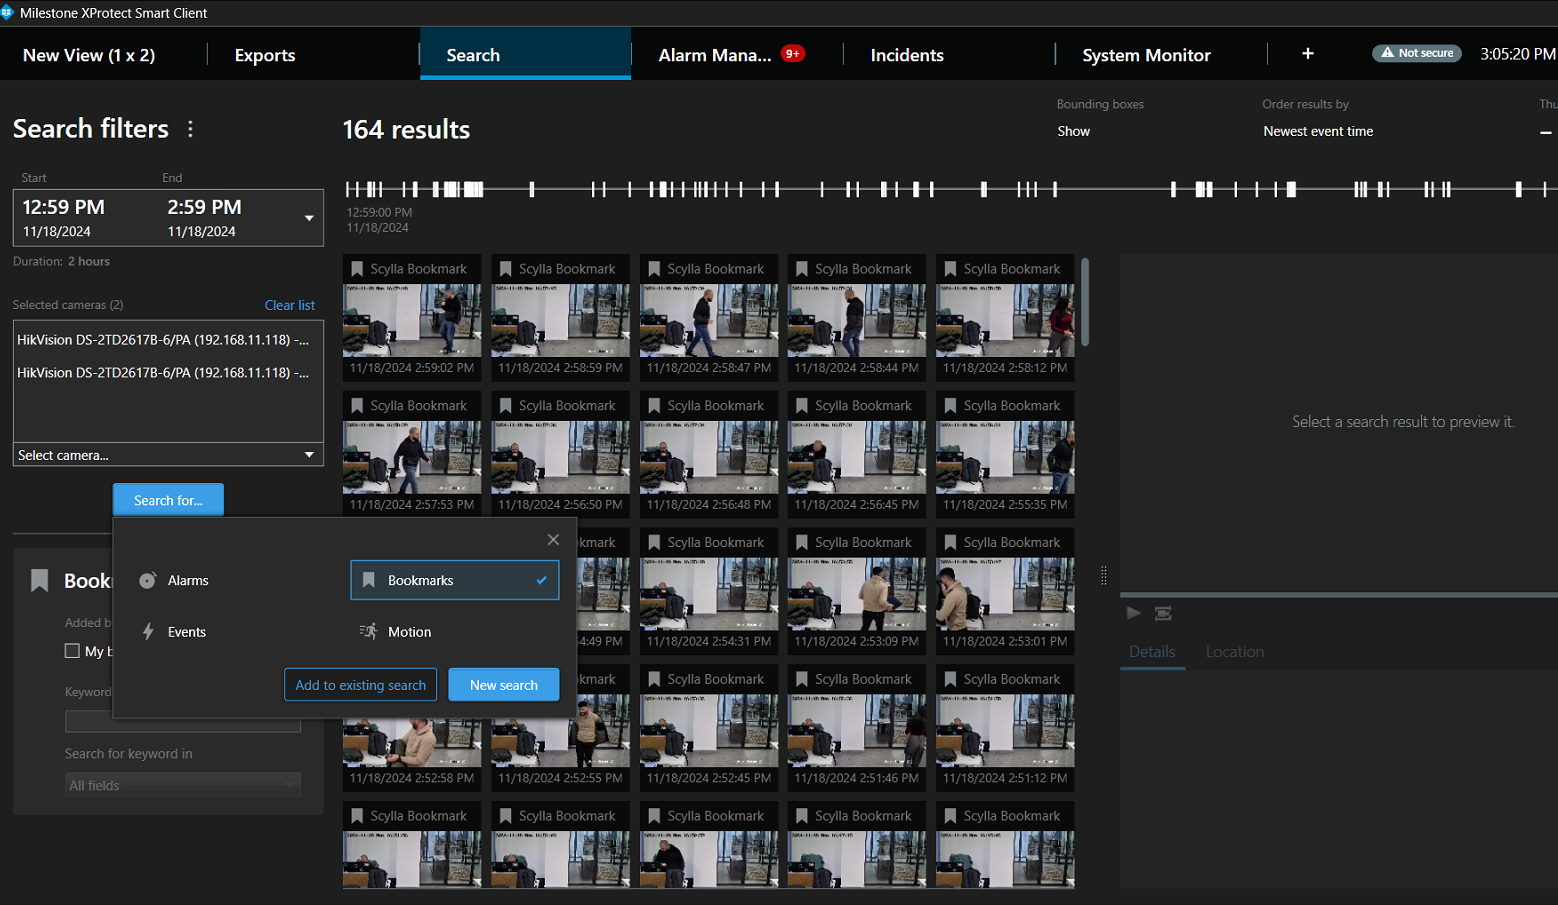
When the Bookmark setting is enabled in the Scylla Alarm Receiver UI, you can view bookmarks directly on the timeline or locate them by navigating to the Search menu.
In the Search page, select date/time, select the camera(s) , select Bookmark as Search for …
We value and appreciate your feedback. If you have any questions or suggestions, please contact support@scylla.ai or submit a request to the Scylla Help Center at https://support.scylla.ai/portal/en/home.