Exacq
Introduction
This manual offers an overview of the integration between Scylla and the Exacqvision Video Management System (VMS), along with step-by-step instructions for its use.
Scylla is fully integrated with Exacqvision Professional, enabling two-way communication: it receives data from the Exacqvision Server and sends alerts or responses back to the Exacqvision Client.
Scylla Dashboard Configuration
Open the Scylla Asteria or Scylla On-Premise Dashboard.
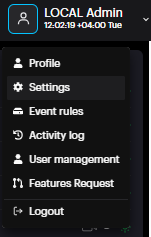
Go to Account menu -> Settings
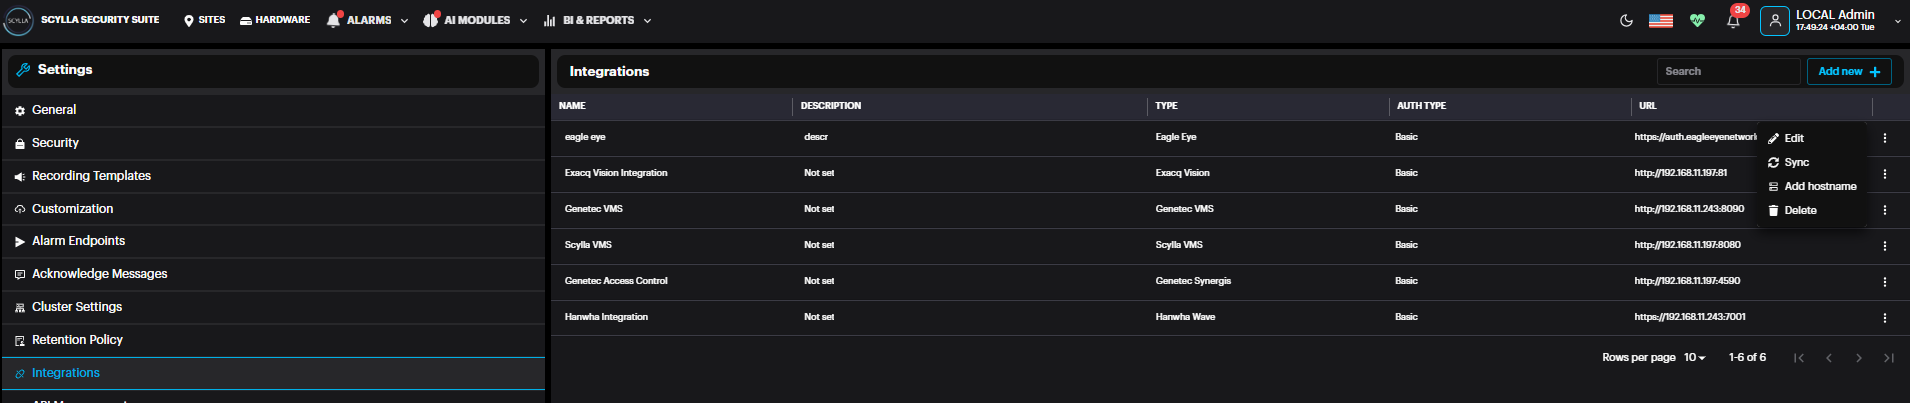
Now navigate to Integrations menu
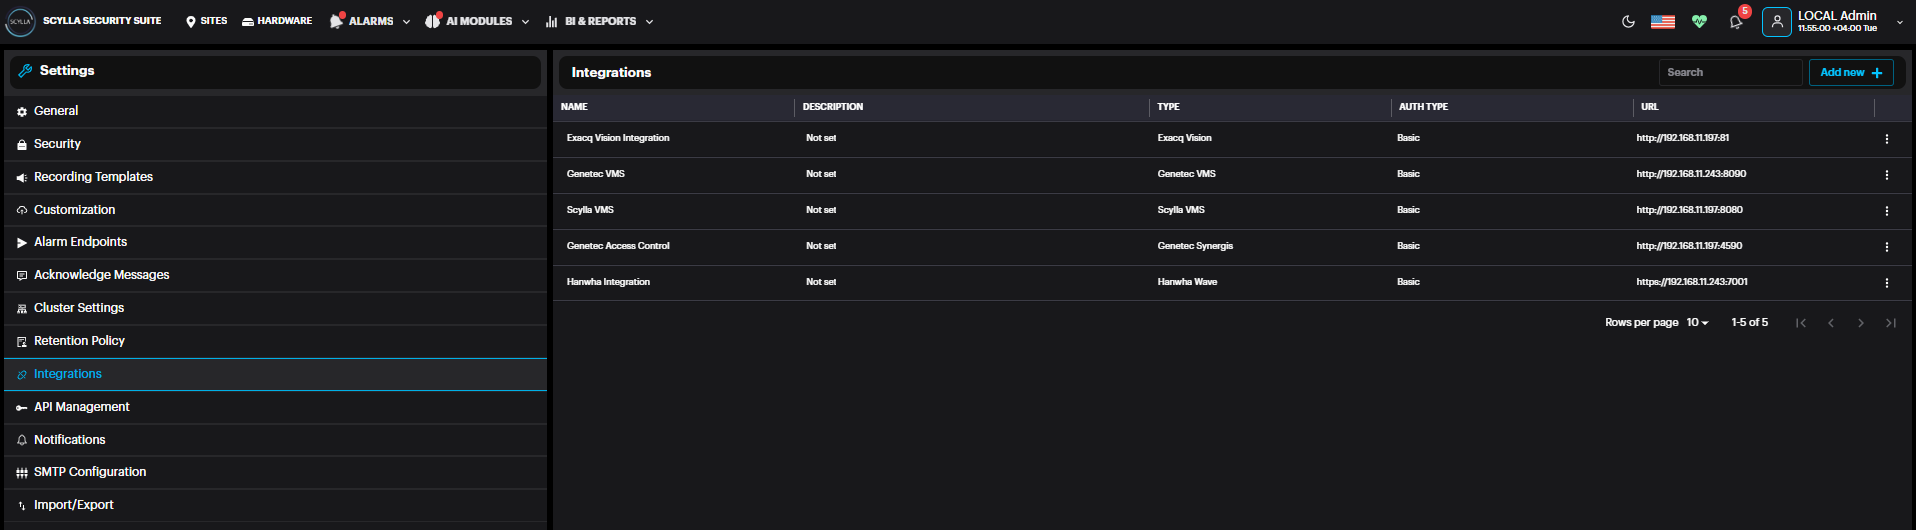
Click Add new +
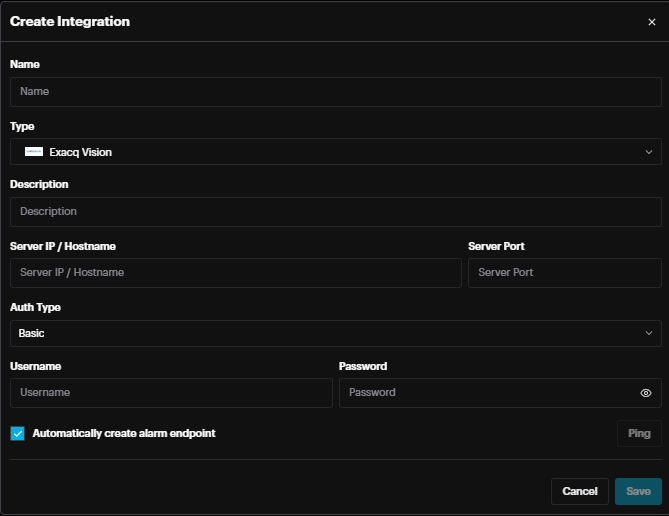
Name: name the integration
Type: Select ExacqVision from the list
Description: Add a description if needed
Server IP/Hostname: IP address of the ExacqVision Server
Port: ExacqVision Web Service Port
Auth Type: Basic or Bearer (select Basic)
Username: username of ExacqVision Server/NVR account
Password: password of ExacqVision Server/NVR account
Click Ping to test the connection, if successfully connected then a message will be displayed.
Note: The following Exacqvision Web Service must be installed, and its designated port will be used to establish the connection.
Note: RTSP Server in Exacqvision responsible for streaming out should be enabled and credentials set.

For seamless integration , use same credentials for Exacqvision RTSP Server and the Server/NVR credentials.

Automatically create alarm endpoint: If enabled, an alarm endpoint will be automatically created in the settings-> alarm endpoints
Importing Cameras from VMS
Scylla On-Premise
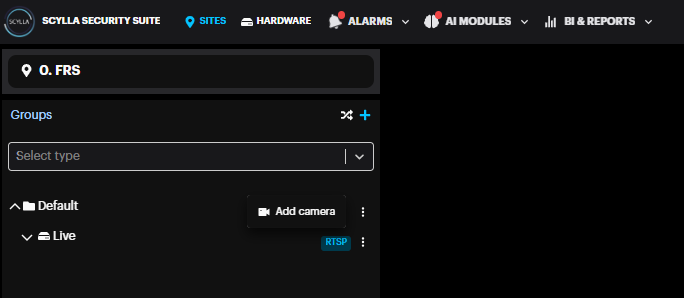
Go to Sites page , select a site -> Properties -> Manage Devices

Click the three dots near the Group (Default) -> Add Camera
Select Live Stream and click Next
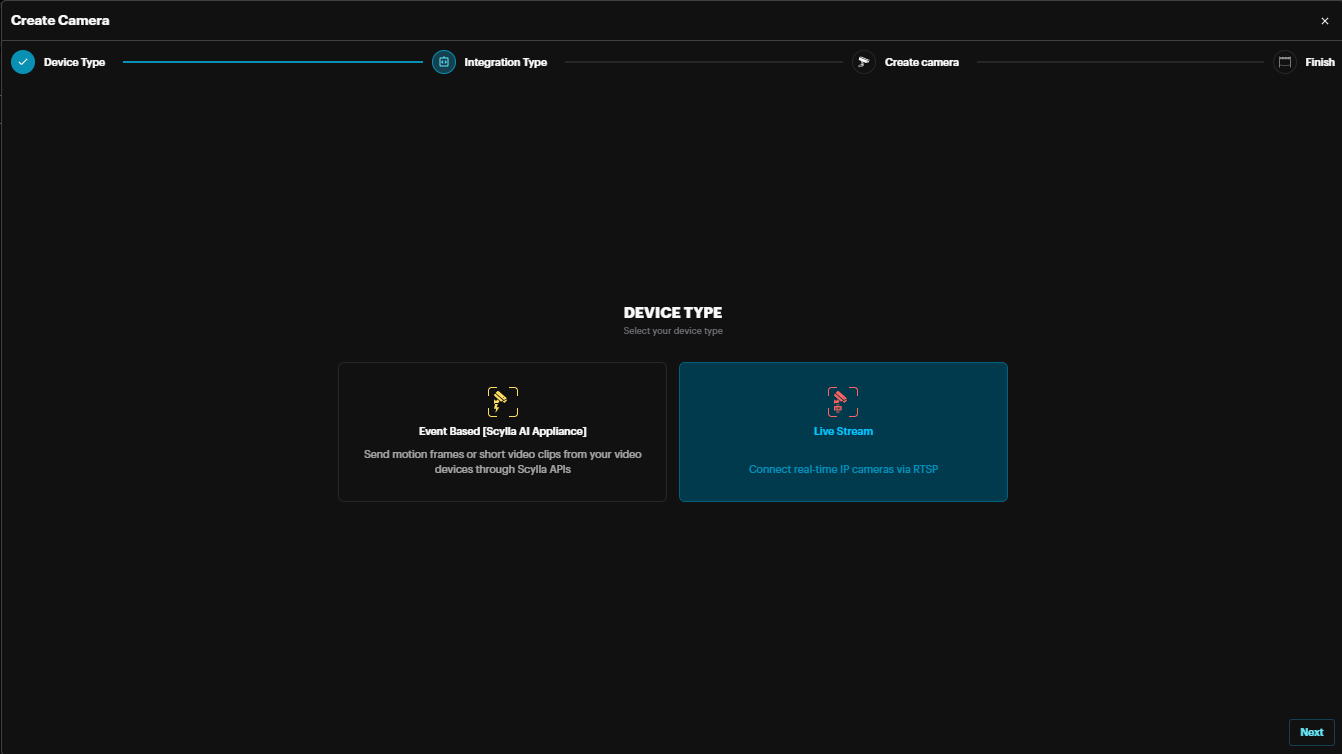
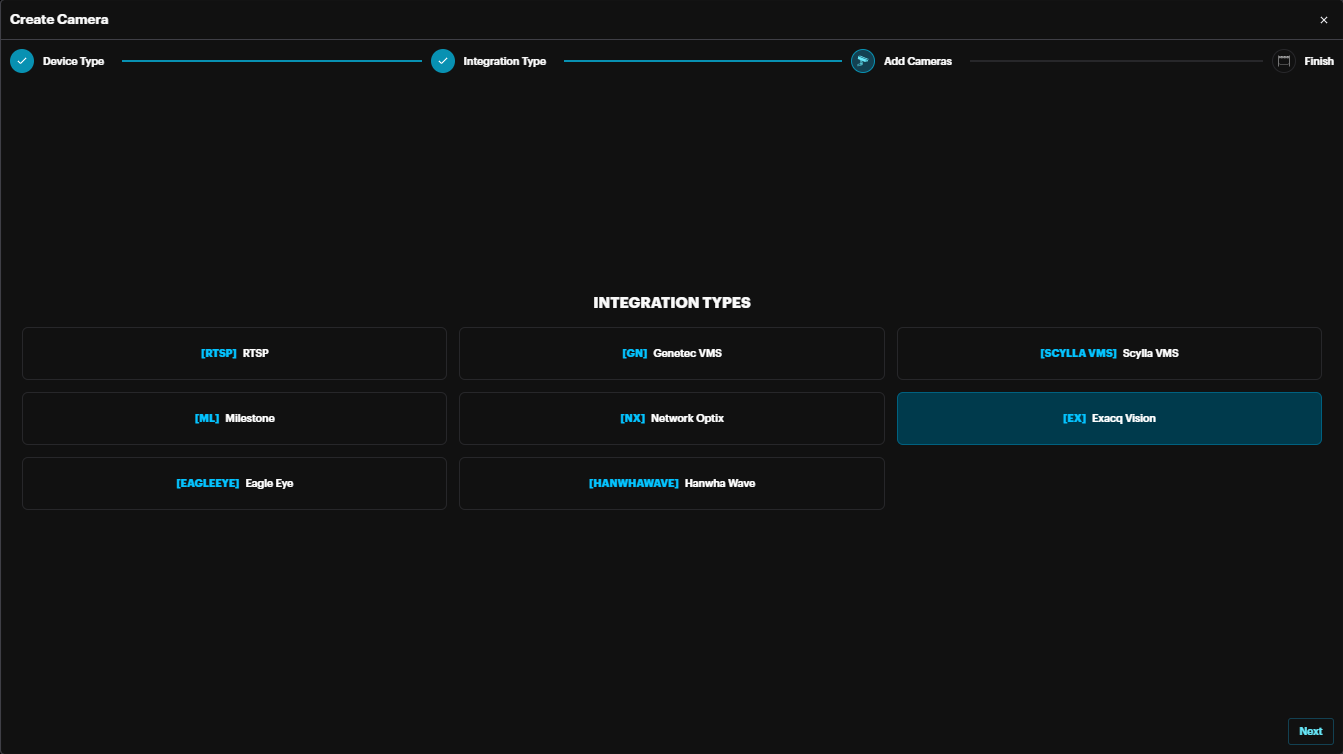
Select ExacqVision and click Next
Select the integration from the drop-down menu and the cameras on ExacqVision server will appear
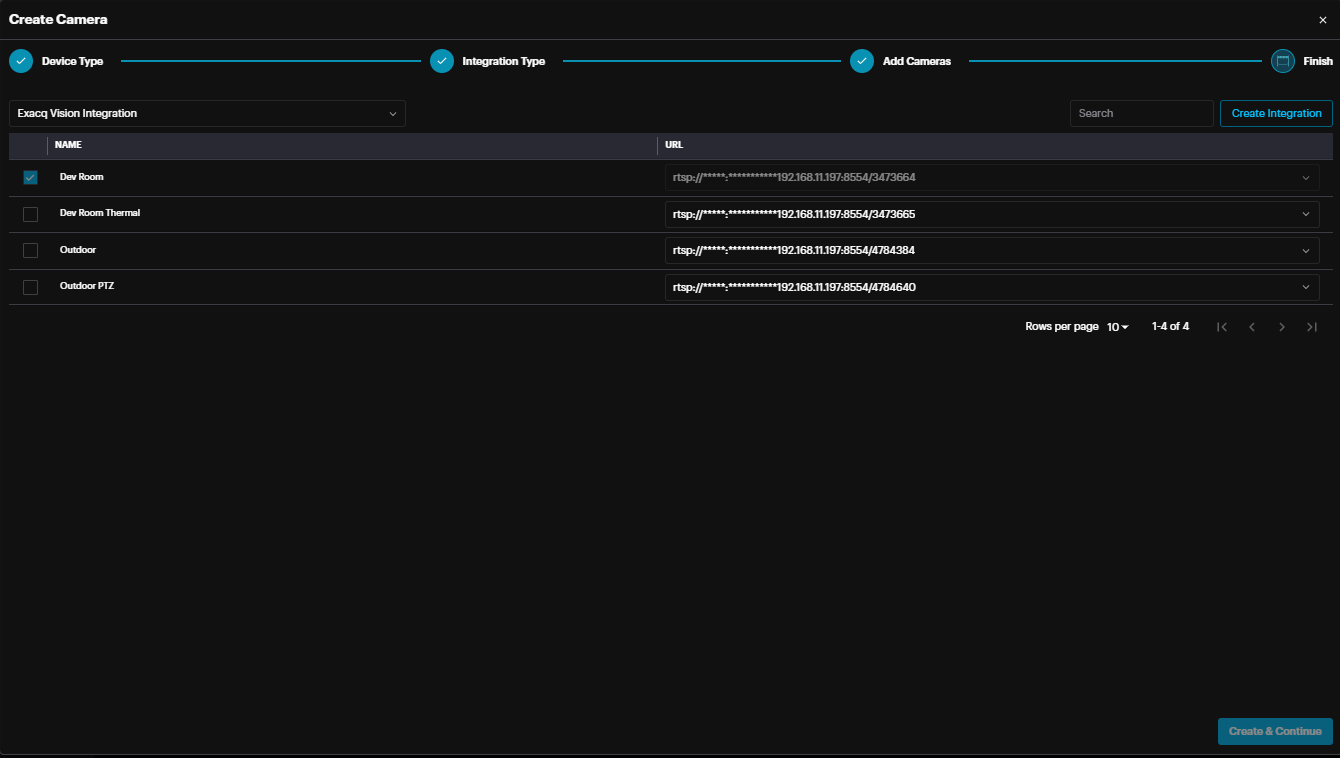
Enable the cameras that will be imported to Scylla on-premise server.
Click Create & Continue

The imported camera(s) will appear under the group

Once deployed, the alarms will appear on Scylla Dashboard and ExacqVision Client.
(alarm endpoint and event rule should be already configured).
Sync feature
If there are any changes to camera names in the VMS or if a camera is removed from the VMS, use the sync feature to update these changes on the Scylla dashboard.
Navigate to Settings à Integrations à three dots à Sync
Deployment
Next, deploy the cameras to the AI Module(s).
This enables the selected cameras to function with the AI system and trigger alarms upon detection.
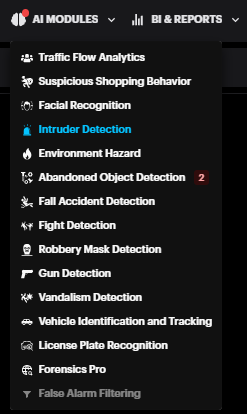
Go to the AI Module section on top, then choose the AI module you want to use with the camera.
Now click the Deployments button.

Deployments pop up appears, click Add.
If you have not allocated capacity for this module , Navigate to Account Menu -> Settings -> Cluster Settings.
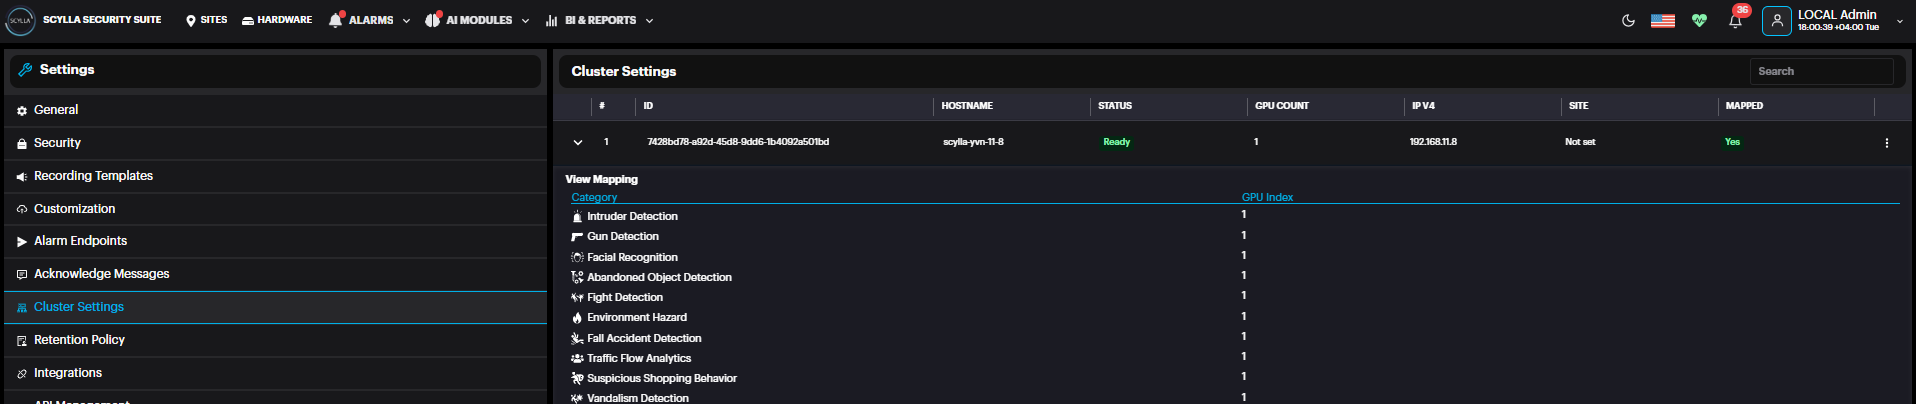
Here, Cluster information appears with number of GPUs installed (under GPU count)
And a summary about the modules/gpu mapping.
If you have several GPUs installed, you can balance the load by distributing the modules across several GPUs.
Click on the three dots in the cluster record then GPU Mapping.

Now the list of modules with their GPU mappings appears, if any.
You can add mapping by clicking +.
After selecting module and mapping to the GPU index, click submit.
Now you are ready to add deployment.
Back to deployments page, it is possible to create Deployment sets to assign cameras to sets and save them to avoid camera selection every time manually.
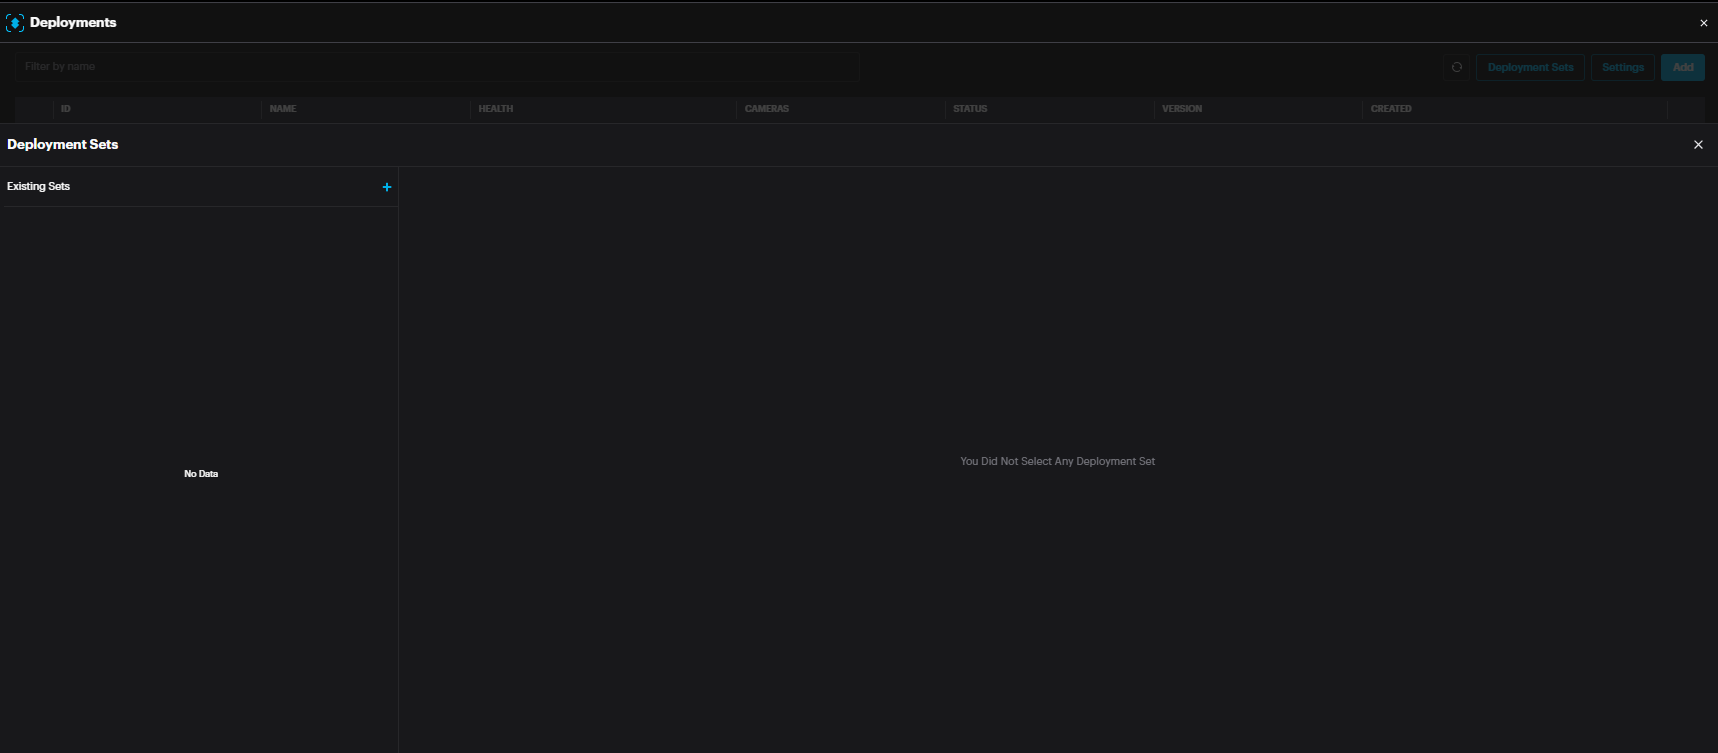
Click Deployment Sets

Click the add button to add a Set.

Name the Set. Click Save.
List of available cameras and selected cameras appear.

Choose the required camera(s) and drop them in the Selected cameras window by clicking the > arrow.
It is possible to remove cameras from a set by selecting the camera and clicking < arrow.
After adding the camera(s) to a set, click Save.
Now click on the add button to add a deployment.

A new deployment window appears.
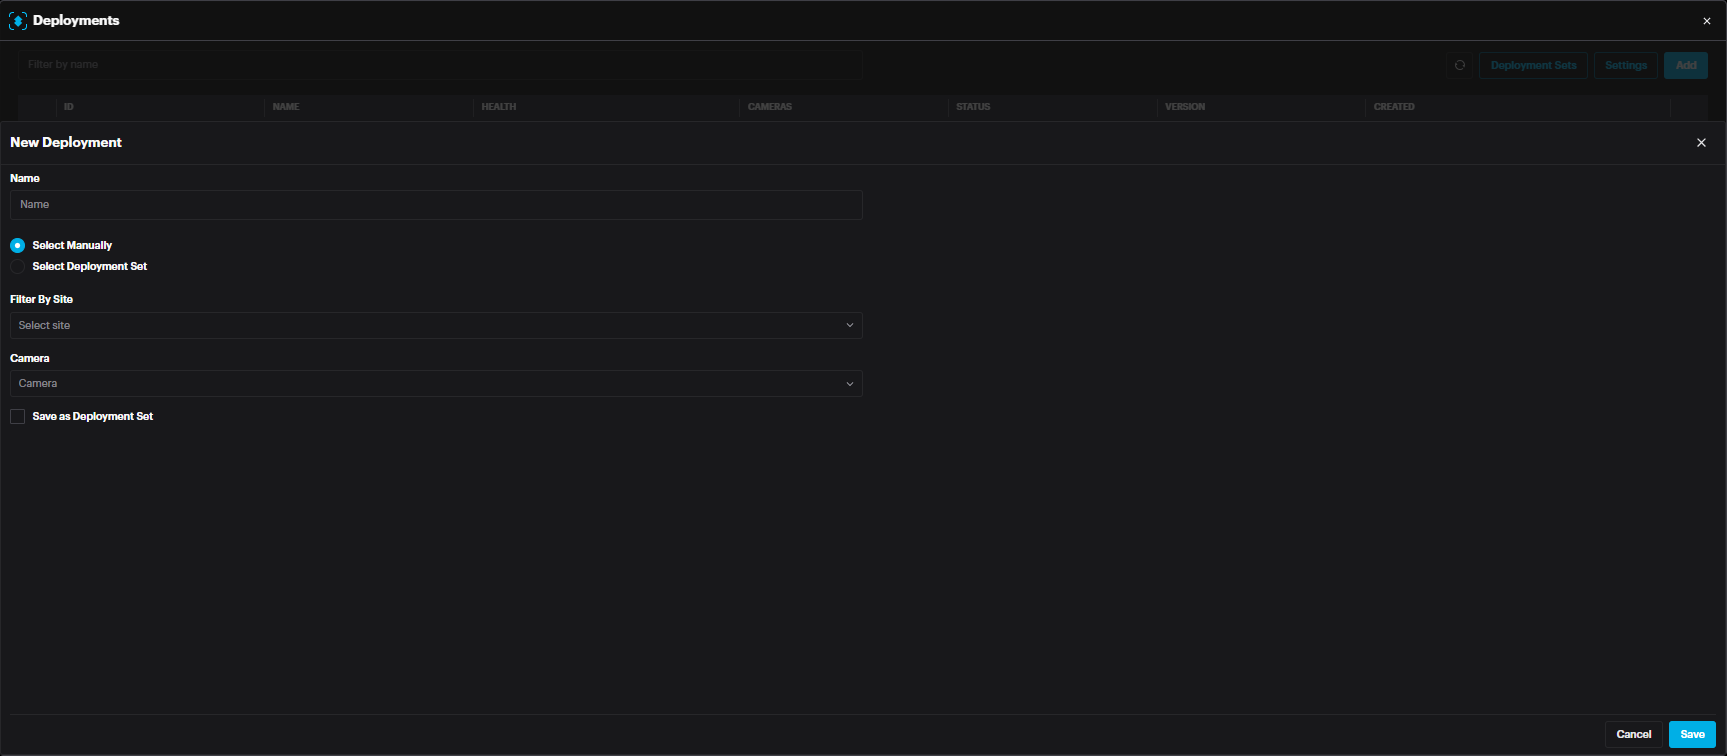
Name: Name of deployment
Select Manually: Select the cameras manually from the camera drop down menu below.
Select Deployment Set: select Deployment set if you have already created one.
After selecting the camera(s) or set, click Save.

The new deployment will appear with the status (Pending, Waiting or Running).
In the deployment window, click Settings to access configuration specific to the module.

The settings page includes settings specific to the module such as threshold, cooldown between detection, etc. Change these settings carefully as it will affect the detection rate.
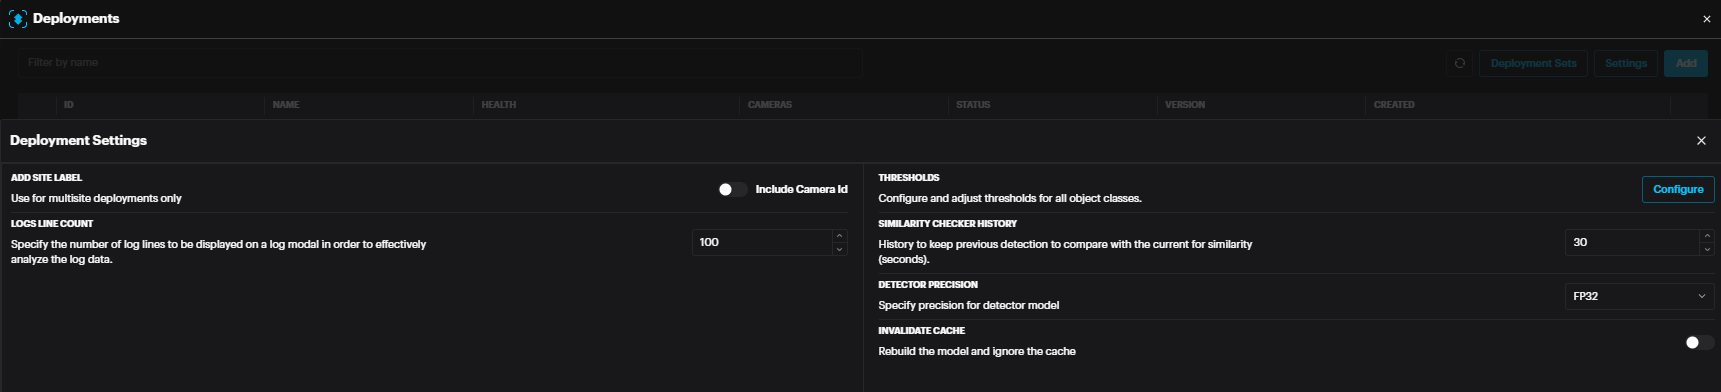
In case of any setting change, click Save.
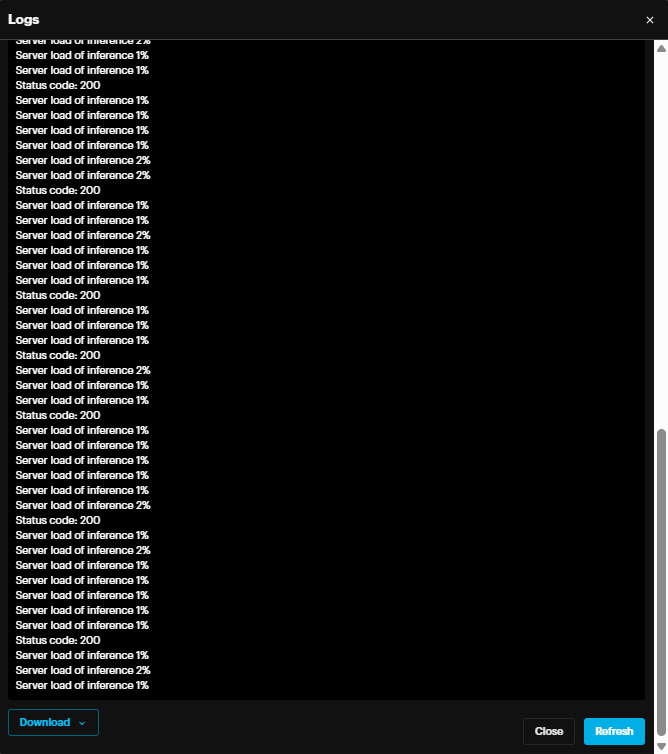
For successful deployment, the deployment status should state Running (usually in few minutes after adding deployment). You can refresh the page by clicking the refresh button on the top right of the window.
In case the status is not changed to Running, it is possible to check the logs by clicking more options (three dots) then View Logs. In the Logs window, it is possible to Download the logs from the bottom left section.
It is possible to Restart the deployment, Redeploy , edit deployment or Delete deployment by clicking the three dots at the end of the record.
Configuring Event Rules
Event rules are created to link the events, schedules and actions.
Scylla On-Premise
Go to Account Menu -> Event rules

Click Add to add a new event rule.
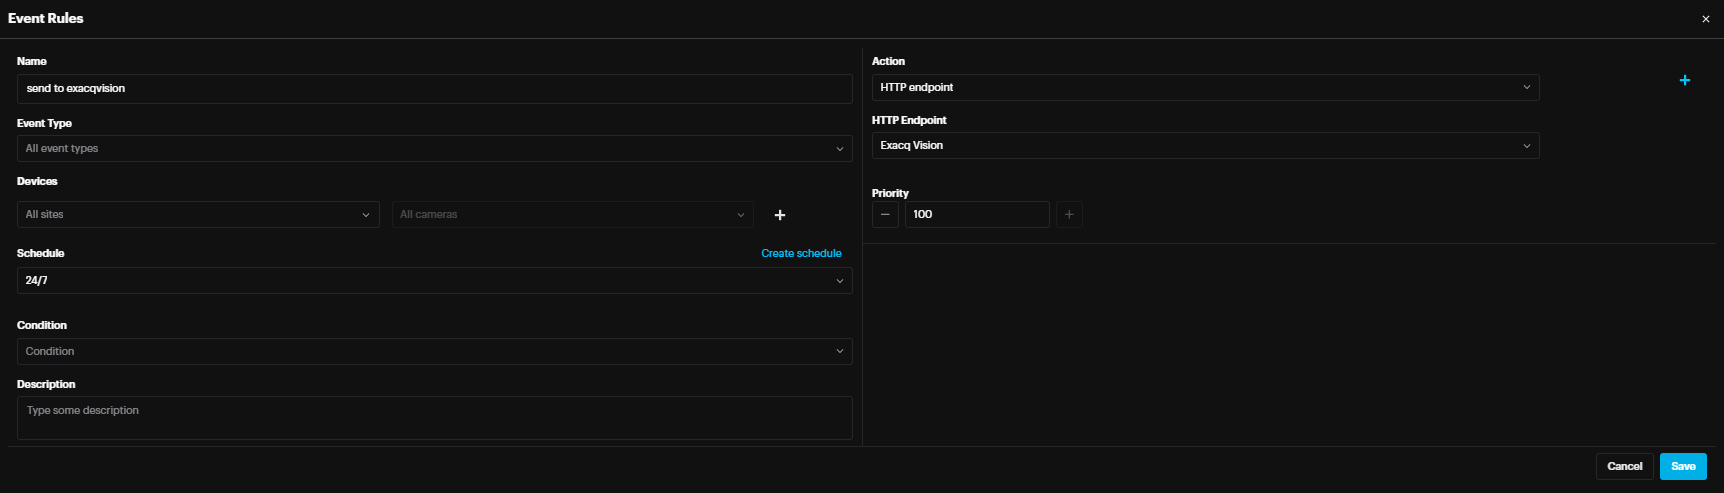
Name the event rule, select the event type (default is All event type), Select the Site and camera(s) whose event will trigger the action (default is All Sites & All cameras), select schedule (select the default 24/7 from drop down menu or create new schedule by clicking create schedule) , select condition if required such as send only when alarm is acknowledged on scylla on-premise dashboard or cloud dashboard(default is no condition meaning all the triggered alarms on scylla will be sent to exacqvision).
In the action select HTTP Endpoint and for HTTP Endpoint select ExacqVision.
Click Save.
Now Scylla On-Premise is ready to send the alarm to ExacqVision from camera(s) that are configured in the Event Rule.
ExacqVision Client
Event Monitoring
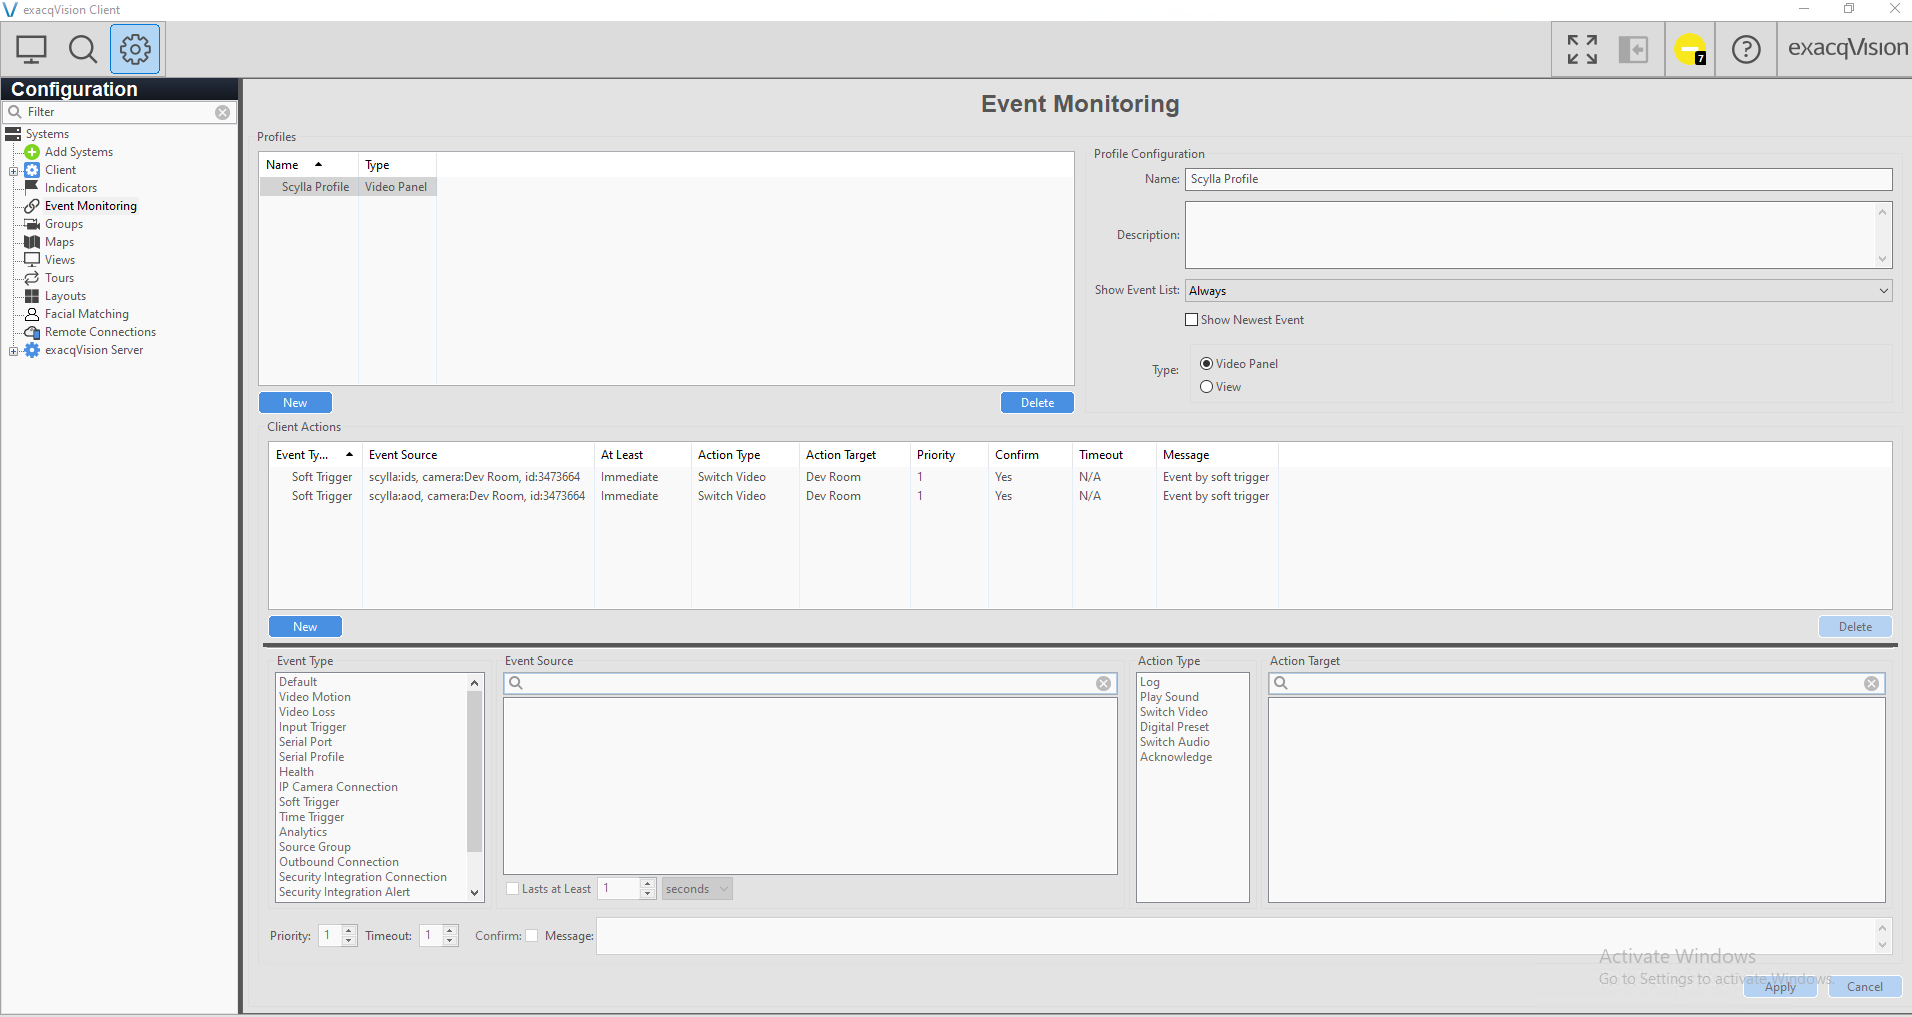
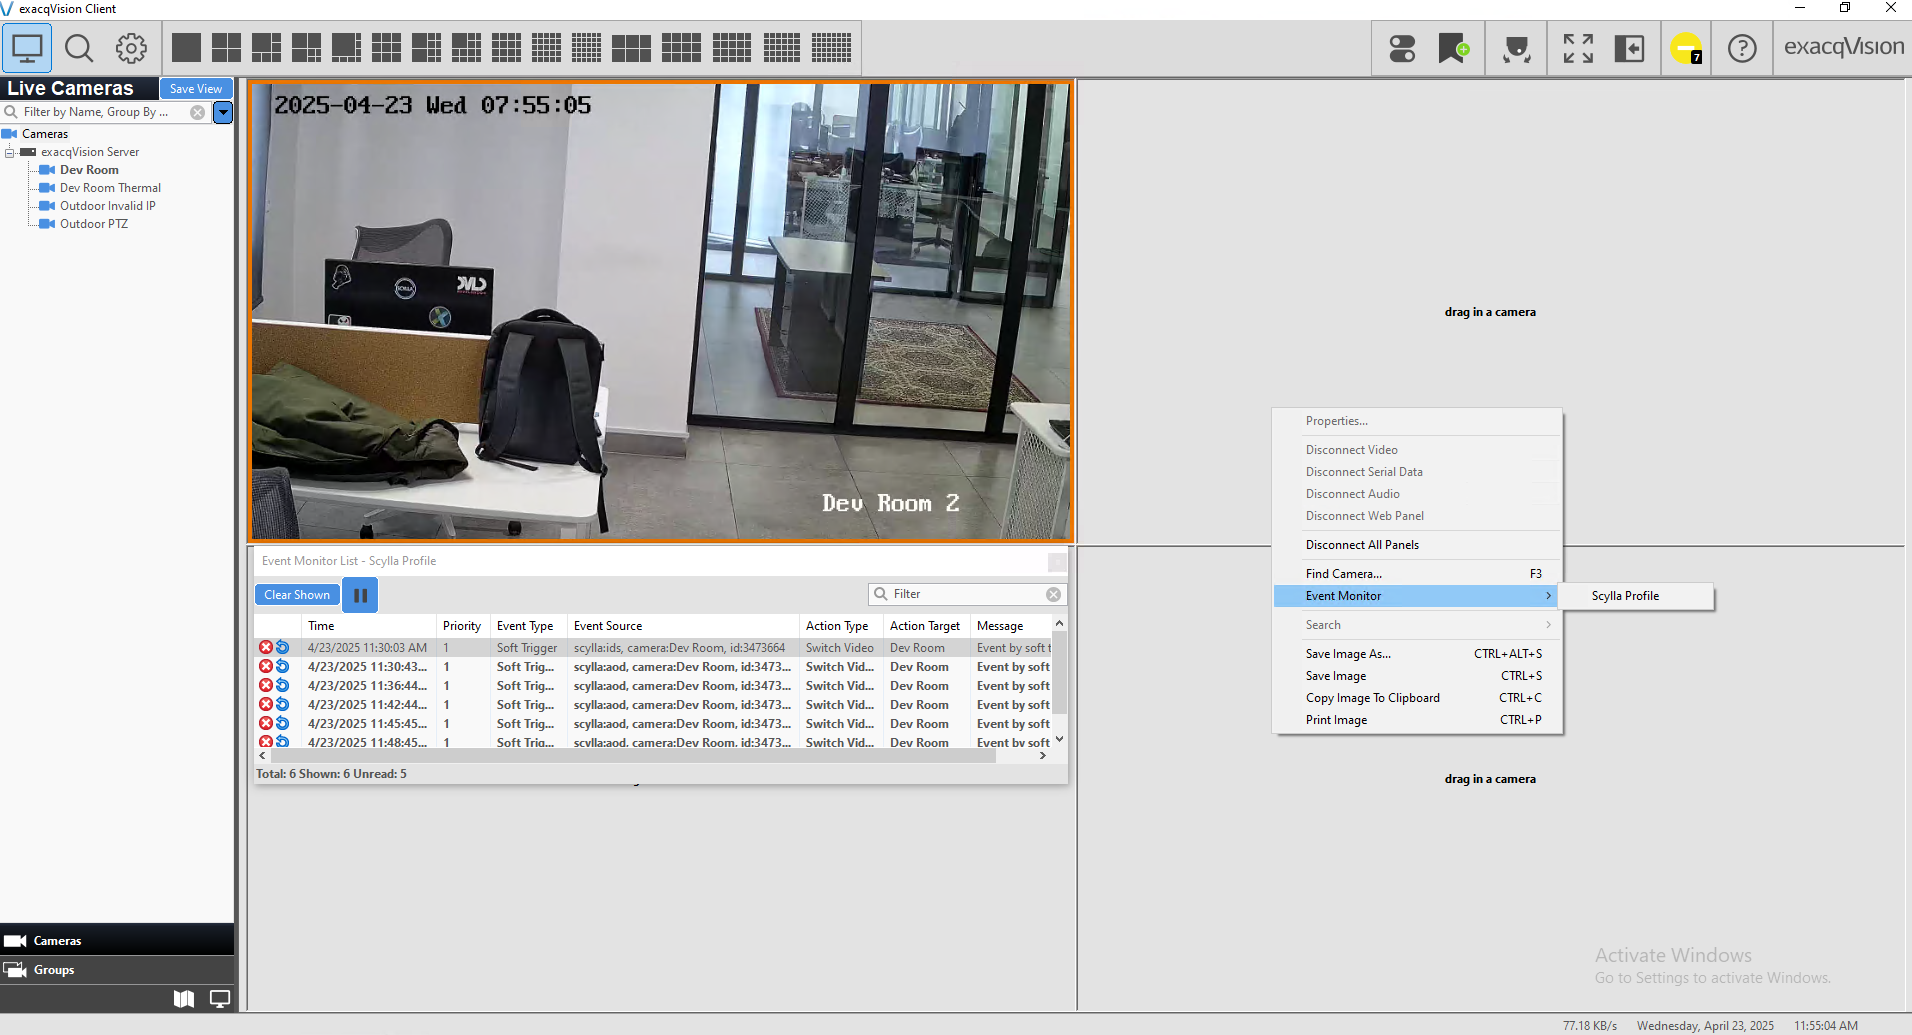
When an alarm is triggered on the Scylla dashboard, an Event Monitoring Profile named "Scylla Profile" is automatically created in ExacqVision. In addition, Soft Triggers are automatically generated under Client Actions.
These soft triggers are associated with both the camera and the AI module category. For example, if a single camera is configured for both Intruder Detection and Abandoned Object Detection in Scylla, two separate soft triggers will be created in ExacqVision—one for each module.
Each Soft Trigger Action Target corresponds to the camera where the alarm was detected, and the Action Type is set to Switch Video.
Alarm Live Monitoring
To monitor Scylla events in real time:
- Go to the Live page in ExacqVision.
- Right-click on an empty video window.
- Navigate to Event Monitor.
- Select Scylla Profile. Go to the Live page in ExacqVision.
Right-click on an empty video window.
Navigate to Event Monitor.
Select Scylla Profile.
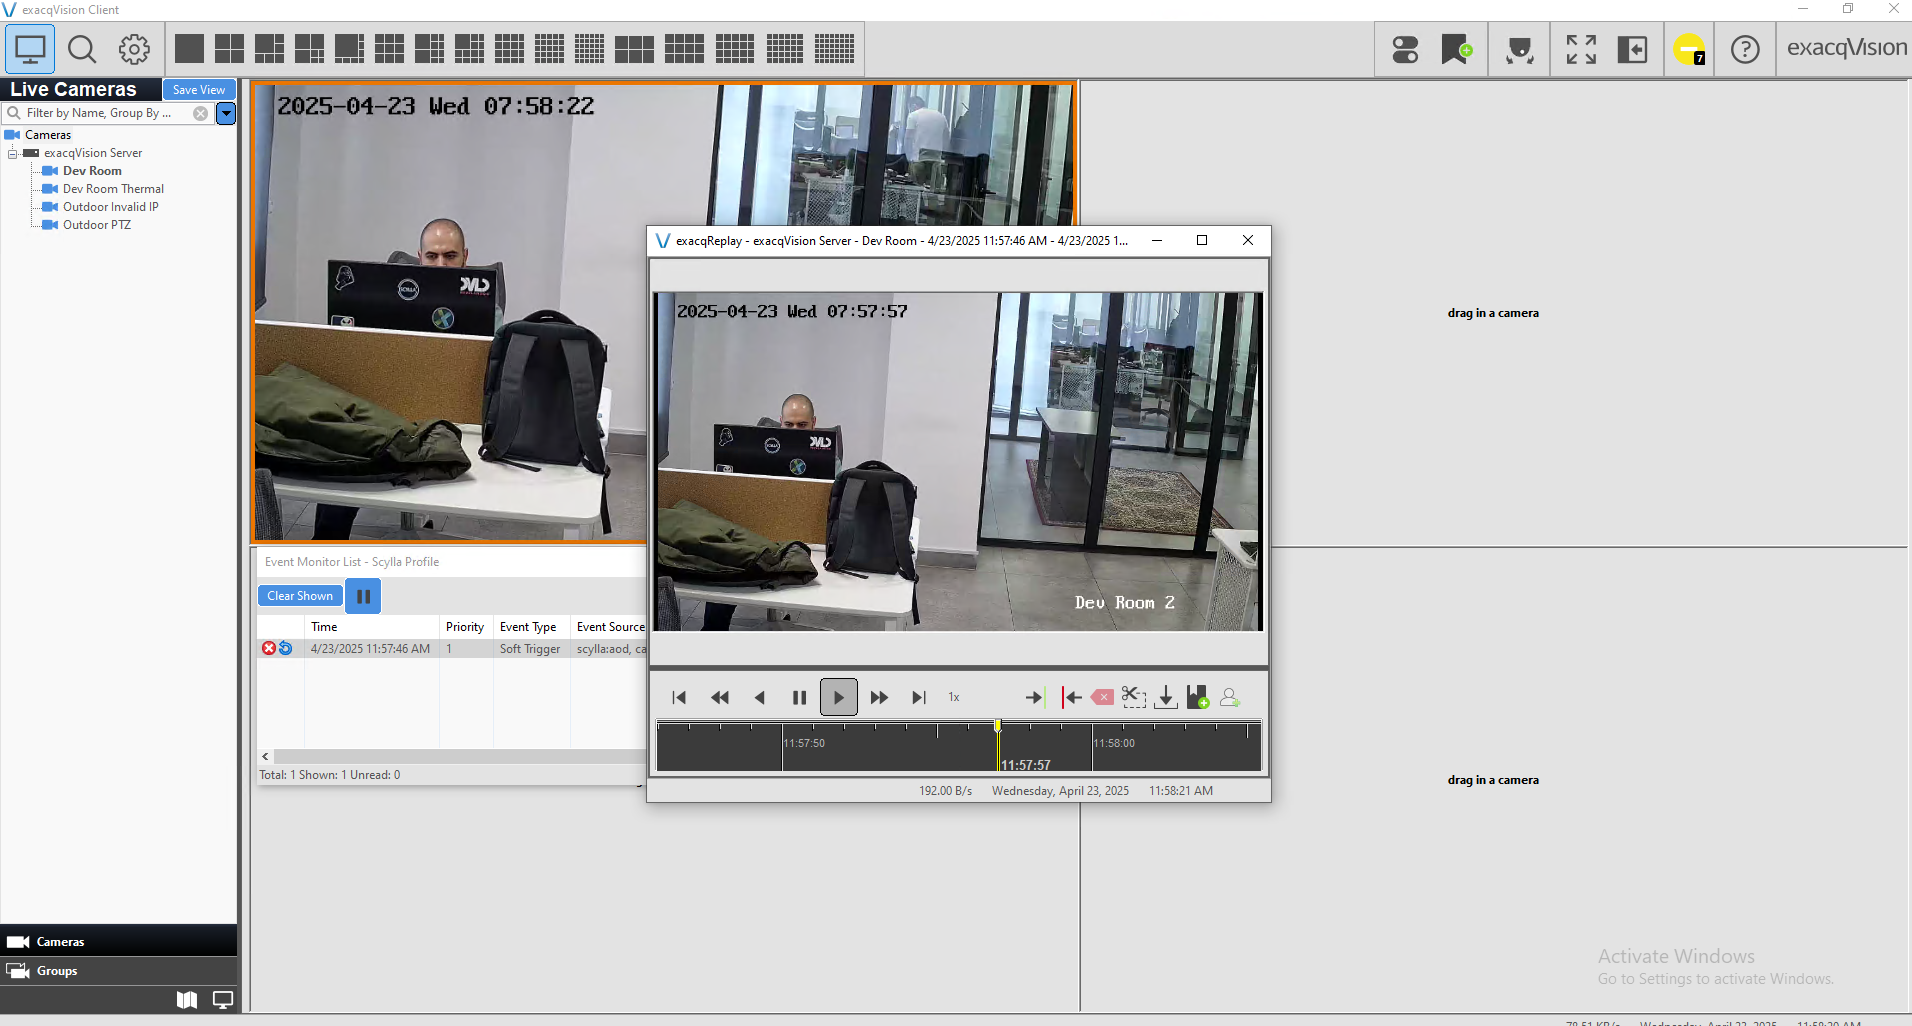
After selecting Scylla Profile in the Event Monitor:
- The Video Panel and Event List will appear.
- Any new alarm triggered by Scylla will automatically be added to the Event List in real time. The Video Panel and Event List will appear.
Any new alarm triggered by Scylla will automatically be added to the Event List in real time.
To review an alarm:
- Double-click on an event in the list.
- This will open the ExacqReplay window and jump directly to the moment the alarm was detected—provided that recording is enabled for the corresponding camera in ExacqVision. Double-click on an event in the list.
This will open the ExacqReplay window and jump directly to the moment the alarm was detected—provided that recording is enabled for the corresponding camera in ExacqVision.
Optional Configurations on ExacqVision
Event Linking
Users can configure Event Linking using Soft Triggers. For example, a Soft Trigger from the Scylla IDS Outdoor PTZ can initiate an action such as recording video on the Outdoor PTZ camera, with predefined pre- and post-recording durations.
-
Navigate to the Event Linking menu.
-
Click New to create a new event link.
-
Select Soft Trigger as the Event Type.
-
Choose the appropriate camera/module as the Event Source.
-
Select your desired Action Type and the corresponding Action Target.
-
Click Apply to save the configuration.
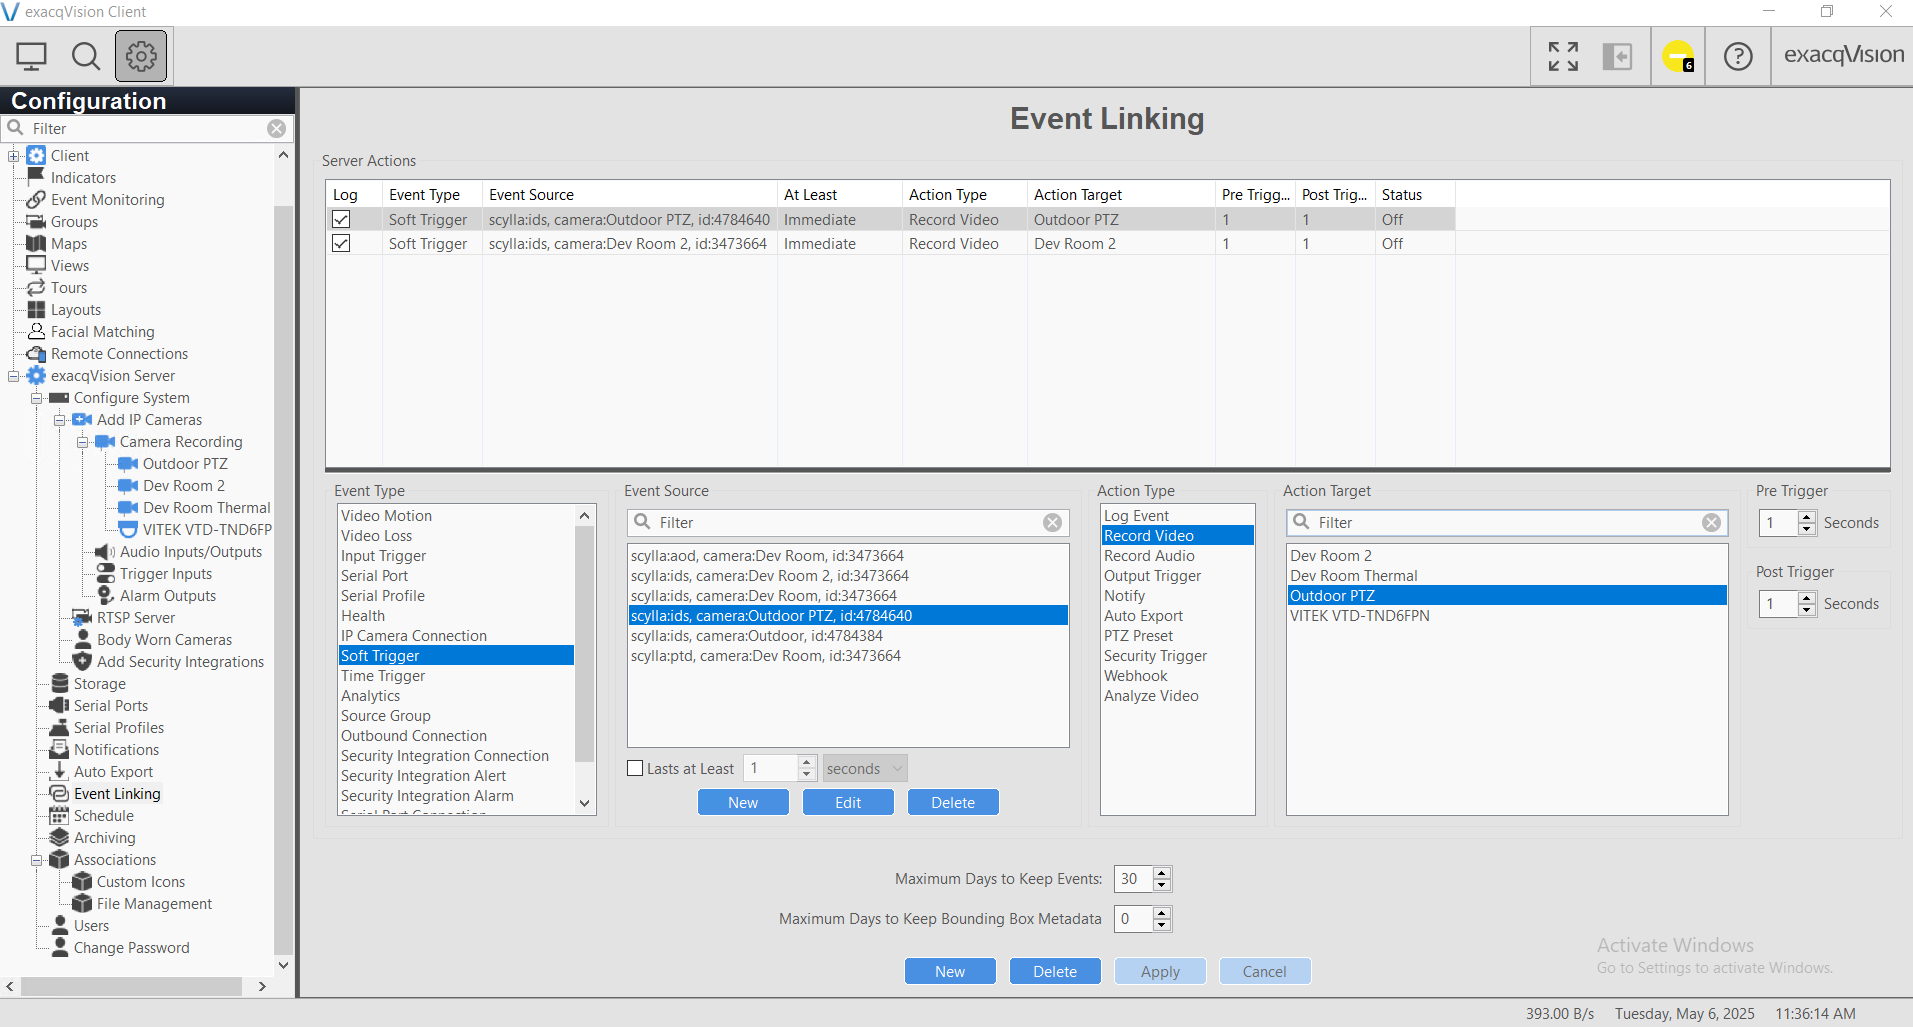
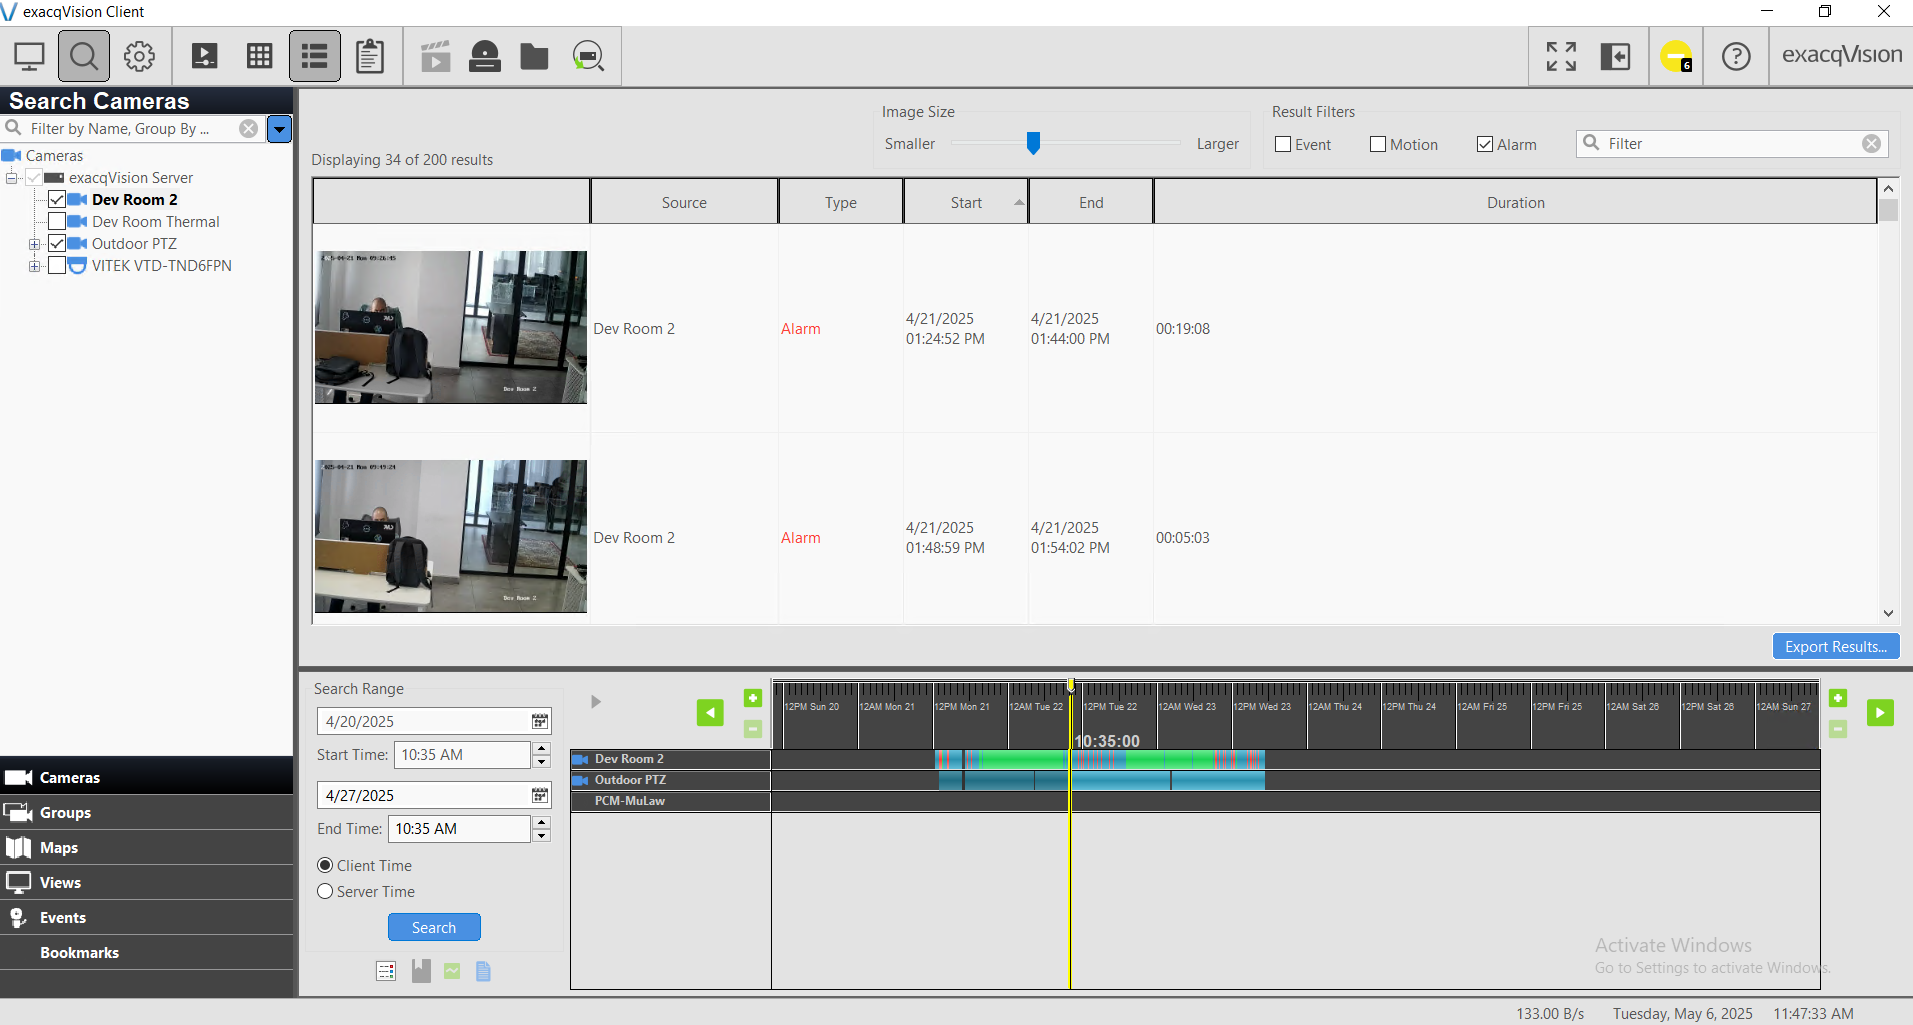
This feature can be useful for locating related alarms later on the Search page.
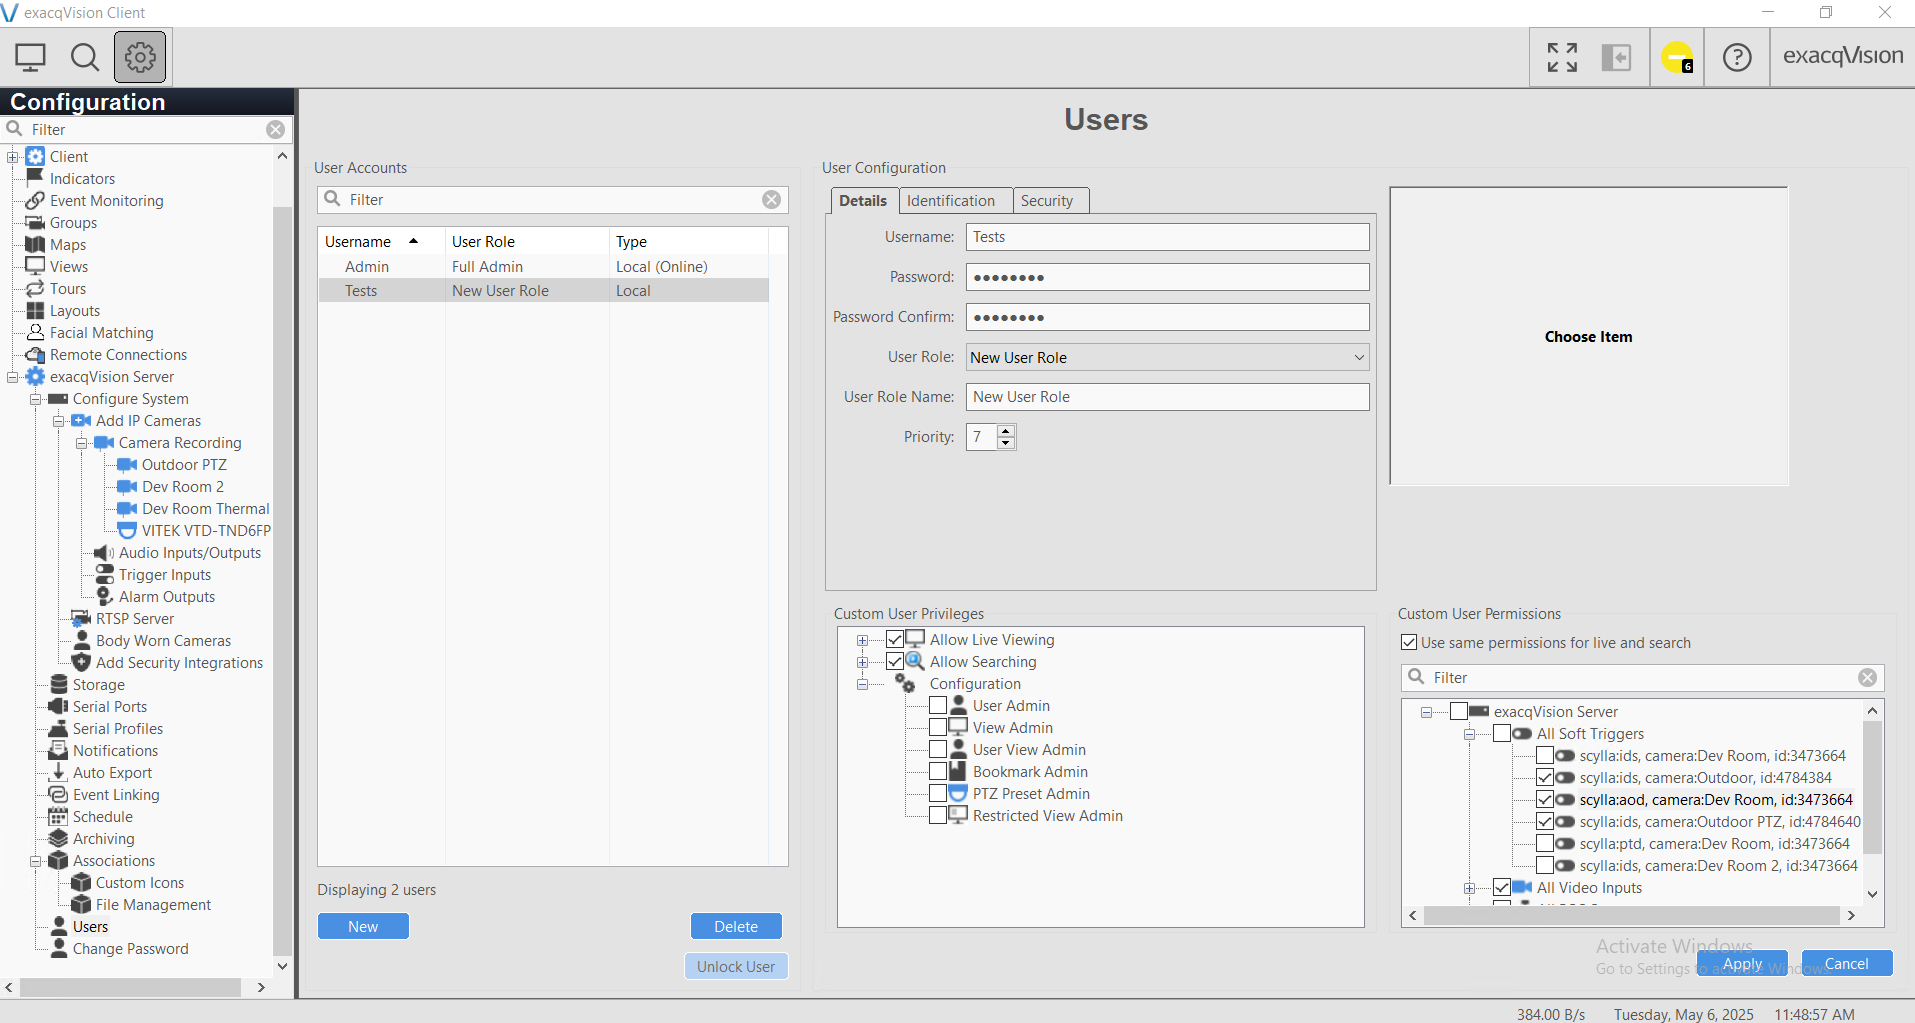
User Management
Users can manage exacqVision accounts by assigning access only to the specific Soft Triggers from Scylla that are needed—either per camera or per module. This allows for granular control over which Scylla Alarms each user can access.
We value and appreciate your feedback. If you have any questions or suggestions, please contact support@scylla.ai or submit a request to the Scylla Help Center at https://support.scylla.ai/portal/en/home.