Patriot Systems
Introduction
This manual provides detailed configuration steps for integrating Scylla with Patriot Systems.
This integration enables seamless communication between the two systems, allowing alarms generated in Scylla to be transmitted to Patriot Systems along with the associated media.
Patriot Systems configuration
ICA setup
Patriot needs to be on version 6.6.26 or later, with the ICA module registered
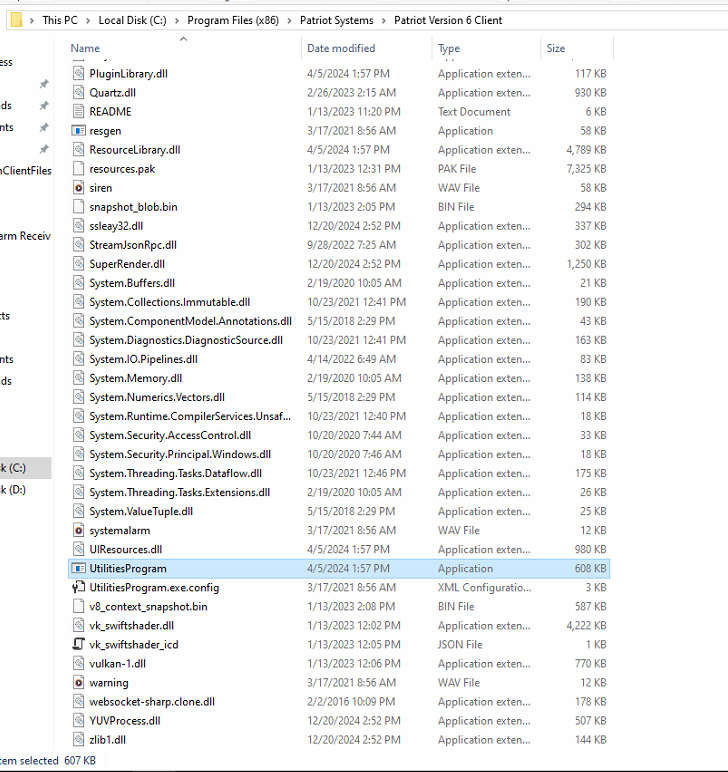
To configure the ICA on the Patriot system, start by navigating to the Patriot installation folder: C:\Program Files (x86)\Patriot Systems\Patriot Version 6 Client.
Then, launch the UtilitiesProgram from this location.
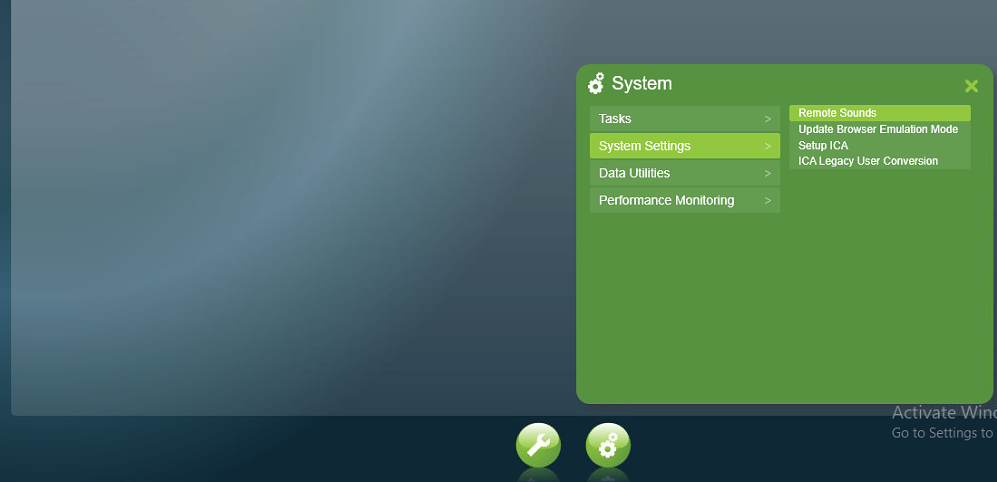
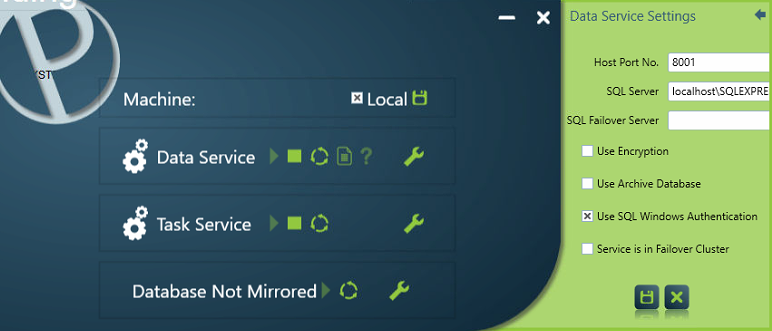
Next, go to System > System Settings > Setup ICA to complete the configuration.
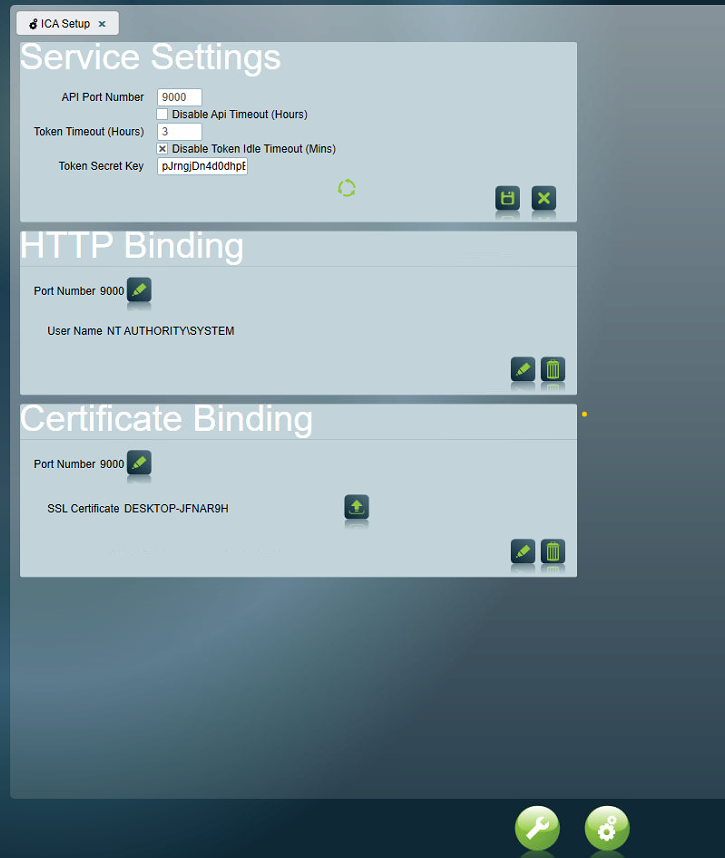
On this page, specify the API port number, which will be used later to establish the connection between Scylla and Patriot. Once done, click Save to apply the changes.
Folder Access Permission
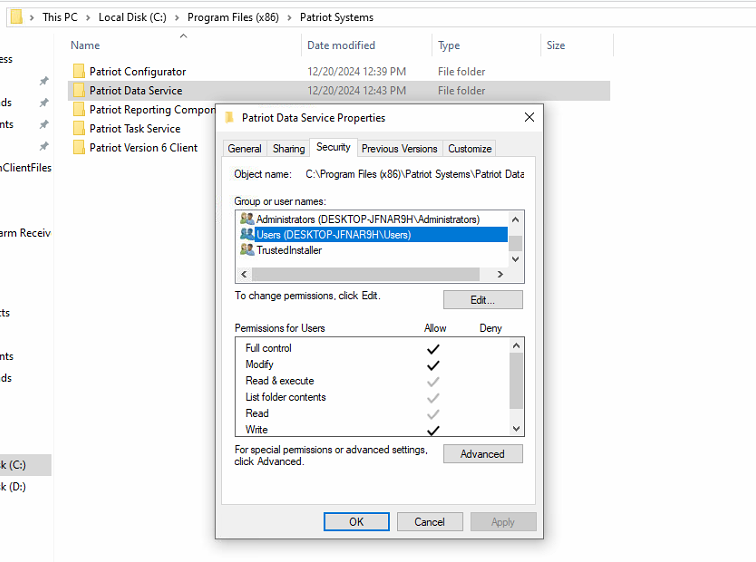
Now, navigate to the directory where the Patriot system is installed. Locate the Patriot Data Service folder, right-click on it, and select Properties. Go to the Security tab and grant the Windows user Full Control permission. Click OK.
Next, launch the Patriot Configurator application.

Restart both Data Service and Task Service
Testing ICA
To test if the ICA is set up correctly, open a web browser and enter the following in the address bar:
http://localhost:<API port number>/
Replace <API port number> with the port number you configured earlier.
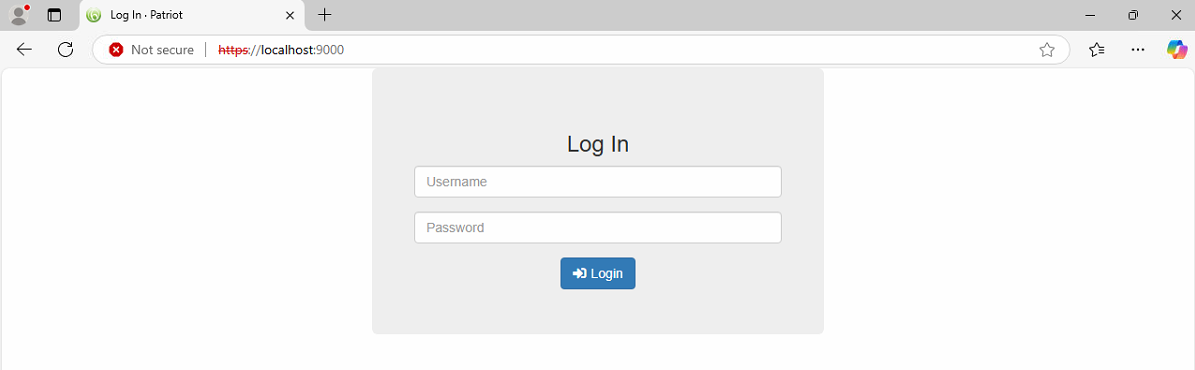
You should see the login page displayed. This confirms that the ICA has been successfully set up.
Note: You will not be able to log in at this point. Logging in will only be possible after creating the API user, as described in the following steps.
Create Web-Access (API) Security Group
Next, create a web access security group. To do this, navigate to Security > Operators > Security Groups.
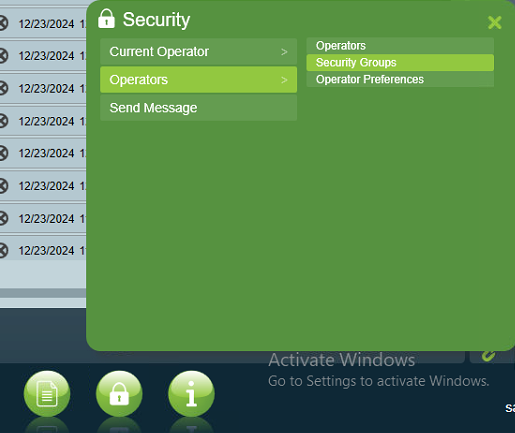
Click Insert to add a new Security Group.
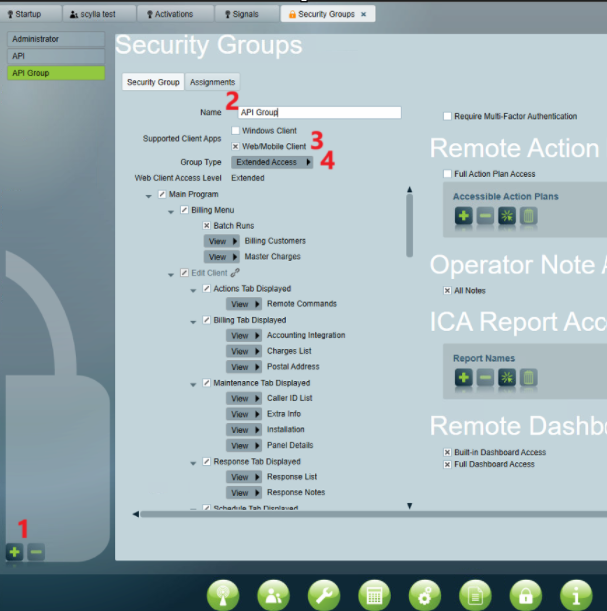
- Name the Security Group.
- Enable the Web.mobile client option.
- Select Extended Access for the Group Type (Leave all access options enabled). Name the Security Group.
Enable the Web.mobile client option.
Select Extended Access for the Group Type (Leave all access options enabled).
Create Web-Access (API) User
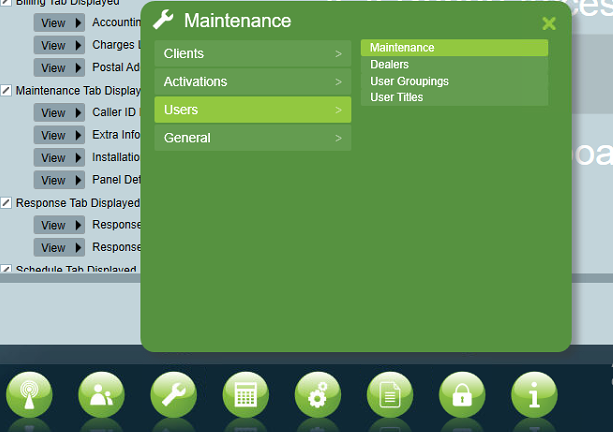
To create an API user, navigate to Maintenance > Users > Maintenance.

-
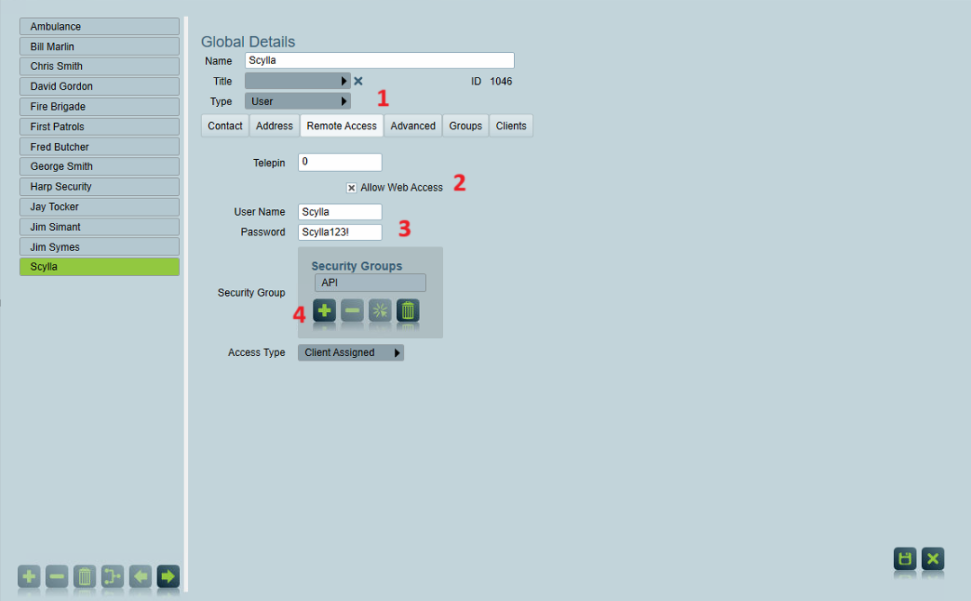
Click Insert to add a new user. Click Insert to add a new user.
-
Name the user.
-
Click Save to apply the changes. Name the user.
Click Save to apply the changes.
-
Go to the Remote Access tab. Go to the Remote Access tab.
-
Enable Allow Web Access.
-
Enter the credentials (these will be used as API credentials and will be set on the Scylla Dashboard later to establish the connection).
-
Click Insert under Security Groups and select the API Security Group created in the previous step. Enable Allow Web Access.
Enter the credentials (these will be used as API credentials and will be set on the Scylla Dashboard later to establish the connection).
Click Insert under Security Groups and select the API Security Group created in the previous step.
Click Save
Create a video storage folder
To allow for direct media transmissions you will need to set up the Video Storage folder in the System Wide Settings.
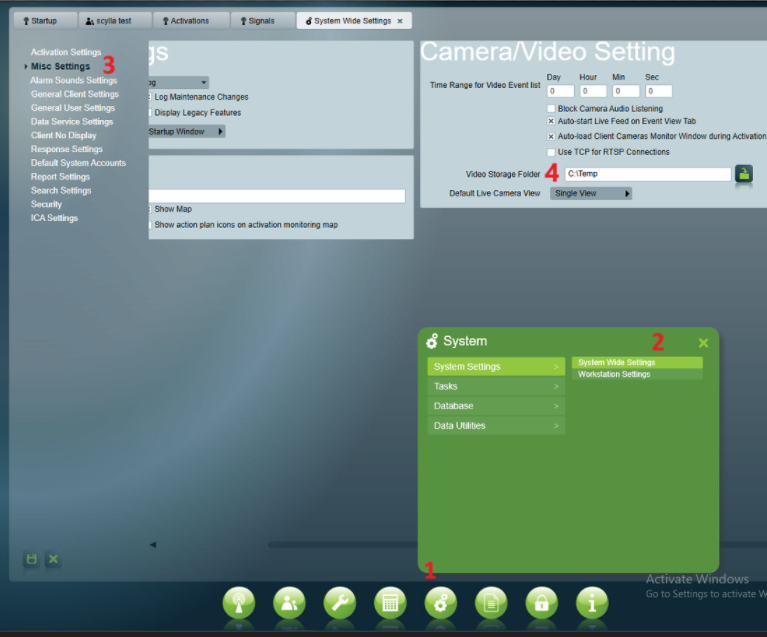
- To do that, navigate to System > System Settings > System Wide Settings.
- Go to Misc Settings.
- In the Video Storage Folder field, select the folder where you want to store the alarm videos. To do that, navigate to System > System Settings > System Wide Settings.
Go to Misc Settings.
In the Video Storage Folder field, select the folder where you want to store the alarm videos.
Create a client
Now, we need to create a new client on Patriot. If you already have an existing client and wish to use that, you can skip this step.
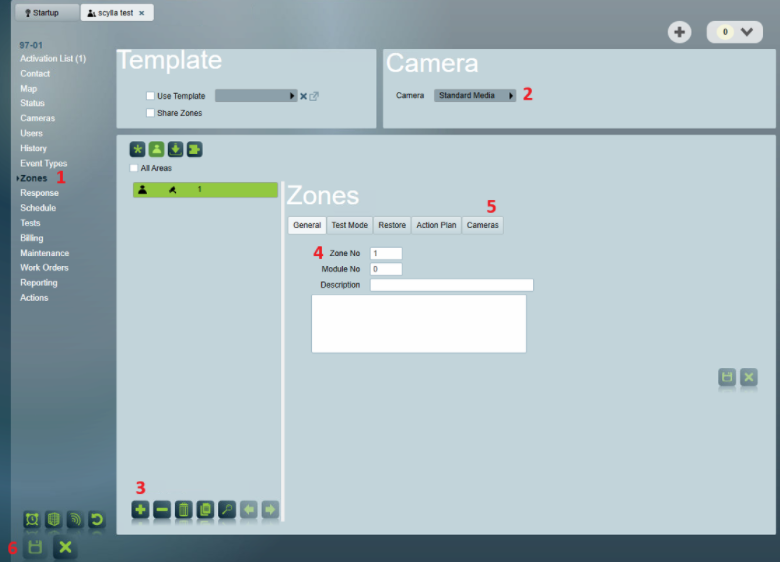
Note: To receive and view the alarm video sent by Scylla, the camera type should be set to Standard Media on the Zones page.

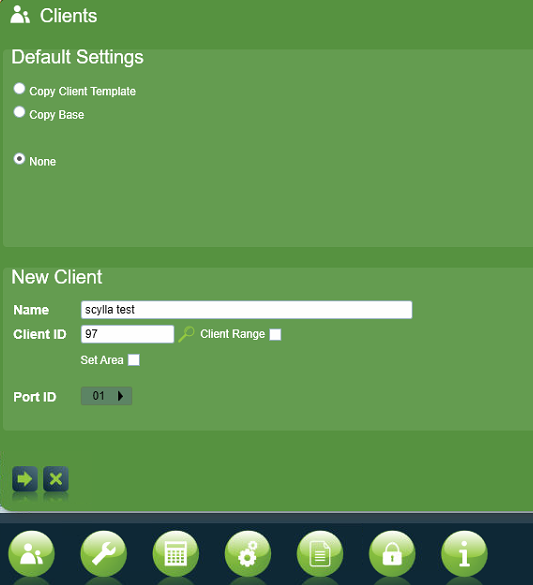
Click Insert then Name the client and assign a client ID and proceed.
In the Client menu, follow these steps:
- Go to Zones.
- Select Standard Media as the Camera Type.
- Click Insert to add a new zone.
- In the General tab, set the Zone No to 1 (this is for receiving alarms from the Scylla Asteria Box; if using Hikvision or Dahua NVR, set the Zone No accordingly).
- In the Cameras section, enable the Camera Enabled setting.
- Click Save to apply the changes. Go to Zones.
Select Standard Media as the Camera Type.
Click Insert to add a new zone.
In the General tab, set the Zone No to 1 (this is for receiving alarms from the Scylla Asteria Box; if using Hikvision or Dahua NVR, set the Zone No accordingly).
In the Cameras section, enable the Camera Enabled setting.
Click Save to apply the changes.
Assign API user to the client
Next, assign the API user to the client.

1- Navigate to the Users page.
2- Click the Assign Existing User button.

1-Enter the user's name in the Search field.
2-Click the Search button.
3-Select the API user created in the previous step.
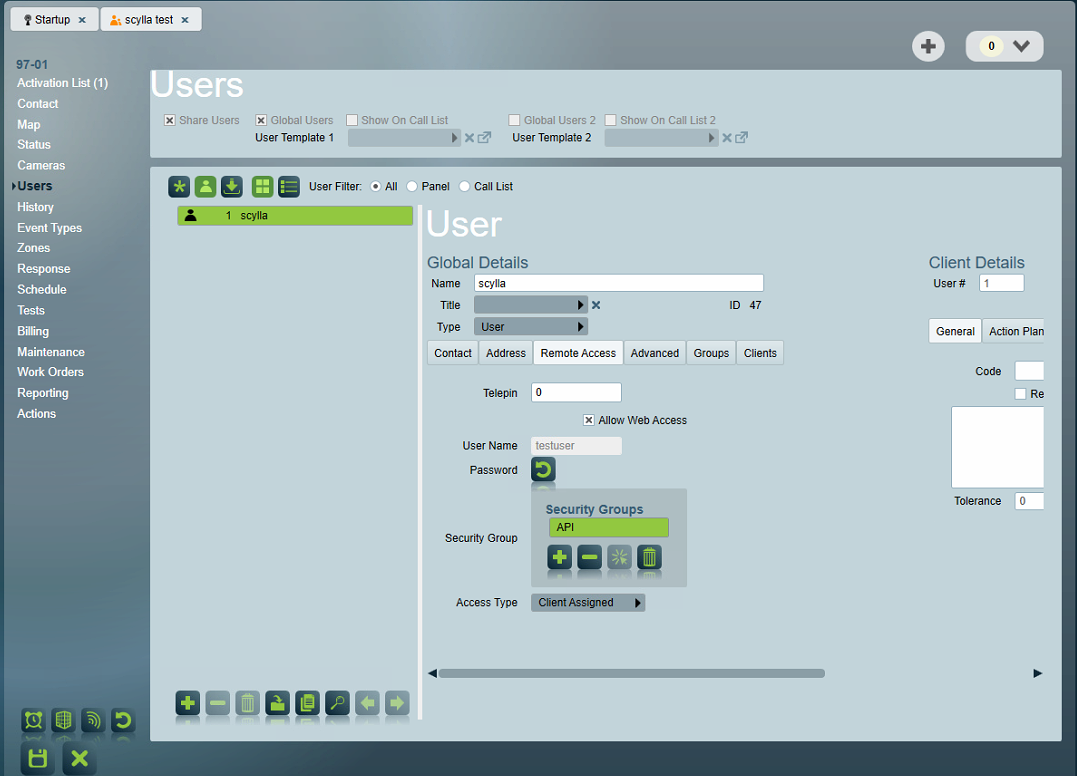
The user should now be visible, and the Remote Access tab will display the user's credentials along with the security group to which they belong.
Scylla Dashboard configuration
Creating Integration
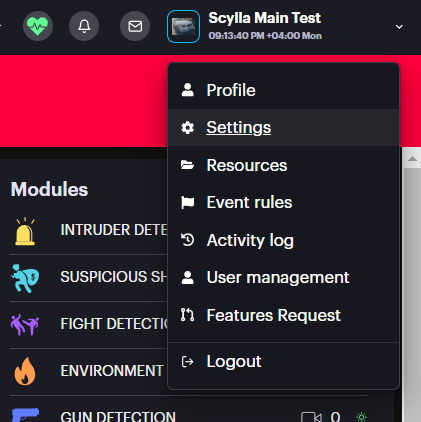
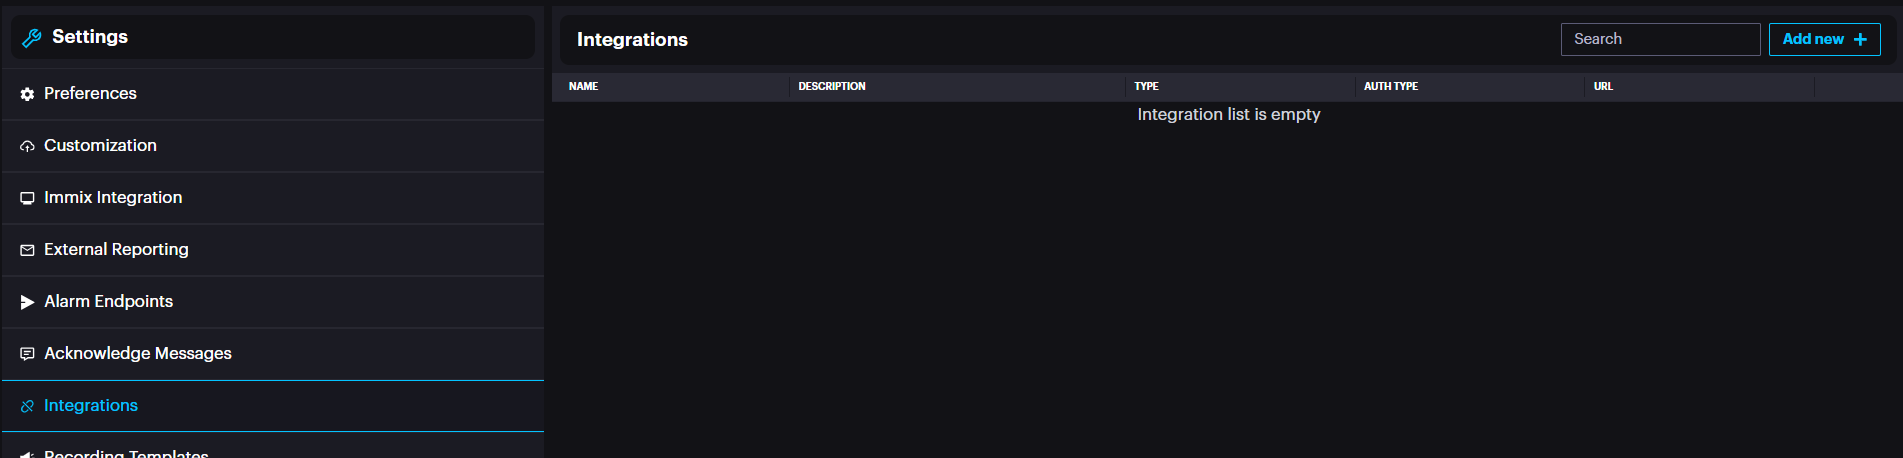
Log in to your Scylla Cloud Dashboard account and go to Settings > Integration.
To add a new integration, click on the Add new + button.
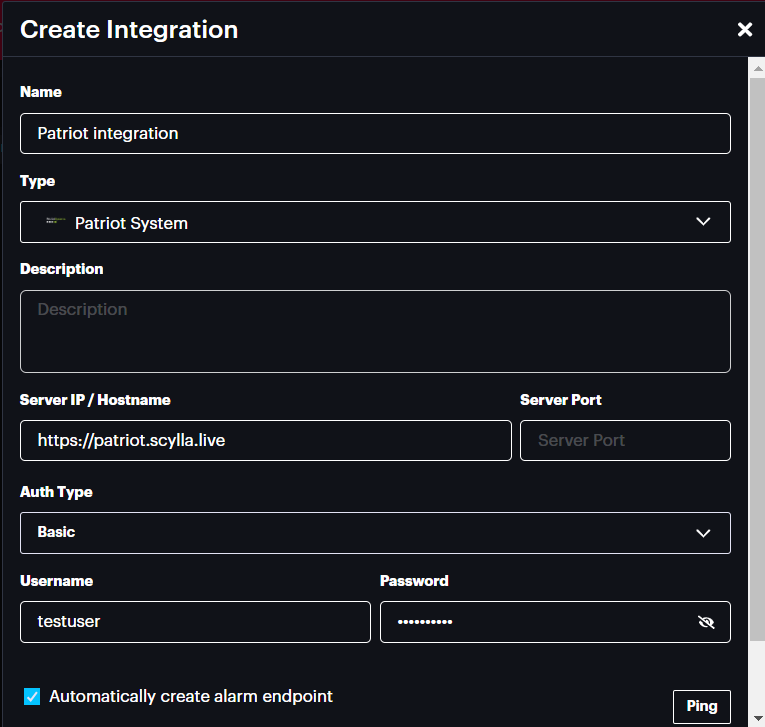
1-Name: Enter a name for the integration.
2-Type: Select Patriot System.
3-Server IP/Hostname: Enter the URL provided by Scylla.
4-Auth Type: Choose Basic.
5-Username & Password: Enter the API user credentials from the Patriot System.
Click on Ping. If the connection is successful, a confirmation message will appear at the top of the screen.

Click Save.
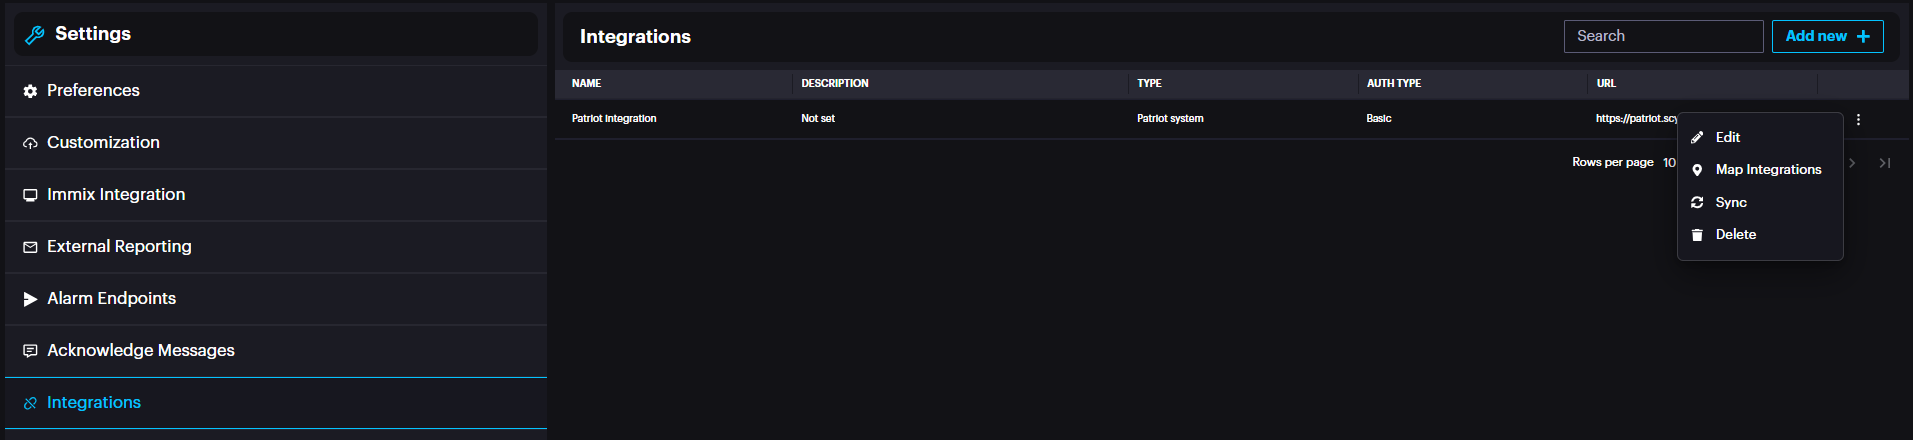
Next, click on the three dots menu and select Map Integrations.
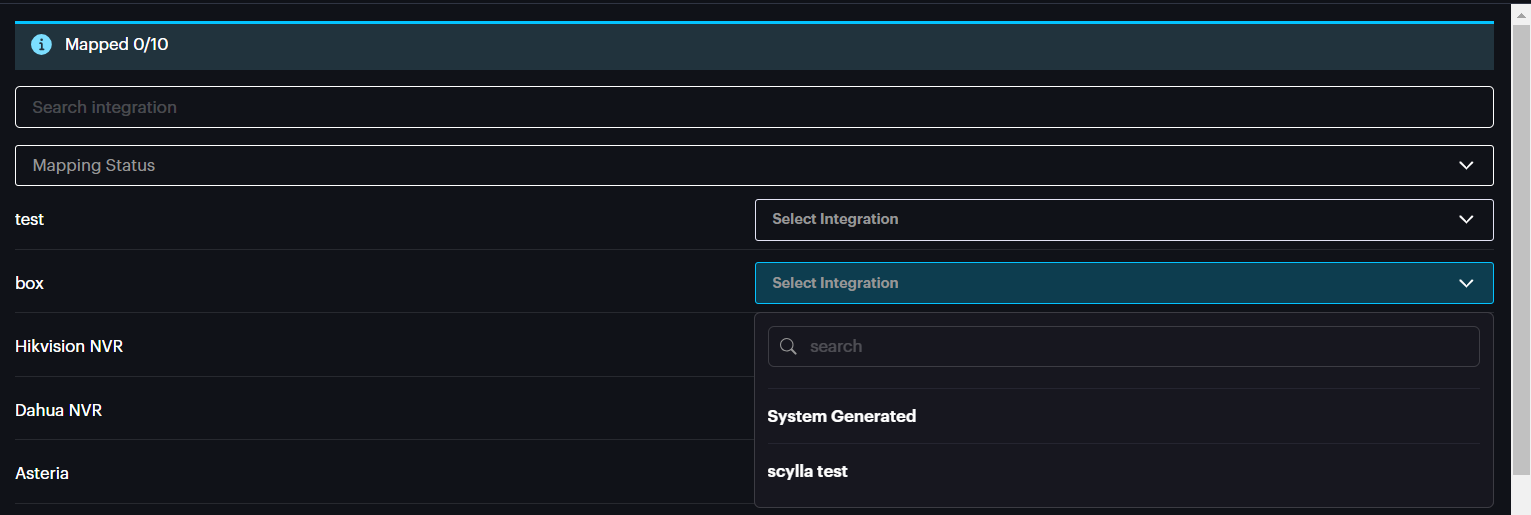
In the mapping window:
- On the left, you'll see a list of all integration drivers available on the Scylla dashboard.
- On the right, a dropdown menu will display the clients from the Patriot system. On the left, you'll see a list of all integration drivers available on the Scylla dashboard.
On the right, a dropdown menu will display the clients from the Patriot system.
Map each box/NVR on Scylla to the corresponding client in the Patriot system.

Click Save.
Creating Event Rule
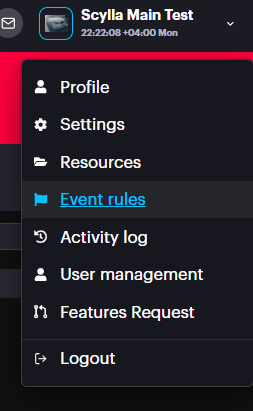
The final configuration step on the Scylla Dashboard is to create an event rule. Navigate to Settings > Event Rules to set it up.
Click on Add, and the Event Rule window will pop up.
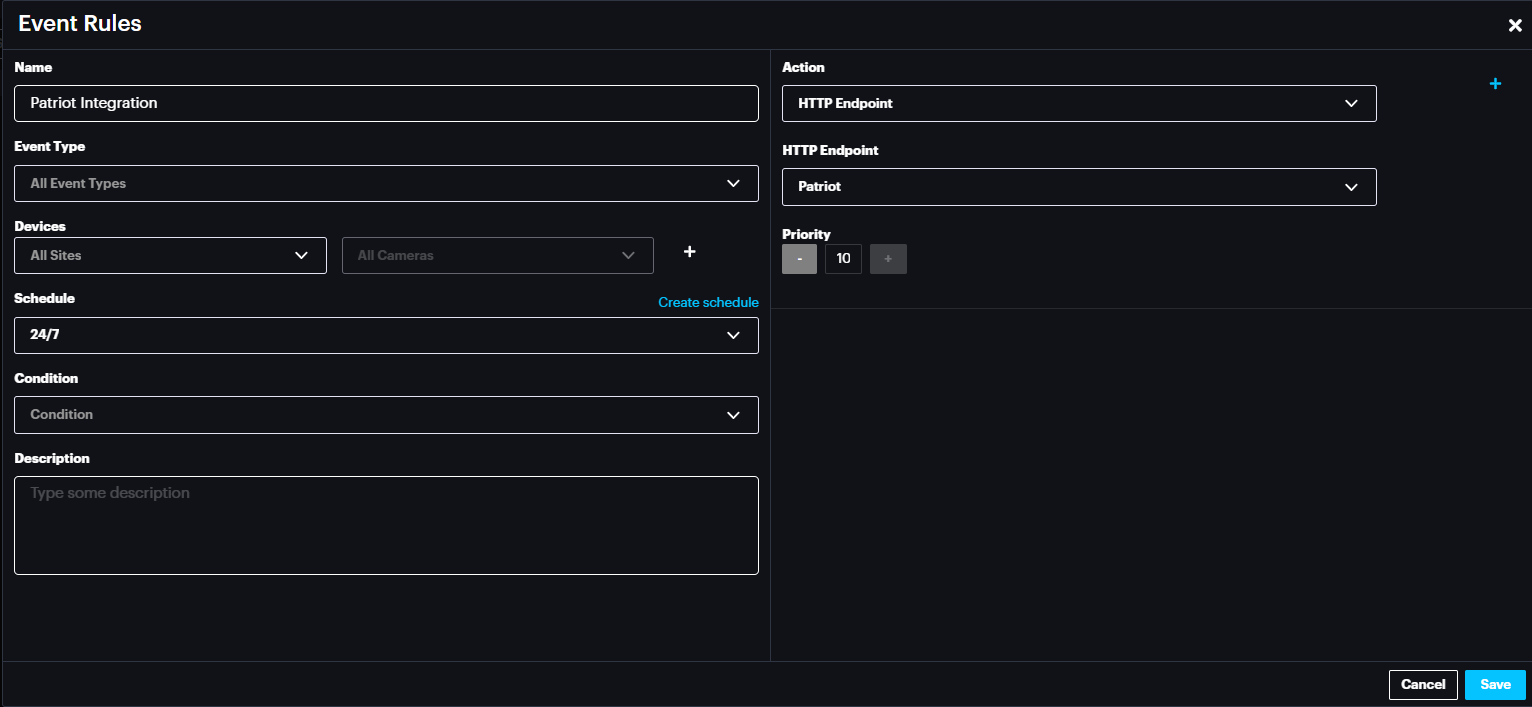
- Name: Enter the name of the event rule.
- Event Type: Select the AI module whose alarms will trigger this event rule, or keep it set to "All Event Types."
- Device: Select the site(s) or camera(s) whose alarms will trigger this event rule, or keep it set to "All Sites/All Cameras."
- Schedule: Select the schedule when this event rule will be active. Click "Create Schedule" to create a custom schedule.
- Condition: Leave this field empty.
- Description: Provide a description for this event rule. Name: Enter the name of the event rule.
Event Type: Select the AI module whose alarms will trigger this event rule, or keep it set to "All Event Types."
Device: Select the site(s) or camera(s) whose alarms will trigger this event rule, or keep it set to "All Sites/All Cameras."
Schedule: Select the schedule when this event rule will be active. Click "Create Schedule" to create a custom schedule.
Condition: Leave this field empty.
Description: Provide a description for this event rule.
Actions:
- Select HTTP Endpoint: Choose the HTTP endpoint.
- HTTP Endpoint: Select "Patriot." Select HTTP Endpoint: Choose the HTTP endpoint.
HTTP Endpoint: Select "Patriot."
Patriot Alarm Signals
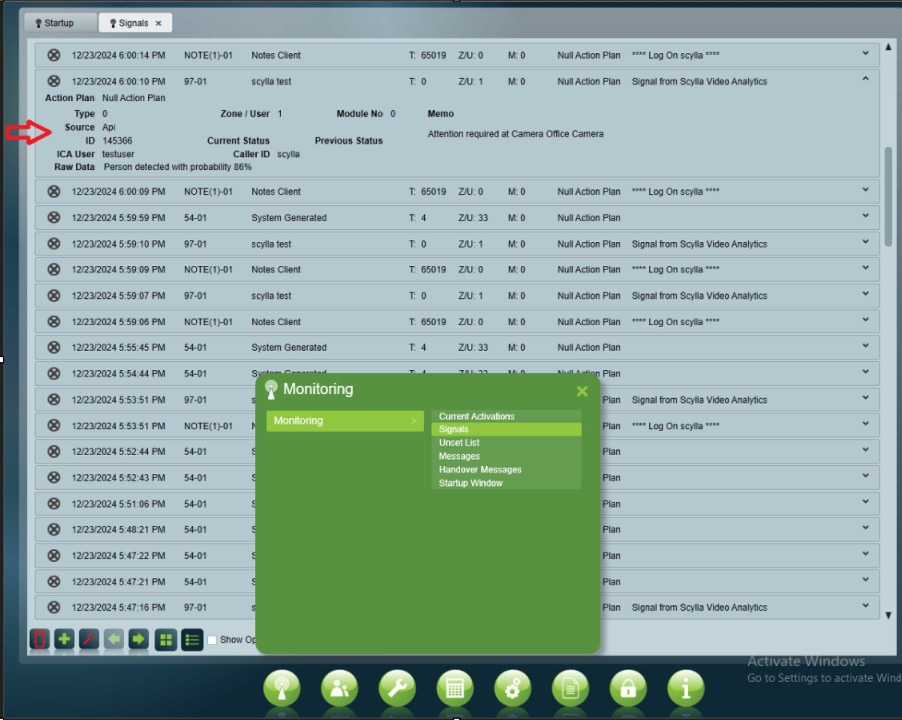
In the Signals -> Monitoring -> Signals page, the alarms sent by Scylla will appear, displaying information such as the detected object and its associated probability.
4o mini
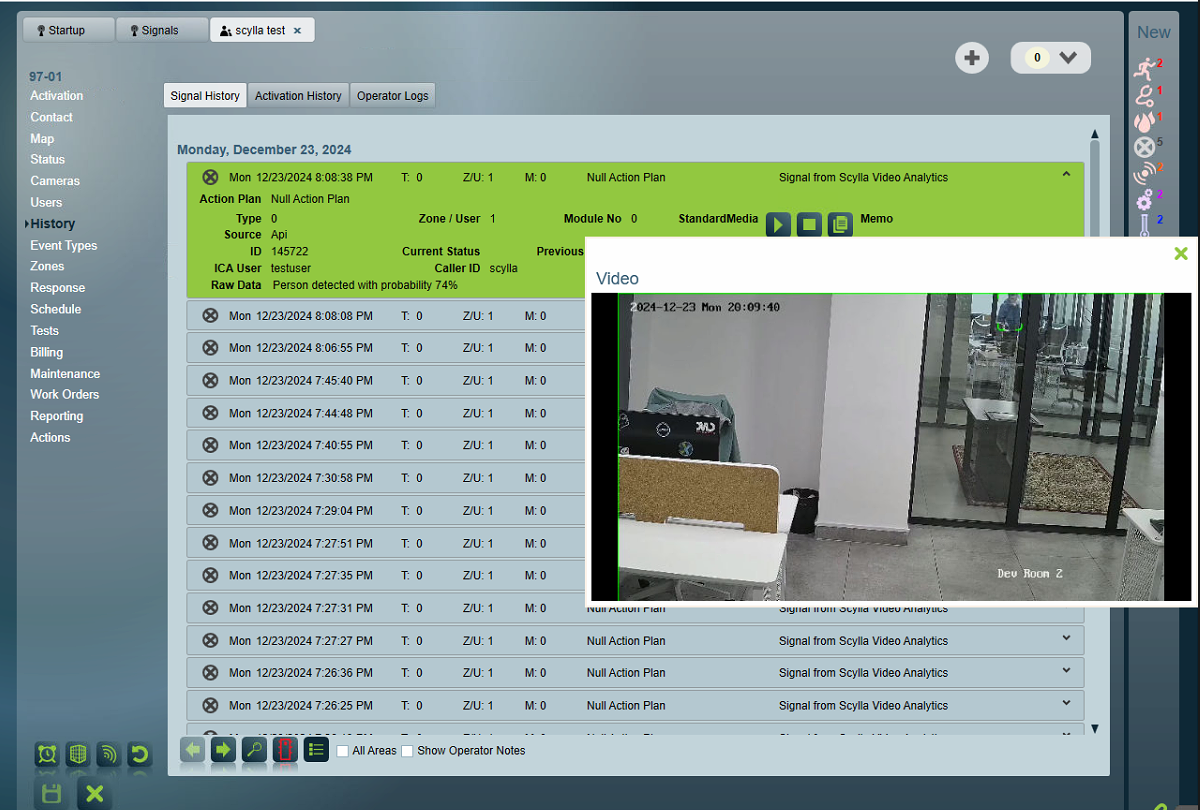
Additionally, in the Client menu under the History page, all Scylla alarms for that client will be displayed, with the option to view the detection video.
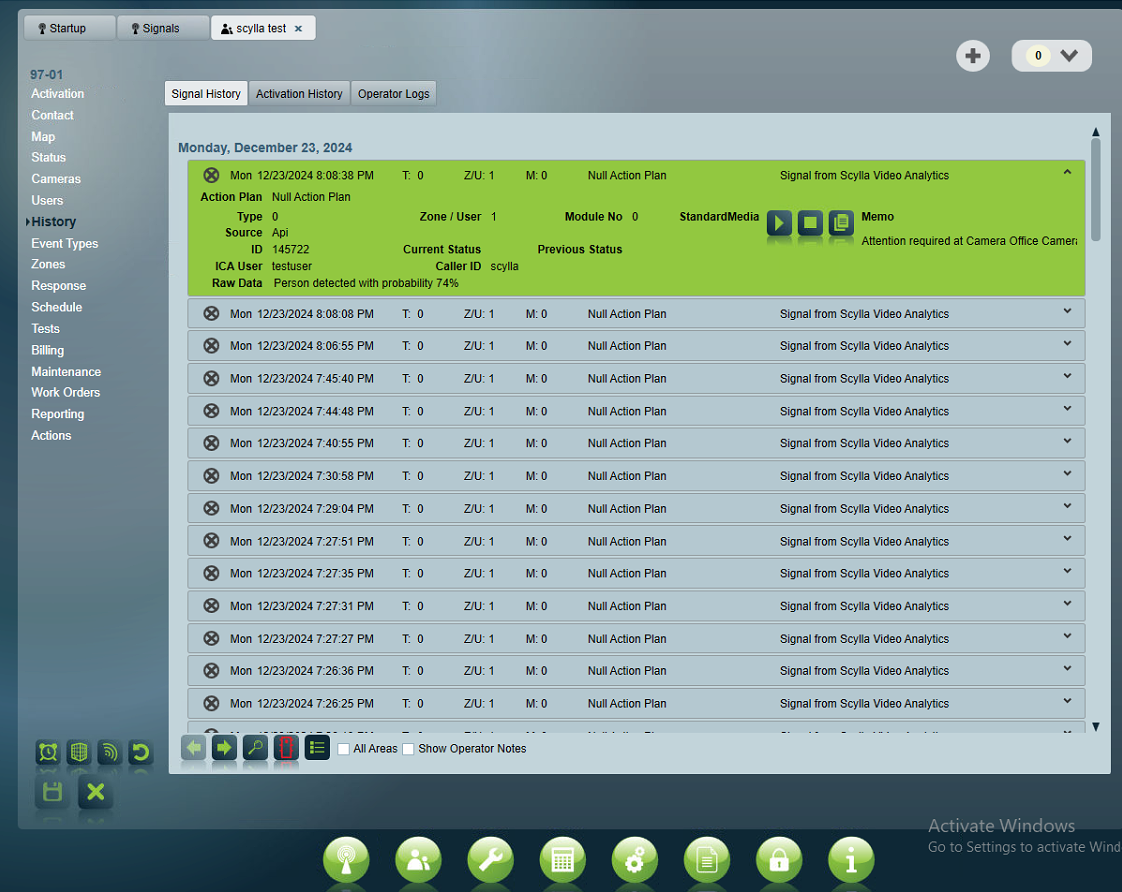
Clicking on the Play button will display the detection video.
This is the basic method for viewing Scylla-sent alarms on Patriot. The Patriot system also allows for various configurations for activations, which you can follow to customize the system further.
We value and appreciate your feedback. If you have any questions or suggestions, please contact support@scylla.ai or submit a request to the Scylla Help Center at https://support.scylla.ai/portal/en/home.