Immix AI Link
Introduction
This manual provides an overview of the Scylla - Immix AI Link integration, including instructions for configuring both systems.
The integration between Immix AI Link and Scylla is bidirectional. It enables Immix to send a video clip to Scylla AI for analysis, and then receive the result back on the Immix platform.
This feature can be utilized for false alarm filtering by specifying an Object of Interest (OOI) on the Immix platform. If the video clip received by Scylla contains the specified OOI, it will be considered a true alarm; otherwise, it will be categorized as a false alarm.
Scylla Dashboard Configuration
Creating Integration
The first step is to create an integration.
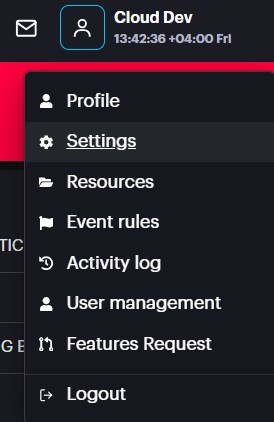
To do this, navigate to the Account menu, then go to Settings and select Integration.
Next, add a new integration by clicking on "Add New +" button.
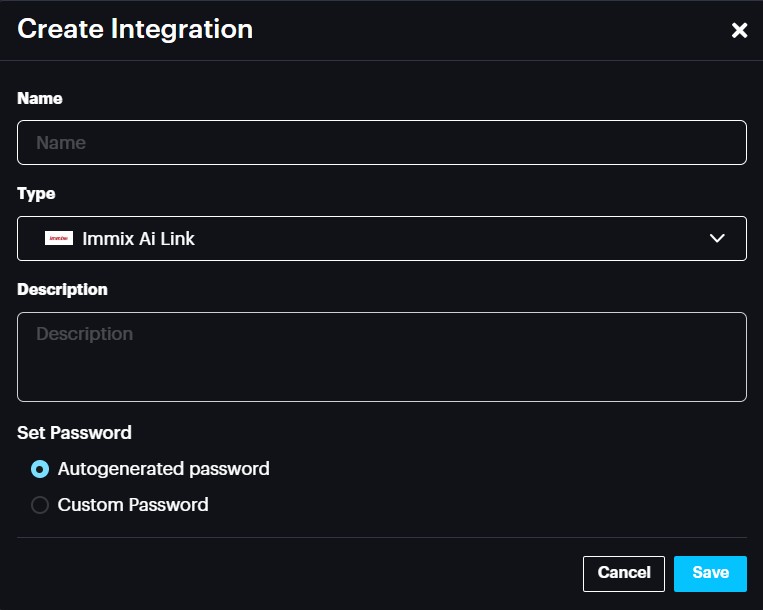
Name: Enter a name for the integration.
Type: Select "Immix AI Link" from the options.
Description (Optional): Provide any relevant information about the integration. Set Password: This is the password that will be used on the Immix side to establish the integration.
The password can either be autogenerated by the system or custom set by the user.
Click Save.
A new record will be added to the list.
Click the three dots at the end of the record and select Edit.

This will display the username (generated by Scylla) and the password (set by the user). These credentials will be set on the Immix platform in later stage.

Immix Configuration
Establishing Connection
Log in to Immix and go to the System tab -> System Devices.
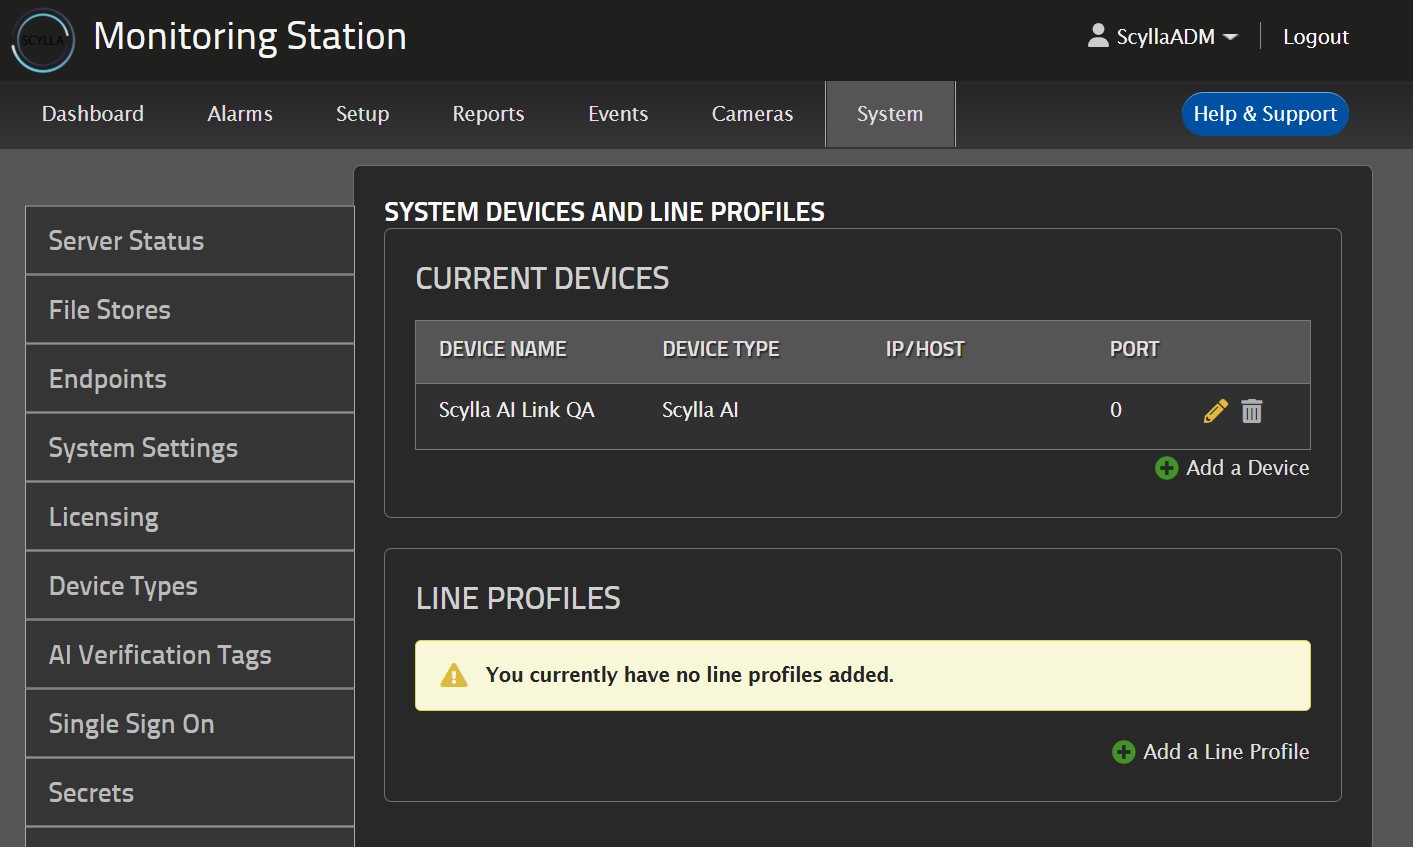
Click on "Add a Device."
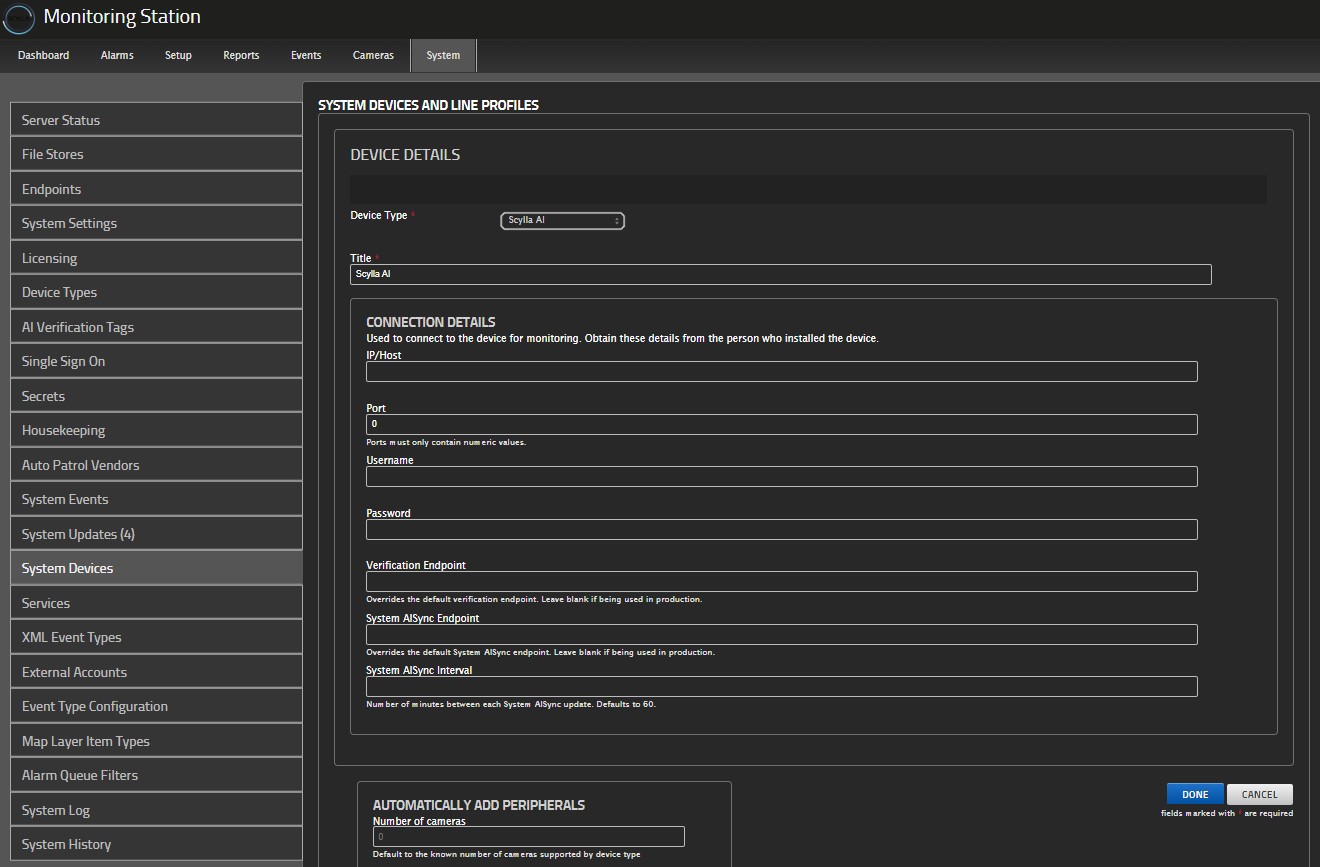
Device Type: Scylla AI
Username & Password: These credentials should be copied from the Scylla Dashboard.
Verification Endpoint: https://ailink-prd.scylla.ai/v1/connect
System AISync Endpoint: wss://ailink-prd.scylla.ai/v1/sync
System AISync Interval: This is the sync interval between Immix and Scylla, in minutes.
Click Done.
If the configuration is successful, you should be able to see the sites and cameras created on the Scylla Dashboard.
Creating Alarms
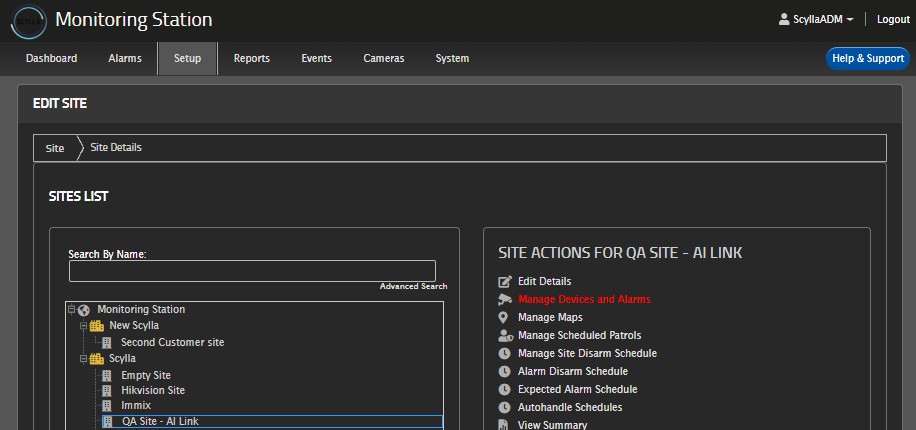
Navigate to the Setup page -> Edit Sites
Select the desired site from the list, then click on Manage Devices and Alarms.
Navigate to the Alarms tab.
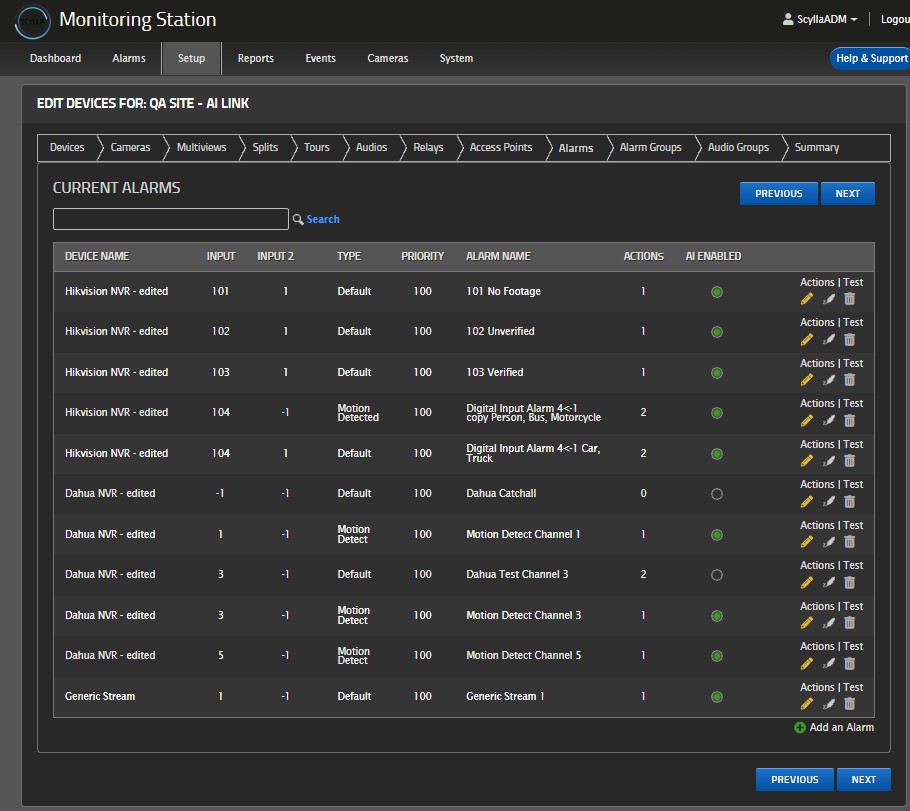
If there are no alarms in the list, click on Add an Alarm.
If alarms are already listed, click the Edit icon.
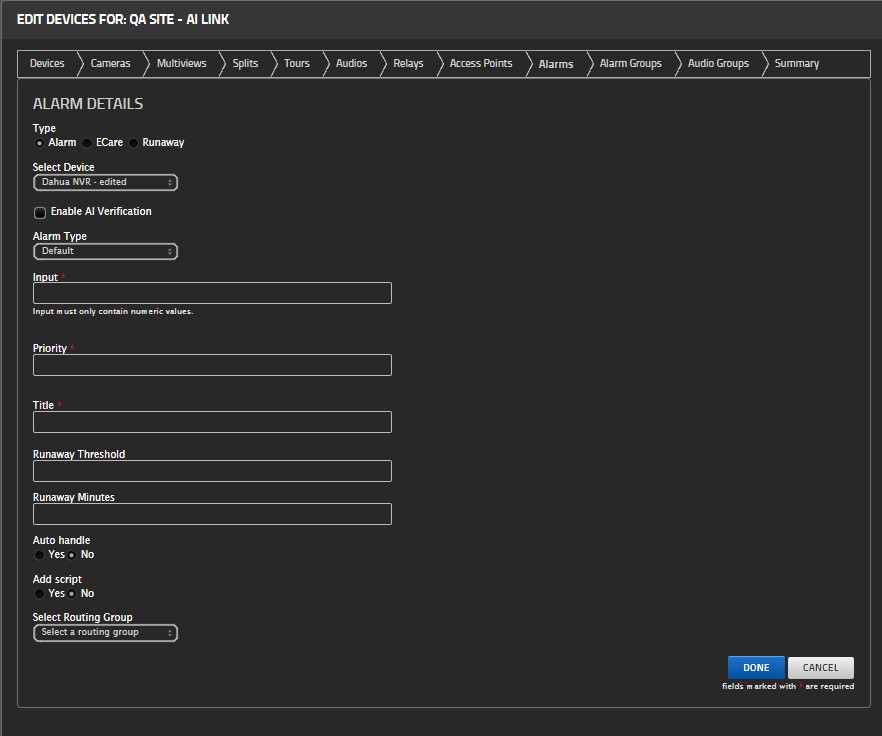
Type: Alarm
Select Device: Select the device that will be the source of the alarm
Enable AI Verification: This should be enabled . Once enabled a new section appears on the right.
Alarm Type: Select the Alarm type that will trigger the AI Verification
Input: Enter the channel number of the device (you can check the input number in the Camera tab).
Priority: Set the priority based on the user's preference in Immix.
Title: Name the alarm
AI Verification
Select AI Verification Type: Select the System Device created initially for Scylla on Immix
Object of Interest (OOI): Select the object of interest(s) that, when detected by Scylla, will trigger the alarm and mark it as True.
Click Done.
Note: It is possible for the same device to have multiple alarms, each with a different alarm type and its own unique object of interest(s).
Creating Actions
After successfully creating the alarm, you will be redirected to create an action.
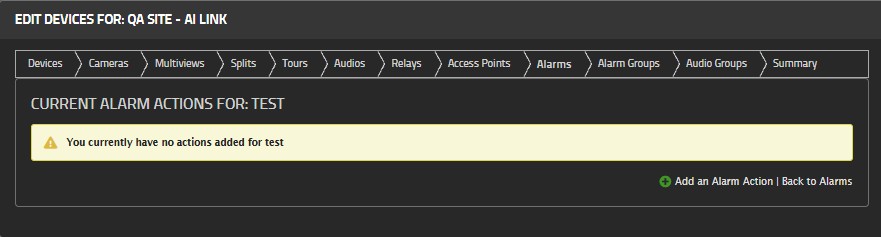
Click the Add an Alarm Action button.
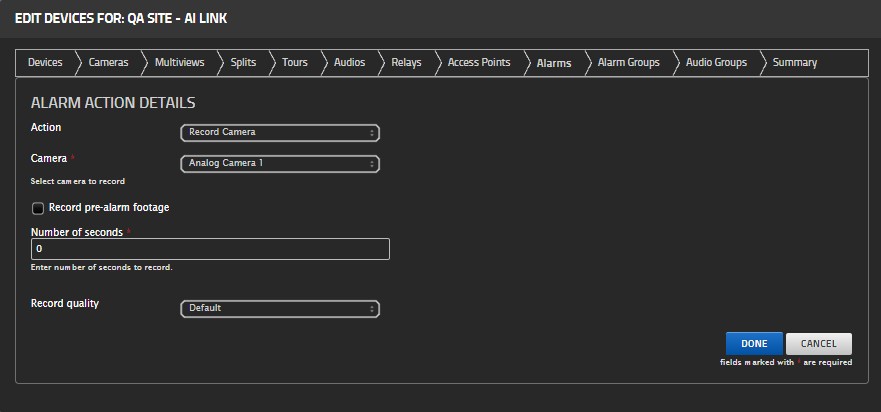
Action: Select Record Camera
Camera: Choose the camera to record
Record Pre-Alarm Footage: Optional, can be enabled based on user preference
Number of Seconds: Set the duration of the video clip to be recorded and sent to Scylla Record Quality: Can be adjusted based on user preference Click Done.
Note: It is possible to create several actions for the same Alarm.
Click Back to Alarms at the bottom.
In the alarm record, there is an option to Test.
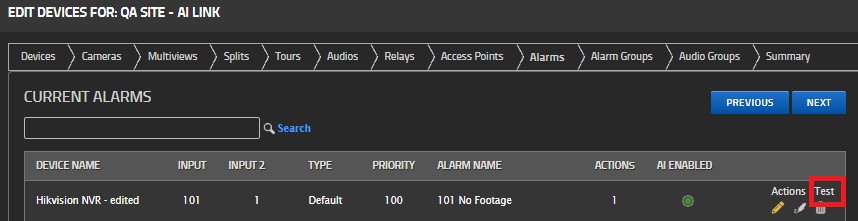
If Test is clicked, an alarm will be triggered on the Scylla dashboard (either marked as Verified or Rejected based on the Object of Interest).
Now, any alarm triggered on Immix will send a video to Scylla for processing. Scylla will then send the alarm back to Immix.
Scylla Dashboard Alarms
Whenever an alarm is triggered on the Immix platform, the video is sent to Scylla for processing. Scylla will verify the alarm based on the OOI settings: if an object is detected, the alarm is considered verified; otherwise, it is marked as a false alarm. Alarms will be shown on the Scylla Dashboard as demonstrated below:
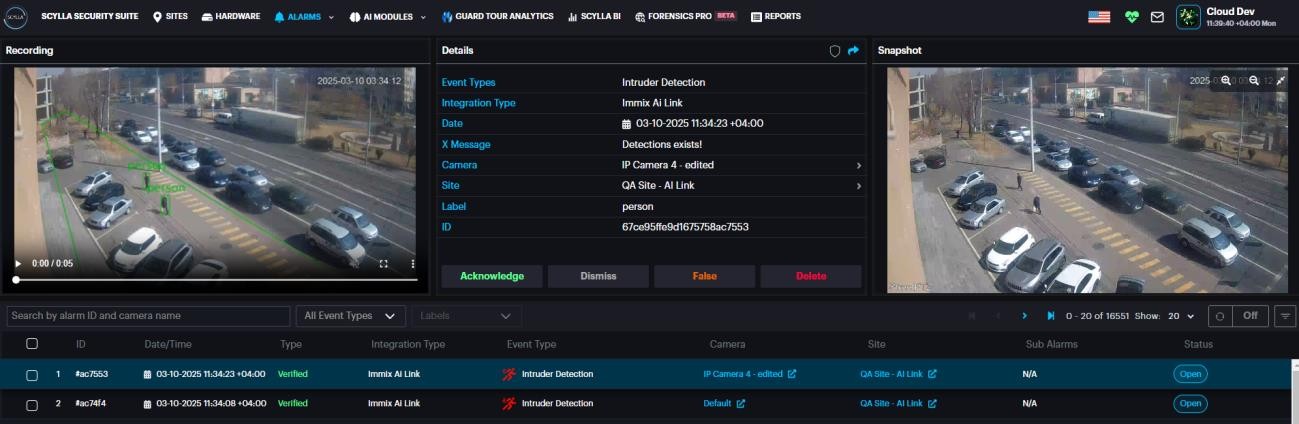
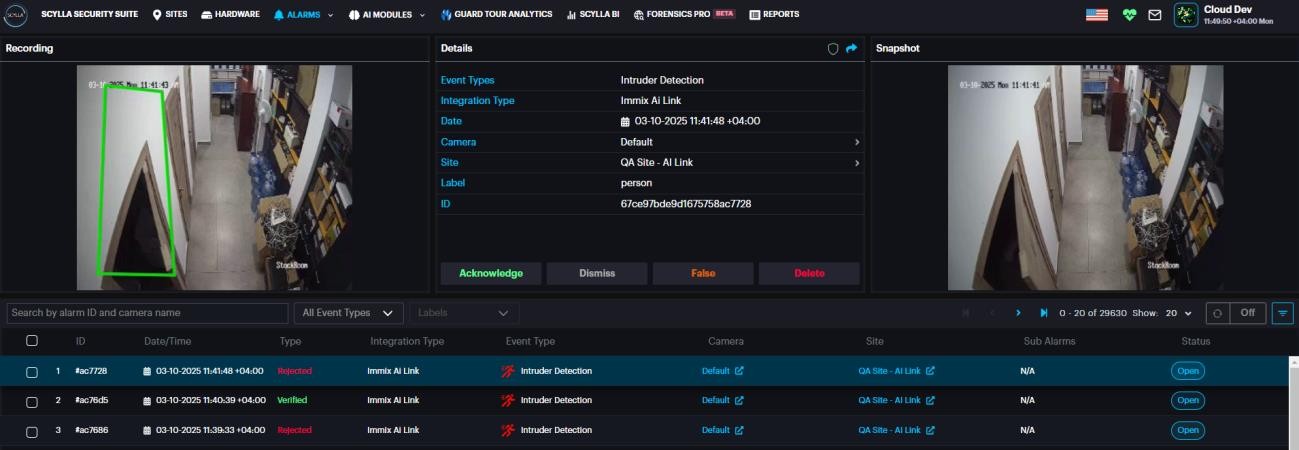
Note: Devices without a camera ID on Immix, alarms from these devices will be displayed under the camera name 'Default' on the Scylla dashboard.
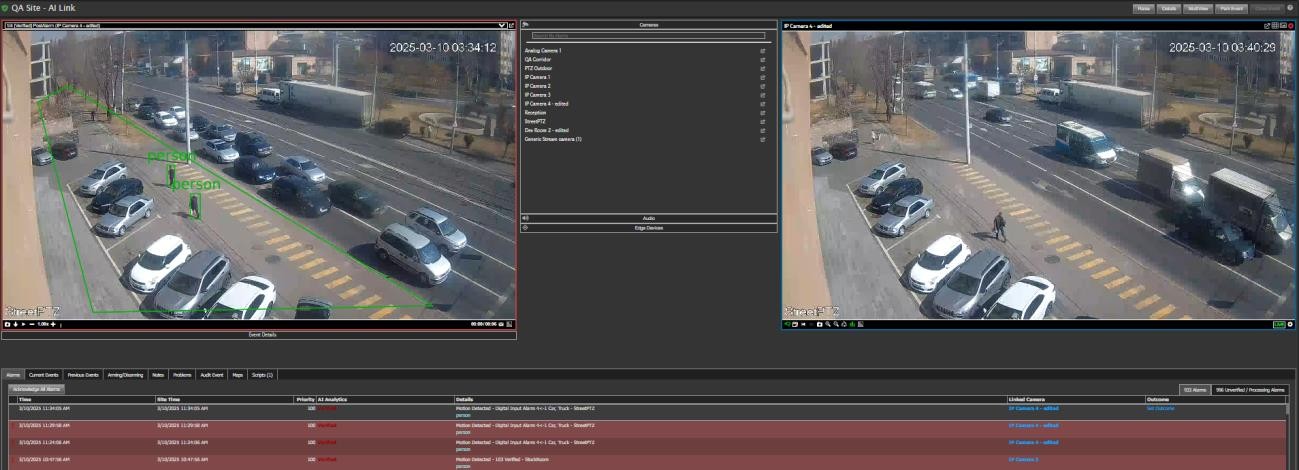
Immix Alarms
Alarms will be sent back to Immix by Scylla.
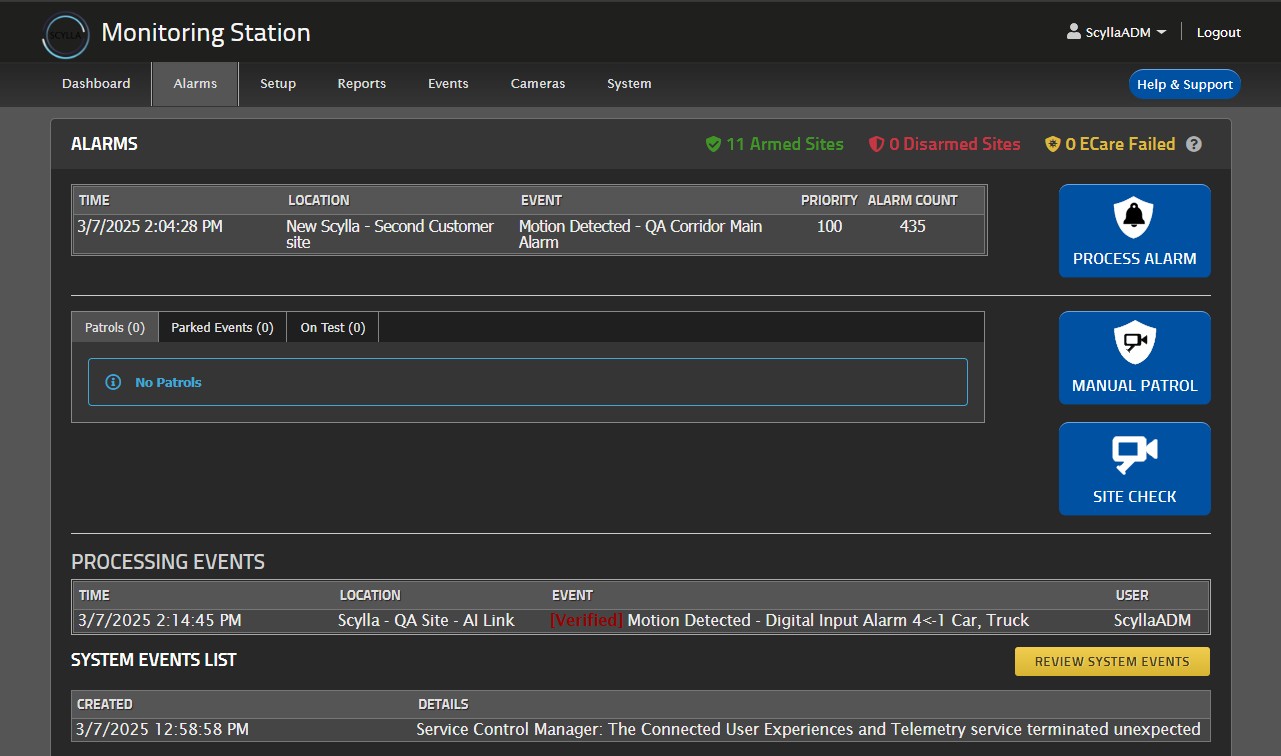
To view the alarms with active areas and bounding boxes, navigate to the Alarms page.
We value and appreciate your feedback. If you have any questions or suggestions, please contact support@scylla.ai or submit a request to the Scylla Help Center at https://support.scylla.ai/portal/en/home.